Onkyo TX-DS595 Owner Manual - Page 20
Speaker Distance, Level Calibration
 |
View all Onkyo TX-DS595 manuals
Add to My Manuals
Save this manual to your list of manuals |
Page 20 highlights
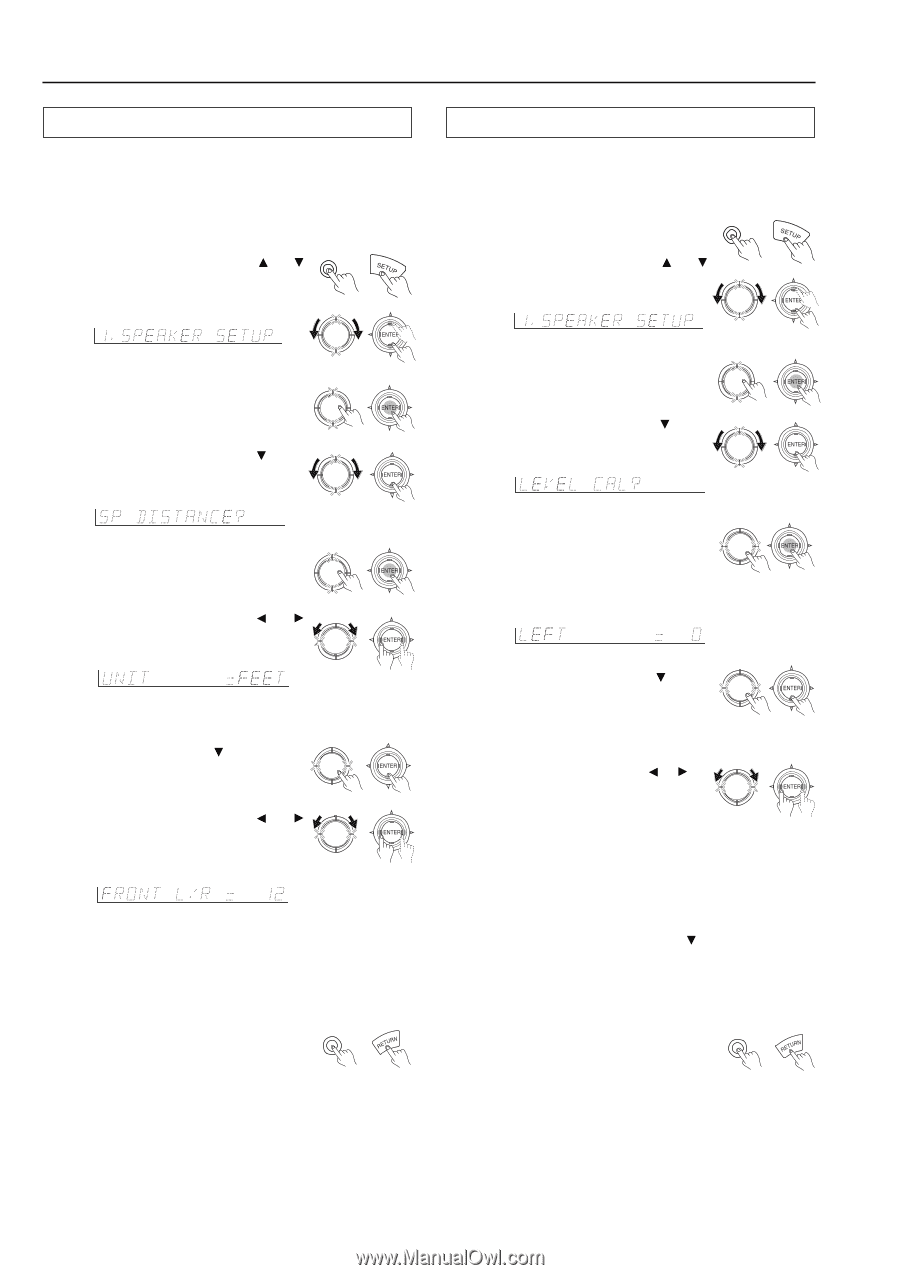
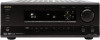
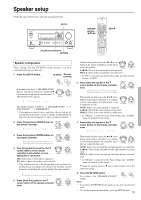
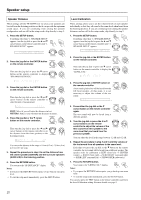
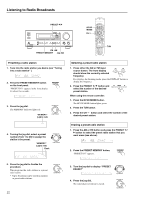
Speaker setup Speaker Distance These settings tell the TX-DS595 how far away your speakers are located from the listening position so that it can provide the optimum sound space. If you are continuing from setting the speaker configuration and are still in the setup mode, skip directly to step 2. 1. Press the SETUP button. If anything other than "1. SPEAKER SETUP" appears, turn the jog dial or press the and cursor buttons on the remote controller until "1. SPEAKER SETUP" appears. SETUP DSP/MODE ADJ PUSH TO ENTER 2. Press the jog dial or the ENTER button DSP/MODE ADJ on the remote controller. PUSH TO ENTER Then turn the jog dial or press the cursor button on the remote controller to display "SPEAKER DISTANCE." DSP/MODE ADJ PUSH TO ENTER 3. Press the jog dial or the ENTER button DSP/MODE ADJ on the remote controller. PUSH TO ENTER Then turn the jog dial or press the and cursor buttons on the remote controller to select the unit of measurement. DSP/MODE ADJ PUSH TO ENTER FEET: Select if you will enter the distances in feet. METERS: Select if you will enter the distances in meters. 4. Press the jog dial or the cursor button on the remote controller. DSP/MODE ADJ PUSH TO ENTER Then turn the jog dial or press the and cursor buttons on the remote controller to set the distance from the front speakers to the listening position. DSP/MODE ADJ PUSH TO ENTER f t You can set the distance in the range of 1 feet (0.3 m) - 30 feet (9 m) in 1 feet (0.3 m) steps. 5. Repeat the procedure in step 4 to set the distance from the center speaker (CENTER) and the surround speakers (SURR L/R) to the listening position. 6. Press the RETURN button. RETURN You return to the "SP DISTANCE?" display. Notes: • If you press the RETURN button again, you go back up one more level. • To exit the setup mode immediately, press the SETUP button. Level Calibration These settings allow you to set the volume levels of each speaker individually so that they all sound at the same level when heard from the listening position. If you are continuing from setting the speaker distances and are still in the setup mode, skip directly to step 2. 1. Press the SETUP button. If anything other than "1. SPEAKER SETUP" appears, turn the jog dial or press the and cursor buttons on the remote controller until "1. SPEAKER SETUP" appears. SETUP DSP/MODE ADJ PUSH TO ENTER 2. Press the jog dial or the ENTER button DSP/MODE ADJ on the remote controller. PUSH TO ENTER Then turn the jog dial or press the cursor button on the remote controller to display the "LEVEL CAL." DSP/MODE ADJ PUSH TO ENTER 3. Press the jog dial or ENTER button on the remote controller. A test sound (pink noise) will be heard from the left front speaker. At this point, it is not necessary to adjust the volume of the test sound. DSP/MODE ADJ PUSH TO ENTER dB 4. Press either the jog dial or the cursor button on the remote controller again. The test sound will now be heard from a different speaker. DSP/MODE ADJ PUSH TO ENTER 5. Turn the jog dial or press the or cursor buttons on the remote controller to adjust the volume of the test sound from this speaker to the same level that you heard from the previous speaker. DSP/MODE ADJ PUSH TO ENTER You can adjust the level in the range between -12 dB and +12 dB. 6. Repeat the procedure in step 4 and 5 until the volume of the test sound from all speakers is the same level. Each time you press the jog dial or the button on the remote controller, the test sound will be heard from a different speaker. The speaker order for calibration is LEFT (front left) → CENTER (center) → RIGHT (front right) → SURR RIGHT (surround right) → SURR LEFT (surround left) → SUBWOOFER (subwoofer). 7. Press the RETURN button. RETURN You return to the "LEVEL CAL?" display. Notes: • If you press the RETURN button again, you go back up one more level. • To exit the setup mode immediately, press the SETUP button. You can also press the TEST button on the remote controller to perform the Level Calibration setting. For more details, see page 9. 20
-
 1
1 -
2
-
3
-
4
-
5
-
6
-
7
-
8
-
9
-
10
-
11
-
12
-
13
-
14
-
 15
15 -
 16
16 -
 17
17 -
 18
18 -
 19
19 -
 20
20 -
 21
21 -
 22
22 -
 23
23 -
 24
24 -
 25
25 -
26
-
27
-
28
-
29
-
30
-
31
-
32
-
33
-
34
-
35
-
36
-
37
-
38
-
39
-
40
-
41
-
42
-
43
-
44
-
45
-
46
-
47
-
48
-
49
-
50
-
51
-
52
 |
 |