Onkyo TX-DS595 Owner Manual - Page 32
Preference
 |
View all Onkyo TX-DS595 manuals
Add to My Manuals
Save this manual to your list of manuals |
Page 32 highlights
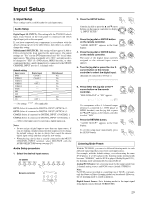
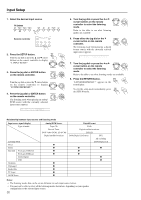
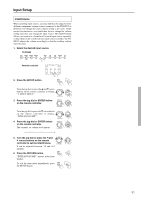
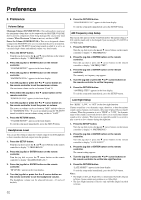
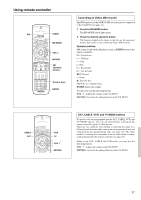
Preference 3. Preference Volume Setup Maximum Volume (MAXIMUM VOL): This setting allows you to set the maximum volume that can be output with the MASTER VOLUME dial to prevent components from being damaged by excessively loud volumes. When Maximum Volume is not set, set this to OFF. Power On Volume (POWERONVOL): This sets a designated volume setting for the TX-DS595 to be set every time that the power is turned on. This prevents the TX-DS595 from being turned on while it is set to an extremely high volume and suddenly output very loud sounds. 1. Press the SETUP button. Turn the jog dial or press the and cursor buttons on the remote controller to display "3. PREFERENCE." 2. Press the jog dial or ENTER button on the remote controller. "VOLUME SETUP?" appears in the front display. 3. Press the jog dial or ENTER button on the remote controller. "MAXIMUM VOL=" appears in the front display. 4. Turn the jog dial or press the or cursor button on the remote controller to set the maximum volume. The maximum volume can be set between 30 and 79. 5. Press either the jog dial or the cursor button on the remote controller. "POWER ON VOL" appears in the front display. 6. Turn the jog dial or press the or cursor button on the remote controller to set the power on volume. The power on volume can be set between "MIN" and the value set for "MAXIMUM VOL." If you do not mind having the TX-DS595 turned on with its current volume setting, set this to "LAST." 7. Press the RETURN button. "VOLUME SETUP?" appears in the front display. To exit the setup mode immediately, press the SETUP button. Headphones Level You can use this setting to adjust the volume output from the headphones so that it matches the level output from the speakers. 1. Press the SETUP button. Turn the jog dial or press the and cursor buttons on the remote controller to display "3. PREFERENCE." 2. Press the jog dial or ENTER button on the remote controller. Turn the jog dial or press the cursor button on the remote controller to display "HEADPHONES LVL?". 3. Press the jog dial or ENTER button on the remote controller. "HP LEVEL" appears in the front display. 4. Turn the jog dial or press the or cursor button on the remote controller to set the headphone volume. The headphone volume can be adjusted between -12 and +12 decibels. 5. Press the RETURN button. "HEADPHONES LVL?" appears in the front display. To exit the setup mode immediately, press the SETUP button. AM Frequency step Setup This screen only appears on the worldwide model. The initial setting is 9 kHz, and this needs only to be changed if you are using the TX-DS595 in a 10-kHz region. 1. Press the SETUP button. Turn the jog dial or press the and cursor buttons on the remote controller to display "3. PREFERENCE." 2. Press the jog dial or ENTER button on the remote controller. Turn the jog dial or press the cursor button on the remote controller to display "AM FREQ STEP?". 3. Press the jog dial or ENTER button on the remote controller. The currently set frequency step appears. 4. Turn the jog dial or press the or cursor buttons on the remote controller to set the frequency. 5. Press the RETURN button. "AM FREQ STEP?" appears in the front display. To exit the setup mode immediately, press the SETUP button. Late Night Setup Sets "HIGH," "LOW," or "OFF" for the late night function. Cinema sound has a vast dynamic range; therefore, to hear the quieter sounds such as human conversations, they must be played back at larger volumes. When this parameter is set to "HIGH" or "LOW," the dynamic range of the sound is narrowed down to allow you to easily hear minute sounds at low volumes. This function is especially useful if you wish to play a movie at low volumes during the nighttime. 1. Press the SETUP button. Turn the jog dial or press the and cursor buttons on the remote controller to display "3. PREFERENCE." 2. Press the jog dial or ENTER button on the remote controller. Turn the jog dial or press the cursor button on the remote controller to display "LATE NIGHT?". 3. Press the jog dial or ENTER button on the remote controller. The current setting appears. 4. Turn the jog dial or press the or cursor buttons on the remote controller to set the late night function. 5. Press the RETURN button. "LATE NIGHT?" appears in the front display. To exit the setup mode immediately, press the SETUP button. Notes: • The depth of the Late Night effect is determined by Dolby Digital software. Some sounds may produce no or little effect. • The Late Night function is effective only on Dolby Digital encoded software. 32
-
 1
1 -
2
-
3
-
4
-
5
-
6
-
7
-
8
-
9
-
10
-
11
-
12
-
13
-
14
-
15
-
16
-
17
-
18
-
19
-
20
-
21
-
22
-
23
-
24
-
25
-
26
-
 27
27 -
 28
28 -
 29
29 -
 30
30 -
 31
31 -
 32
32 -
 33
33 -
 34
34 -
 35
35 -
 36
36 -
 37
37 -
38
-
39
-
40
-
41
-
42
-
43
-
44
-
45
-
46
-
47
-
48
-
49
-
50
-
51
-
52
 |
 |