Onkyo TX-DS595 Owner Manual - Page 7
RT/PTY/TP European models only button [24] - display
 |
View all Onkyo TX-DS595 manuals
Add to My Manuals
Save this manual to your list of manuals |
Page 7 highlights
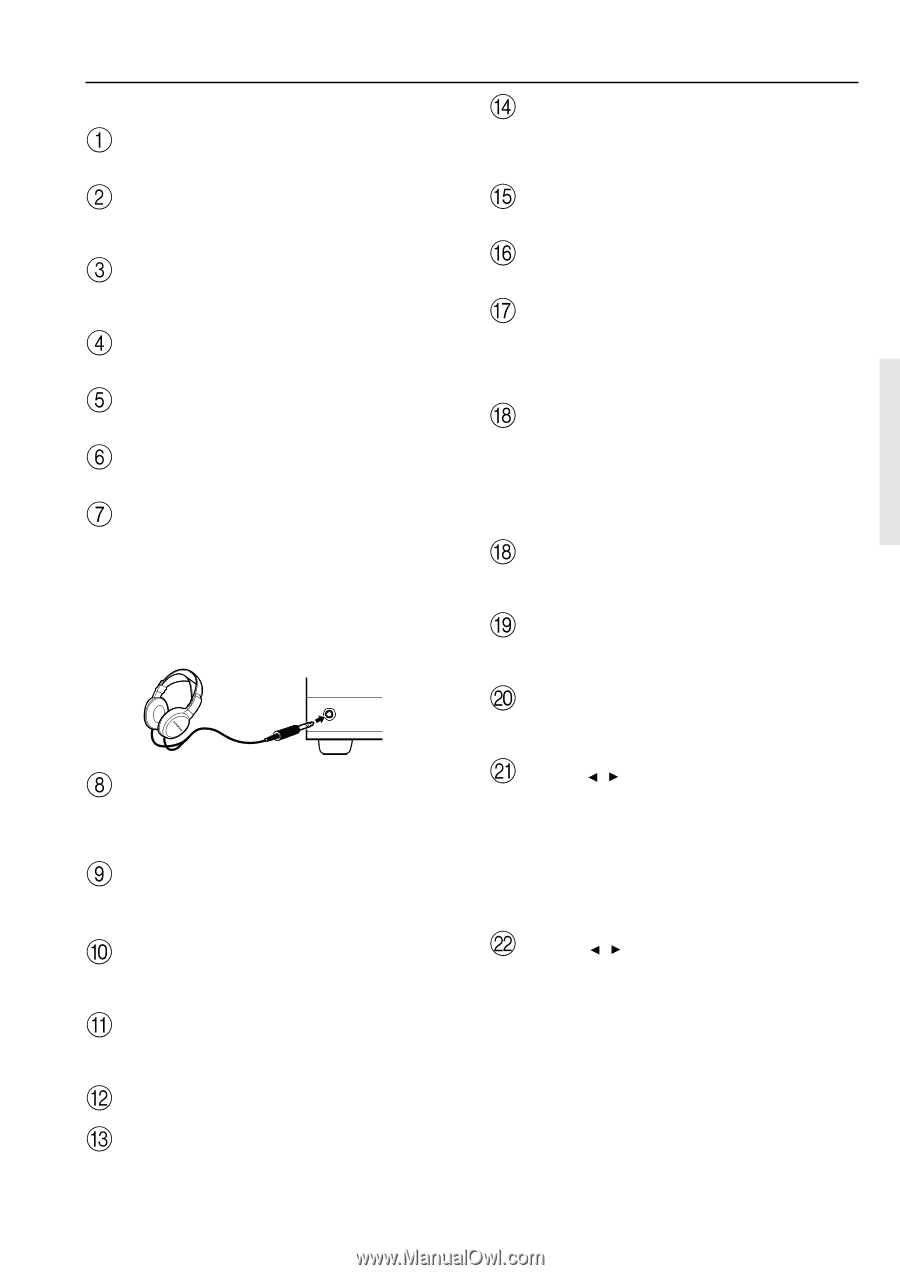
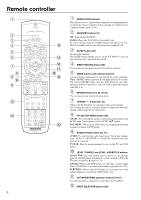
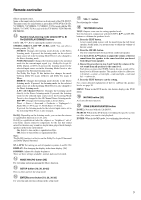
Front panel facilities For operational instructions, see page indicated in brackets [ ]. POWER switch [16] Turns on and off the main power supply for the TX-DS595. STANDBY indicator [16] Lights when the TX-DS595 is in the standby state and flashes when a signal is received from the remote controller. STANDBY/ON button [16] Press to turn on the TX-DS595 when in the standby state. Press again to return the TX-DS595 to the standby state. SPEAKERS A/B buttons [25, 26] Press these buttons to turn on and off speakers systems A and B. CH LEVEL button [27] Press to select the channel whose level is to be adjusted. MASTER VOLUME dial [25] The MASTER VOLUME dial is used to control the volume. PHONES jack To listen with headphones, plug a pair headphones with a standard stereo plug into the PHONES jack on the TX-DS595 front panel. When you connect headphones, the unit will enter STEREO mode automatically and no sound will be heard from the speakers. If you have selected MULTI CH INPUT, you will hear sound only from the FRONT L and R channels. Note that the volume level for the headphones is adjustable. PHONES AUDIO SELECTOR button [27] This button is used to select the type of audio input signal. Each time pressed, the setting cycles from "AUTO" → "MULTICH" → "ANALOG" and back. Input source buttons (DVD, VIDEO 1-3, TAPE, FM, AM, PHONO, and CD) [25] These buttons are used to select the input source. BASS dial [26] Boosts or cuts the bass response. Bass adjustment is effective only for the front speakers and headphones. TREBLE dial [26] Boosts or cuts the treble response. Treble adjustment is effective only for the front speakers and headphones. Front display Remote control sensor [5] SMART SCAN NAVIGATOR jog dial and indicators [19, 20, 22, 24-27, 30-32] Used to make settings in the setup display, change listening mode settings, and more. SETUP button [19, 20, 30-32] Press to enter and exit the setup mode. RETURN button [19, 20, 30-32] Press to move up one level in the setup mode. DISPLAY button [26] The DISPLAY button is used to display information about the current input source signal. Each time you press the display button, the screen changes to show you different information concerning the input signal. RT/PTY/TP (European models only) button [24] This button is only available on European models. Use this button to help tune into the Radio Data System (RDS) for FM broadcasting. RDS was developed within the European Broadcasting Union (EBU) and is available in most European countries. Each time the button is pressed, the display changes from RT (radio text) to PTY (program type) to TP (traffic program) and then back to RT again. DIMMER (other than European models) button Press to set the brightness of the front display. There are 3 settings available: normal, dark, and very dark. FM MODE button [21] When there is too much noise in the stereo reception of an FM broadcast, press to turn off the FM MUTE function. PRESET MEMORY button [22] This button is used to assign the radio station that is currently tuned in to a preset channel or delete a previously preset station. TUNING / buttons [21] Use these buttons to change the tuner frequency. The tuner frequency is displayed in the front display and it can be changed in 50 kHz increments for FM and 10 kHz (or 9 kHz) increments for AM. When FM is selected, you can hold down one of the tuning buttons and then release it to activate the auto-search feature. It will search for a station in the direction of the button you pressed and stop when it tunes into one. PRESET / buttons [22] When AM or FM is selected as the input source, press one of these buttons to jump to a radio station that you preset using the PRESET MEMORY button. Pressing the right button moves from the most recently preset station to older ones, and pressing the left button moves in the reverse order. 7
-
 1
1 -
 2
2 -
 3
3 -
 4
4 -
 5
5 -
 6
6 -
 7
7 -
 8
8 -
 9
9 -
 10
10 -
 11
11 -
 12
12 -
13
-
14
-
15
-
16
-
17
-
18
-
19
-
20
-
21
-
22
-
23
-
24
-
25
-
26
-
27
-
28
-
29
-
30
-
31
-
32
-
33
-
34
-
35
-
36
-
37
-
38
-
39
-
40
-
41
-
42
-
43
-
44
-
45
-
46
-
47
-
48
-
49
-
50
-
51
-
52
 |
 |