Onkyo TX-DS656 Owner Manual - Page 42
Press, ENTER, button.
 |
View all Onkyo TX-DS656 manuals
Add to My Manuals
Save this manual to your list of manuals |
Page 42 highlights
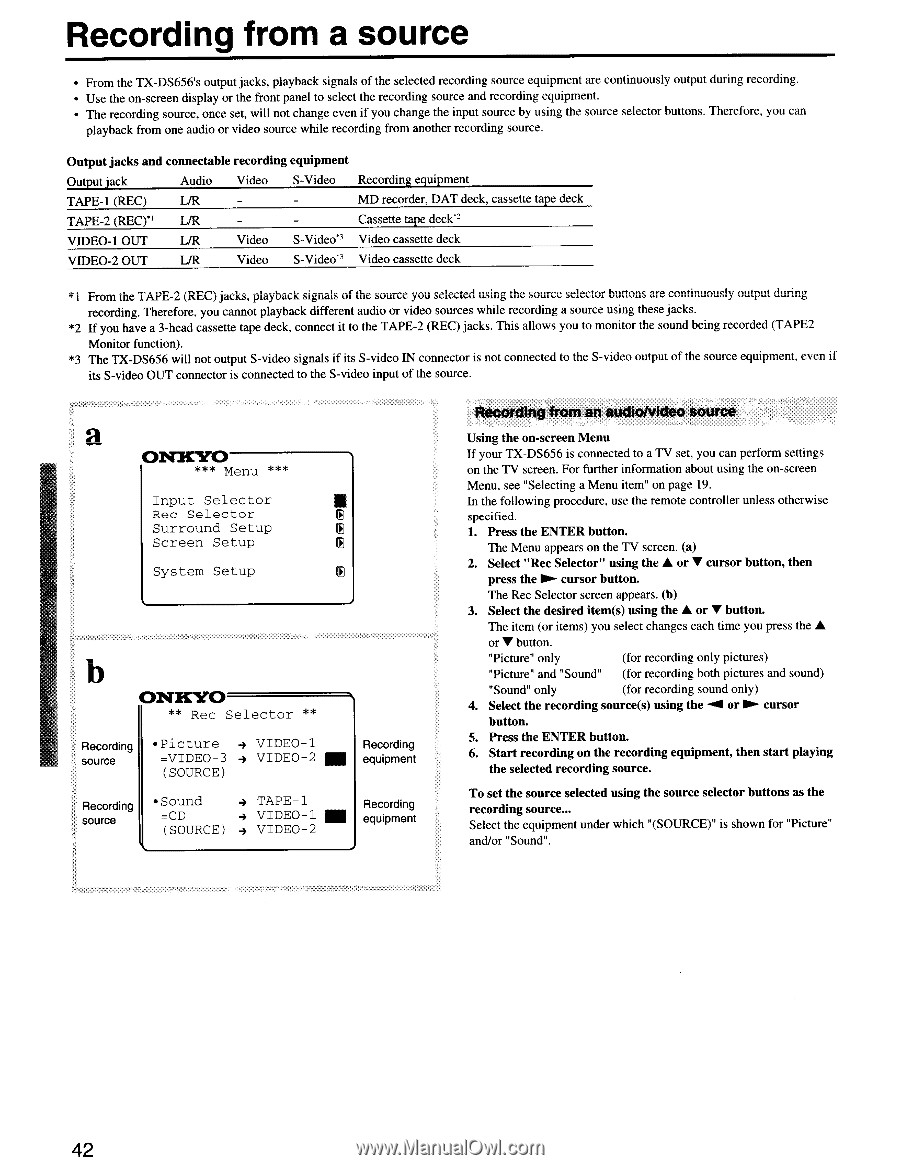
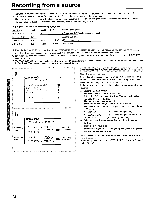
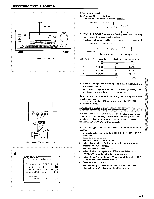
Recording from a source • From the TX-DS656's output jacks, playback signals of the selected recording source equipment are continuously output during recording. • Use the on-screen display or the front panel to select the recording source and recording equipment. • The recording source, once set, will not change even if you change the input source by using the source selector buttons. Therefore, you can playback from one audio or video source while recording from another recording source. Output jacks and connectable recording equipment Output jack Audio Video S-Video Recording equipment TAPE-1 (REC) L/R MD recorder, DAT deck, cassette tape deck TAPE-2 (REC)" L/R Cassette tape deck*2 VIDEO-1 OUT L/R Video S-Video" Video cassette deck VIDEO-2 OUT L/R Video S-Video" Video cassette deck *I From the TAPE-2 (REC) jacks, playback signals of the source you selected using the source selector buttons are continuously output during recording. Therefore, you cannot playback different audio or video sources while recording a source using these jacks. *2 If you have a 3-head cassette tape deck, connect it to the TAPE-2 (REC) jacks. This allows you to monitor the sound being recorded (TAPE2 Monitor function). *3 The TX-DS656 will not output S-video signals if its S-video IN connector is not connected to the S-video output of the source equipment, even if its S-video OUT connector is connected to the S-video input of the source. a ONKYO *** Menu *** Input Selector Rec Selector Surround Setup Screen Setup System Setup b ONICIr0 ** Rec Selector ** Recording source •Picture 4 VIDEO-1 =VIDEO-3 4 VIDEO-2 III (SOURCE) Recording equipment Recording source •Sound 4 TAPE -1 =CD - VIDEO-1 (SOURCE) 4 VIDEO-2 Recording equipment Recording from an audio/video source Using the on-screen Menu If your TX-DS656 is connected to a TV set, you can perform settings on the TV screen. For further information about using the on-screen Menu, see "Selecting a Menu item" on page 19. In the following procedure, use the remote controller unless otherwise specified. 1. Press the ENTER button. The Menu appears on the TV screen. (a) 2. Select "Rec Selector" using the ♦ or V cursor button, then press the ► cursor button. The Rec Selector screen appears. (b) 3. Select the desired item(s) using the ♦ or V button. The item (or items) you select changes each time you press the A or V button. "Picture" only (for recording only pictures) "Picture" and "Sound" (for recording both pictures and sound) "Sound" only (for recording sound only) 4. Select the recording source(s) using the -.0 or ► cursor button. 5. Press the ENTER button. 6. Start recording on the recording equipment, then start playing the selected recording source. To set the source selected using the source selector buttons as the recording source... Select the equipment under which "(SOURCE)" is shown for "Picture" and/or "Sound". 42
-
 1
1 -
2
-
3
-
4
-
5
-
6
-
7
-
8
-
9
-
10
-
11
-
12
-
13
-
14
-
15
-
16
-
17
-
18
-
19
-
20
-
21
-
22
-
23
-
24
-
25
-
26
-
27
-
28
-
29
-
30
-
31
-
32
-
33
-
34
-
35
-
36
-
 37
37 -
 38
38 -
 39
39 -
 40
40 -
 41
41 -
 42
42 -
 43
43 -
 44
44 -
 45
45 -
 46
46 -
 47
47 -
48
-
49
-
50
-
51
-
52
-
53
-
54
-
55
 |
 |