Onkyo TX-DS656 Owner Manual - Page 44
connected.
 |
View all Onkyo TX-DS656 manuals
Add to My Manuals
Save this manual to your list of manuals |
Page 44 highlights
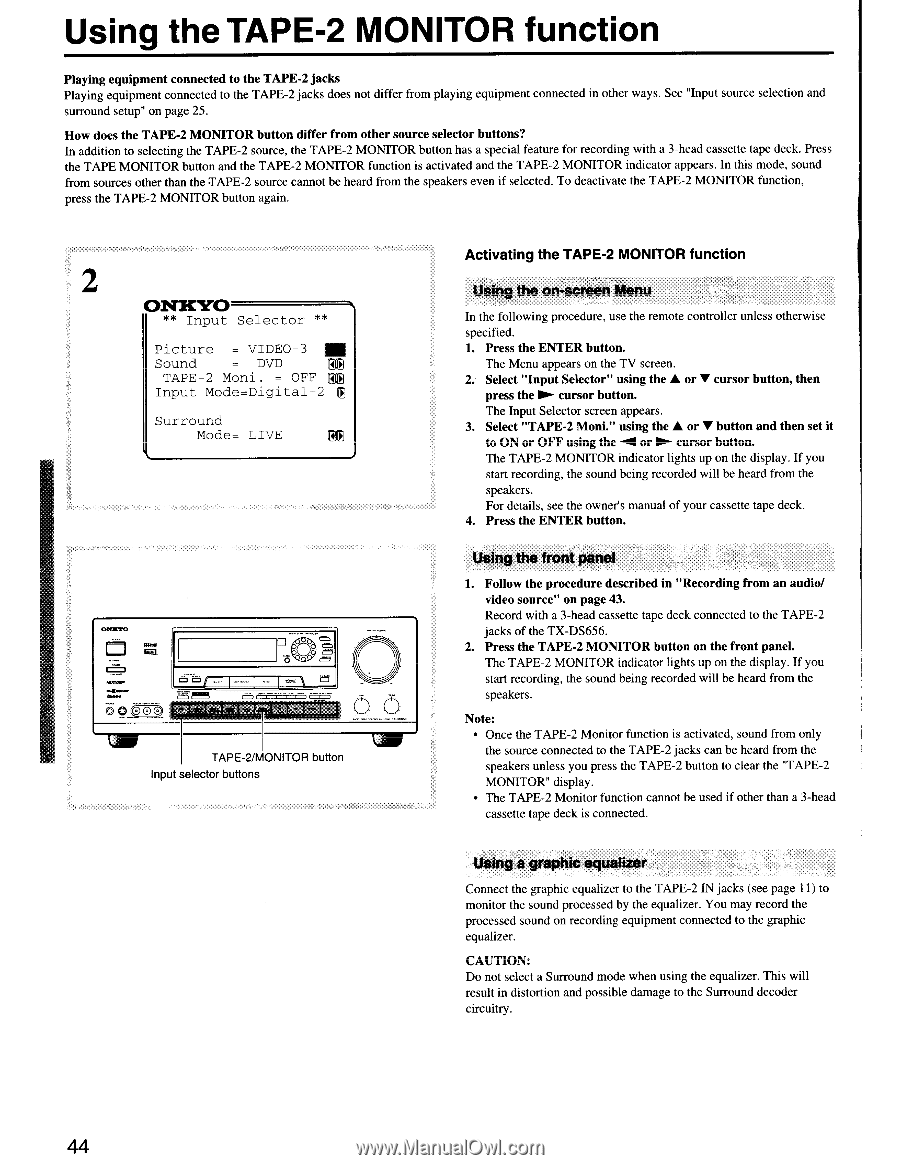
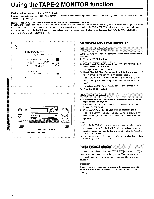
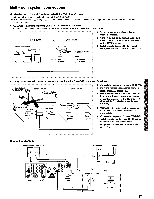
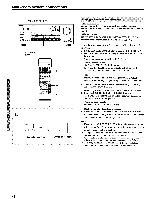
Using the TAPE-2 MONITOR function Playing equipment connected to the TAPE-2 jacks Playing equipment connected to the TAPE-2 jacks does not differ from playing equipment connected in other ways. See "Input source selection and surround setup" on page 25. How does the TAPE-2 MONITOR button differ from other source selector buttons? In addition to selecting the TAPE-2 source, the TAPE-2 MONITOR button has a special feature for recording with a 3-head cassette tape deck. Press the TAPE MONITOR button and the TAPE-2 MONITOR function is activated and the TAPE-2 MONITOR indicator appears. In this mode, sound from sources other than the TAPE-2 source cannot be heard from the speakers even if selected. To deactivate the TAPE-2 MONITOR function, press the TAPE-2 MONITOR button again. 2 ONKYO ** Input Selector ** Picture = VIDEO-3 IM Sound = DVD RR TAPE-2 Moni. = OFF RR Input Mode=Digital-2 Surround Mode= LIVE 11 • • • • TAPE-2/MONITOR button Input selector buttons Activating the TAPE-2 MONITOR function Using the on-screen Menu In the following procedure, use the remote controller unless otherwise specified. 1. Press the ENTER button. The Menu appears on the TV screen. 2. Select "Input Selector" using the A or V cursor button, then press the ► cursor button. The Input Selector screen appears. 3. Select "TAPE-2 Moni." using the A or V button and then set it to ON or OFF using the -41 or MN- cursor button. The TAPE-2 MONITOR indicator lights up on the display. If you start recording, the sound being recorded will be heard from the speakers. For details, see the owner's manual of your cassette tape deck. 4. Press the ENTER button. Using the front panel 1. Follow the procedure described in "Recording from an audio/ video source" on page 43. Record with a 3-head cassette tape deck connected to the TAPE-2 jacks of the TX-DS656. 2. Press the TAPE-2 MONITOR button on the front panel. The TAPE 2 MONITOR indicator lights up on the display If you start recording, the sound being recorded will be heard from the speakers. Note: • Once the TAPE-2 Monitor function is activated, sound from only the source connected to the TAPE-2 jacks can be heard from the speakers unless you press the TAPE-2 button to clear the "TAPE-2 MONITOR" display. • The TAPE-2 Monitor function cannot be used if other than a 3-head cassette tape deck is connected. Using a graphic equalizer Connect the graphic equalizer to the TAPE-2 IN jacks (see page 11) to monitor the sound processed by the equalizer. You may record the processed sound on recording equipment connected to the graphic equalizer. CAUTION: Do not select a Surround mode when using the equalizer. This will result in distortion and possible damage to the Surround decoder circuitry. 44
-
 1
1 -
2
-
3
-
4
-
5
-
6
-
7
-
8
-
9
-
10
-
11
-
12
-
13
-
14
-
15
-
16
-
17
-
18
-
19
-
20
-
21
-
22
-
23
-
24
-
25
-
26
-
27
-
28
-
29
-
30
-
31
-
32
-
33
-
34
-
35
-
36
-
37
-
38
-
 39
39 -
 40
40 -
 41
41 -
 42
42 -
 43
43 -
 44
44 -
 45
45 -
 46
46 -
 47
47 -
 48
48 -
 49
49 -
50
-
51
-
52
-
53
-
54
-
55
 |
 |