Optoma GT5600 EH340UST User Manual - Page 51
USB Reader, Photo, Settings, USB support format
 |
View all Optoma GT5600 manuals
Add to My Manuals
Save this manual to your list of manuals |
Page 51 highlights
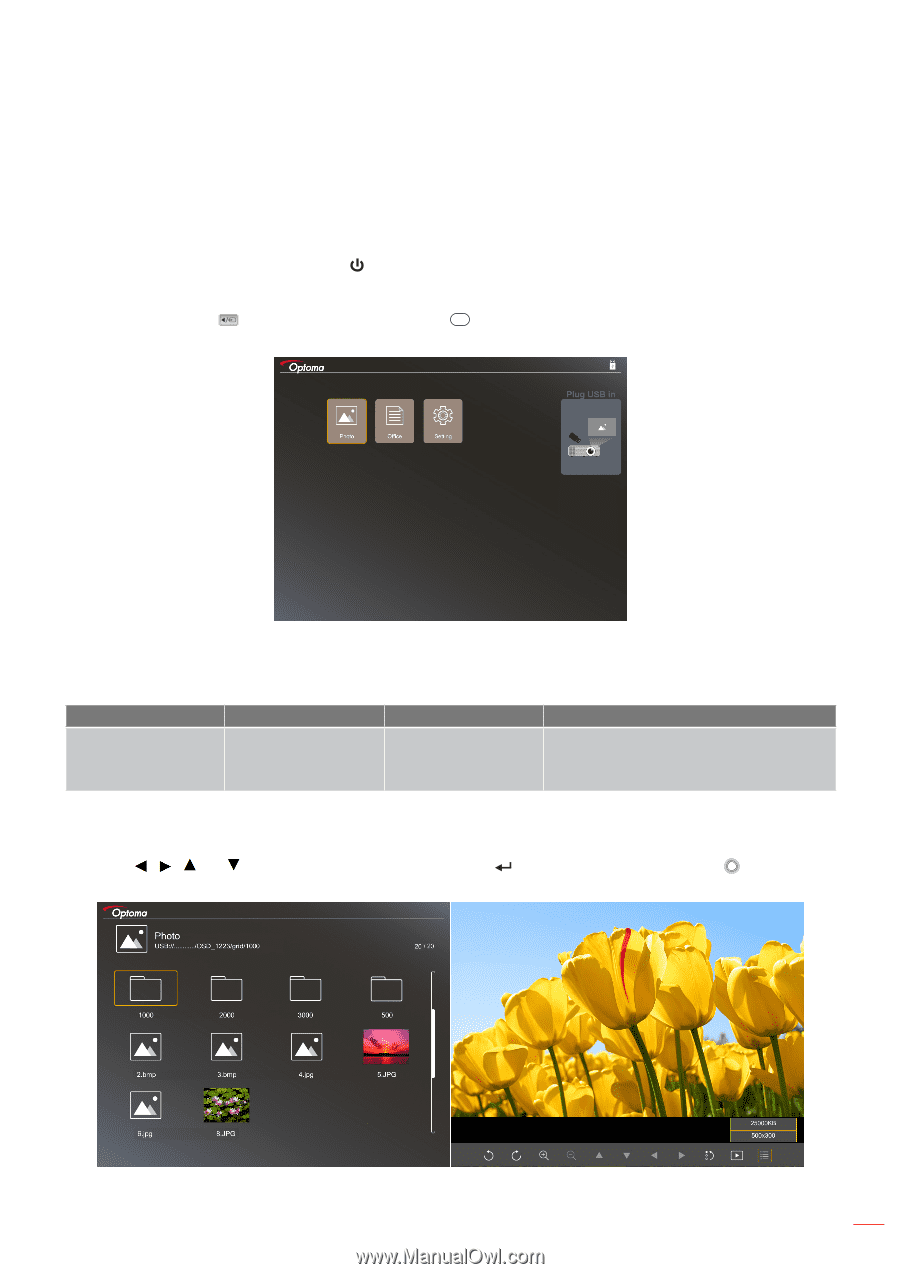
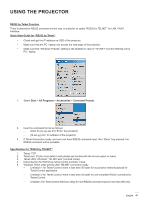
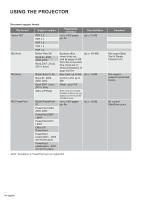
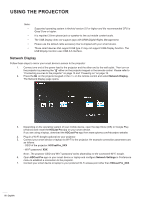
USING THE PROJECTOR USB Reader Note: A USB flash disk must be plugged into the projector if you want to use the USB Reader function. Follow these steps to playback photo or office files on your projector: 1. Connect one end of the power lead to the projector and the other end to the wall outlet. Then turn on the projector by pressing the " " either on the projector keypad or the remote control. Please refer to "Connecting sources to the projector" on page 15 and "Powering on" on page 19. 2. Plug in a USB flash disk to your projector. 3. Press the on the projector keypad or the Source on the remote control and select USB Reader. The USB Reader page opens. 4. Access the USB menu and select the USB Reader files: Photo or Office. Or select the Settings option to change settings for photo or office. USB support format Storage USB Device type USB Flash File system FAT16, FAT32, NTFS, ‡‡ ExFAT ‡‡ File & Dir Level Supports up to 999 directories/files Path name length limit is 100 characters Note: The supported USB storage size is up to 64GB. Photo Press the , , , or to select a photo and then press the remote control to access the photo viewer control. on the projector keypad or the Enter on the English 51
-
 1
1 -
2
-
3
-
4
-
5
-
6
-
7
-
8
-
9
-
10
-
11
-
12
-
13
-
14
-
15
-
16
-
17
-
18
-
19
-
20
-
21
-
22
-
23
-
24
-
25
-
26
-
27
-
28
-
29
-
30
-
31
-
32
-
33
-
34
-
35
-
36
-
37
-
38
-
39
-
40
-
41
-
42
-
43
-
44
-
45
-
 46
46 -
 47
47 -
 48
48 -
 49
49 -
 50
50 -
 51
51 -
 52
52 -
 53
53 -
 54
54 -
 55
55 -
 56
56 -
57
-
58
-
59
-
60
-
61
-
62
-
63
-
64
-
65
-
66
-
67
-
68
-
69
-
70
-
71
-
72
-
73
-
74
-
75
 |
 |