Optoma GT5600 EH340UST User Manual - Page 56
Network Display, HDCast Pro, Network Settings
 |
View all Optoma GT5600 manuals
Add to My Manuals
Save this manual to your list of manuals |
Page 56 highlights
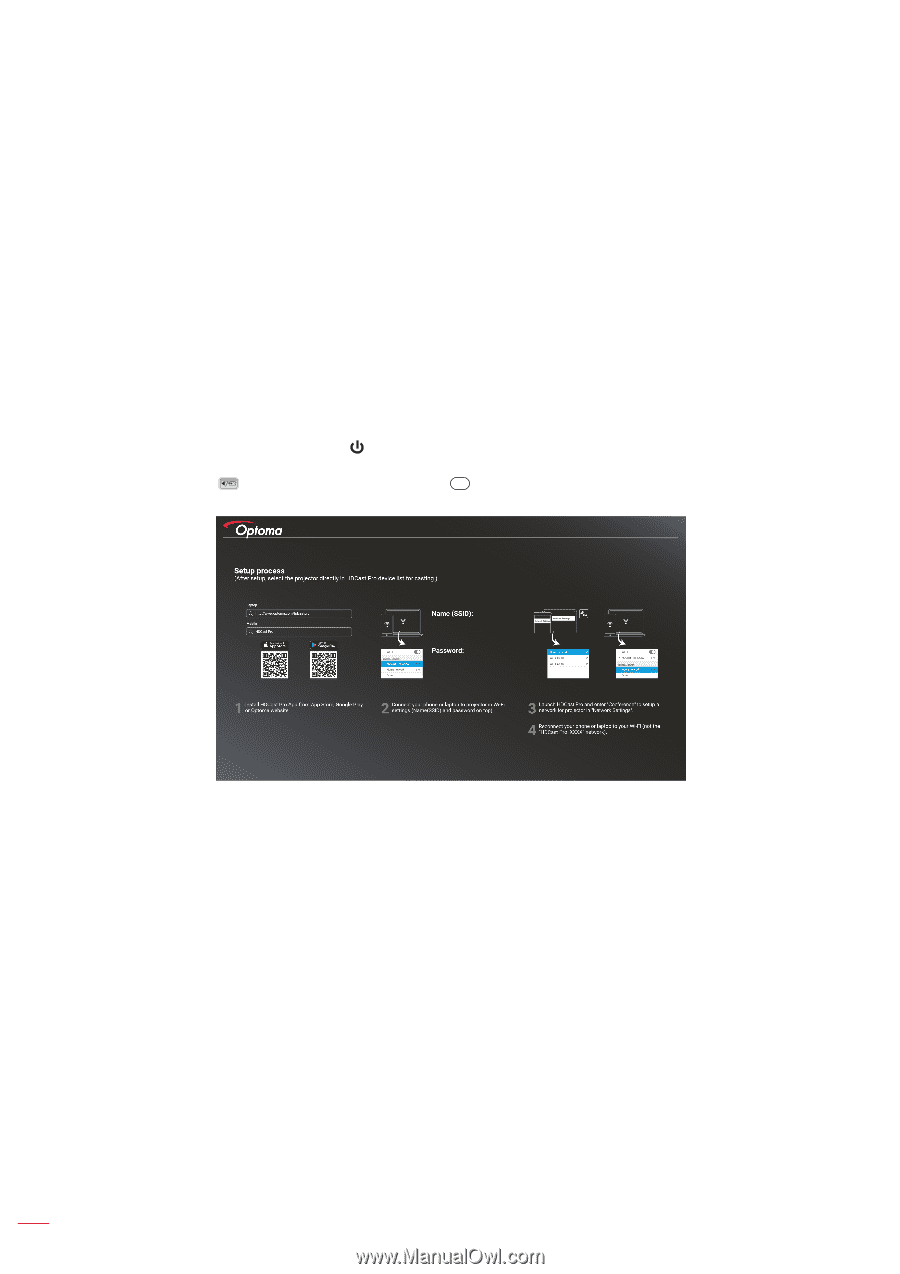
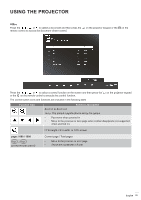
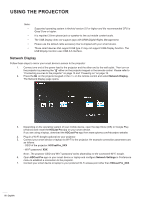
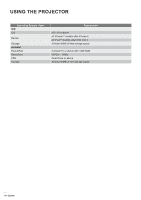
USING THE PROJECTOR Note: ‡‡ Supported operating system is Android version 5.0 or higher and the recommended CPU is Quad Core or higher. It is required 3.5mm phone jack or speaker to line out mobile content audio. The USB Display does not support apps with DRM (Digital Rights Management). Please use the default cable accessory that is shipped with your smart device. Those smart devices that support USB type C may not support USB Display function. The USB Display function uses USB 2.0 interface. Network Display Follow these steps to mirror your smart device's screen to the projector: 1. Connect one end of the power lead to the projector and the other end to the wall outlet. Then turn on the projector by pressing the " " either on the projector keypad or the remote control. Please refer to "Connecting sources to the projector" on page 15 and "Powering on" on page 19. 2. Press the on the projector keypad or the Source on the remote control and select Network Display. The Network Display page opens. 3. Depending on the operating system of your mobile device, open the App Store (iOS) or Google Play (Android) and install the HDCast Pro app on your smart device. If you are using a laptop, download the HDCast Pro app from www.optoma.com/hdcastpro website. 4. Plug in a Wi-Fi dongle (optional) to your projector. 5. Connect your smart device or laptop via Wi-Fi to the projector. An example connection parameters are as follows: - SSID of the projector: HDCastPro_XXX - Wi-Fi password: XXX Note: The projector SSID and Wi-Fi password varies depending on the connected Wi-Fi dongle. 6. Open HDCast Pro app on your smart device or laptop and configure Network Settings in Conference menu to establish a connection to the projector. 7. Connect your smart device or laptop to your preferred Wi-Fi access point other than HDCast Pro_XXX. 56 English
-
 1
1 -
2
-
3
-
4
-
5
-
6
-
7
-
8
-
9
-
10
-
11
-
12
-
13
-
14
-
15
-
16
-
17
-
18
-
19
-
20
-
21
-
22
-
23
-
24
-
25
-
26
-
27
-
28
-
29
-
30
-
31
-
32
-
33
-
34
-
35
-
36
-
37
-
38
-
39
-
40
-
41
-
42
-
43
-
44
-
45
-
46
-
47
-
48
-
49
-
50
-
 51
51 -
 52
52 -
 53
53 -
 54
54 -
 55
55 -
 56
56 -
 57
57 -
 58
58 -
 59
59 -
 60
60 -
 61
61 -
62
-
63
-
64
-
65
-
66
-
67
-
68
-
69
-
70
-
71
-
72
-
73
-
74
-
75
 |
 |