Panasonic NV-GS500 Operating Instructions
Panasonic NV-GS500 Manual
 |
View all Panasonic NV-GS500 manuals
Add to My Manuals
Save this manual to your list of manuals |
Panasonic NV-GS500 manual content summary:
- Panasonic NV-GS500 | Operating Instructions - Page 1
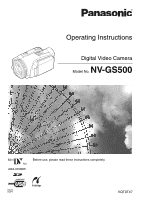
Operating Instructions Digital Video Camera Model No. NV-GS500 Before use, please read these instructions completely. GN VQT0T47 - Panasonic NV-GS500 | Operating Instructions - Page 2
Instructions are the sole responsibility of the user. Try out the Movie Camera. Be sure to try out the Movie Camera or defect of this Movie Camera, its accessories or cassettes. Carefully observe ); there are no user serviceable parts inside. Refer servicing to qualified service personnel. IF THE - Panasonic NV-GS500 | Operating Instructions - Page 3
-If you see this symbolInformation on Disposal in other Countries outside the European Union This symbol is only valid in the European Union. If you wish to discard this product, please contact your local authorities or dealer and ask for the correct method of disposal. 3 VQT0T47 - Panasonic NV-GS500 | Operating Instructions - Page 4
built-in video flash 33 Self-timer recording 35 Wide/Pro-Cinema Function 35 Image stabilizer function 36 Continuous Photoshot 36 Recording in various situations (Scene mode 37 4 VQT0T47 Recording in natural colours (White balance 38 Manual focus adjustment 39 Manual shutter speed/aperture - Panasonic NV-GS500 | Operating Instructions - Page 5
ª Camera 1) (1) 2) 3) 4) VSB0484 5) 6) 7) 8) 9) 1) AC adaptor, DC input lead, AC mains lead -92) Battery pack -93) Remote control, button-type battery -214) Free style remote control -235) Lens cap -86) Multi cable -477) Shoulder strap -78) Digital video head cleaner -639) USB cable and - Panasonic NV-GS500 | Operating Instructions - Page 6
a malfunction and does not affect the recorded picture. (11) Battery holder -9(12) Battery release lever [BATT] -9(13) Power switch [OFF/ON] - 22) Mode select switch [AUTO/MANUAL/ FOCUS] -24-, -37-, -39(23) Power LCD button [POWER LCD] -20(24) USB terminal [ ] -50(25) DV input/output terminal [DV] - Panasonic NV-GS500 | Operating Instructions - Page 7
Kit.) ≥When fitting the tele conversion lens (VW-LT4314NE; optional) or the wide conversion lens (VW-LW4307ME; optional), first remove the lens hood. (Refer to the operating instructions for the tele conversion lens or the wide conversion lens.) ≥When 2 lens accessories, such as the ND filter and - Panasonic NV-GS500 | Operating Instructions - Page 8
hung on the lens cap fixture. (It cannot be hung if the grip belt is used as a hand strap.) 1 Flip the belt. 2 Adjust the length. 3 Fix the belt. ª To use as a hand strap If you use the grip belt as a hand strap, then you can carry or handle this camera more easily - Panasonic NV-GS500 | Operating Instructions - Page 9
not charged. Charge the battery before using this product. ≥Battery charging time (-10-) ≥We recommend using Panasonic batteries. ≥If you use other batteries, we cannot guarantee the quality of this product. ≥If the DC input lead is connected to the AC adaptor, then the battery will not get charged - Panasonic NV-GS500 | Operating Instructions - Page 10
by pressing the [POWER LCD] button. ≥When you use accessories fitted on the camera's smart accessory shoe such as the stereo zoom microphone and video DC light, etc. ≥The batteries heat up after use or charging. The main unit of the movie camera being used will also heat up. This is normal - Panasonic NV-GS500 | Operating Instructions - Page 11
Mode. OFF ON 1 Open the LCD monitor out or extend the viewfinder to use. (-12-) 3 Open the LCD monitor or extend the viewfinder to turn the power on and use the movie camera time function are driven by a builtin lithium battery. ≥Make sure to check the time before recording because the built-in clock is - Panasonic NV-GS500 | Operating Instructions - Page 12
] will appear. Select [YES] and set the date and time. Connect the AC adaptor to the camera or attach the battery to the camera, and the built-in lithium battery will be recharged. Leave the camera as is for approx. 24 hours, and the battery will drive the date and time for approx. 6 months. (Even - Panasonic NV-GS500 | Operating Instructions - Page 13
power turns off. ≥If the standby continues for approx. 30 minutes, then the Status indicator will go off and the camera will be completely turned off. ≥If the Mode dial is moved or the battery is removed in quick start standby mode, quick start is cancelled and the power turns off. ≥When the movie - Panasonic NV-GS500 | Operating Instructions - Page 14
cassette cover, do not get anything, such as a cable, caught in the cover. ≥After use, be sure /or viewfinder and you notice condensation on the lens or the main unit, do not open the [OFF], then to [ON] again. ≥Check if the battery has run down. ª Accidental erasure prevention If the accidental - Panasonic NV-GS500 | Operating Instructions - Page 15
card. ≥Electrical noise, static electricity, or failure of the movie camera or the card may damage or erase the data stored on the card. We recommend saving important data on a personal computer by using a USB cable, PC card adaptor, and USB reader/writer. ª Card access lamp ≥Check that the Status - Panasonic NV-GS500 | Operating Instructions - Page 16
this to play back the still pictures recorded on a card. PC : PC CONNECTION MODE You can view or edit the images recorded on a card on your personal computer. (Refer to the operating instructions for PC connection.) How to use the joystick ª Basic joystick operations Operations on the menu screen - Panasonic NV-GS500 | Operating Instructions - Page 17
Help mode -18- 1 2 Soft skin mode -31- 2/2 1 Tele macro -31- 5) Card recording mode ([AUTO/MANUAL/FOCUS] switch is set to [MANUAL]) 2 38- 1 Shutter speed -39- 6) Card Playback Mode 3 Playback/pause -41- 4 Stop -41- 2 Rewind (review playback) -41- 1 Fast forward (cue playback - Panasonic NV-GS500 | Operating Instructions - Page 18
For each individual menu, please refer to -52-. 1 Press the [MENU] button. MENU ≥The help mode explains the operation icons displayed when the [AUTO/MANUAL/ FOCUS] switch is set to [AUTO] in Tape/Card Recording Mode. 3 Move the joystick up, left, or right to select the desired icon. ≥The menu - Panasonic NV-GS500 | Operating Instructions - Page 19
Before using 5 Move the joystick right or press it to set the selection. ª Operating with remote control The menu screen transition is the same as when the buttons on the main unit are used. 1 Press the [MENU] button. 6 Move the joystick up or down in order to select the item to be set. 2 Select - Panasonic NV-GS500 | Operating Instructions - Page 20
settings. ≥When the LCD monitor is rotated by 180° towards the lens, the brightness of the LCD monitor cannot be adjusted. ≥To adjust on the camera when the AC adaptor is used, the [POWER LCD] function will automatically be activated. ≥You cannot use this function in PC Connection Mode. ª Changing - Panasonic NV-GS500 | Operating Instructions - Page 21
1, 4] -19- (7) (10) Photoshot button [PHOTO SHOT] ¢ (11) Rewind/review button [6] (12) Pause button [;] (13) Stop button [∫] (14) Recording start/ the corresponding buttons on the movie camera. ª Install a button-type battery Install the button-type battery supplied in the remote control before - Panasonic NV-GS500 | Operating Instructions - Page 22
put Button-Type battery in mouth. If swallowed call your doctor. ª Remote control usable range ≥The distance between the remote control and the camera: Within approx. 5 m Angle: Approx. 10o up and 15o down, left, and right ª Selecting the remote control mode If 2 cameras are used simultaneously - Panasonic NV-GS500 | Operating Instructions - Page 23
and low angles. It is also handy when a tripod is used. When you do not use the controller, attach the clip to the grip belt. Left-handed users can use this camera more easily. (1) (2) (3) (1) Recording start/stop button [REC] (2) Zoom lever [W/T] (3) Photoshot button [PHOTO SHOT] ª Connect the free - Panasonic NV-GS500 | Operating Instructions - Page 24
work properly. ª Basic camera holding 1) 2) ≥Adjusting LCD monitor/viewfinder (-20-) ≥Power supply (-9-) ≥Insert a cassette/card (-14-, -15-) ≥Setting date/time (-11-) ≥Getting the remote control ready (-21-) ≥Setting SP/LP mode (-24-) ª About auto mode ≥Set the [AUTO/MANUAL/FOCUS] switch to [AUTO - Panasonic NV-GS500 | Operating Instructions - Page 25
on other digital video equipment or on digital video equipment without the LP mode. ≥Playback of the image on other digital video equipment recorded in the LP mode. ≥Slow/frame-by-frame playback. Recording on a tape Remove the lens cap. (-8-) (When the camera is turned on with the lens cap fitted - Panasonic NV-GS500 | Operating Instructions - Page 26
recorded (unused part of the tape). After the search is finished, the blank search function is cancelled and the camera is put into recording pause. ≥Set to Tape Recording Mode. 1 Press the joystick to display the icon during the recording pause. Move the joystick down until icon 1 appears. 2 Move - Panasonic NV-GS500 | Operating Instructions - Page 27
PRO-CINEMA]: 1 : 1280k720 0.2 : 640k360 REC ASPECT [4:3]: 1M : 1280k960 0.3M : 640k480 Recording still pictures onto a card (Photoshot) ≥Set to Card Recording Mode. PC be indicated.) ≥The iris/gain value is fixed and this camera focuses on the subject automatically. PHOTO SHOT ≥For the number of - Panasonic NV-GS500 | Operating Instructions - Page 28
shutter chance mark does not appear in manual focus mode. ≥When the subject is not easily focused, focus on the subject manually. ≥You can record still pictures on cases. ≥When the zoom magnification is high. ≥When the movie camera is shaken. ≥When the subject is moving. ≥When the subject - Panasonic NV-GS500 | Operating Instructions - Page 29
You can zoom in up to 12k optically. ≥Set to Tape/Card Recording Mode. 1 Wide-angle recording (zoom out): Push the [W/T] lever towards [W]. Close-up recording (zoom in): Push the [W/T] lever towards [T]. Record mode ª Digital zoom function If the zoom magnification exceeds 12 times, then the - Panasonic NV-GS500 | Operating Instructions - Page 30
Wide/Pro-Cinema function is set, a vertically oriented display appears on the viewfinder screen, this is normal and not indicative of any trouble. ≥When the LCD monitor is rotated towards the lens on the screen of the movie camera. ≥Each upward press switches the modes. OFF # Colour night view - Panasonic NV-GS500 | Operating Instructions - Page 31
effective if you record the bust image of a person. ≥Set to Tape/Card Recording Mode. 1 Press the joystick to display the icon. Move the joystick down until icon appears on the screen of the movie camera. ≥If a sharper focus cannot be achieved, adjust the focus manually. ≥In the following cases, the - Panasonic NV-GS500 | Operating Instructions - Page 32
icon again. ≥The [FADE OFF] indication appears on the screen of the movie camera. ª To select the colour for fade in/out The colour which appears in and the external microphone terminal can be adjusted. ≥Set to Tape Recording/Playback Mode. 1 Set [ADVANCED] >> [MIC LEVEL] >> [AUTO], [SETrAGC] or - Panasonic NV-GS500 | Operating Instructions - Page 33
-Ground-Shooting ≥Set to Tape Recording Mode. 1 Set [SETUP] >> [AGS] >> [ON]. ª To cancel Anti-Ground-Shooting Set [SETUP] >> [AGS] >> [OFF]. ≥You cannot use the built-in video flash unless the card is inserted in the movie camera. ≥The movie camera, even when its video flash has been turned off - Panasonic NV-GS500 | Operating Instructions - Page 34
white blotches (colour blotches) on the pictures. If so, either adjust the iris manually or use the backlight compensation function, without using the flash. ≥Carefully read the operating instructions for the video flash. A ≥The [ ] indication appears. ≥The flash is activated 2 times. Do not move - Panasonic NV-GS500 | Operating Instructions - Page 35
Set [BASIC] >> [REC ASPECT] >> [4:3]. ≥The default setting is [16:9]. ≥In the wide/Pro-Cinema mode, the menu screens, operation icons and other screen displays appear horizontally oriented. ≥When images are played back on a TV screen, the date/time indication may be erased in some cases. ≥Depending - Panasonic NV-GS500 | Operating Instructions - Page 36
the image stabilizer off. ≥In the following cases, the image stabilizer function may not work effectively. ≥When the digital zoom is used ≥When a conversion lens is used ≥When the camera is shaken greatly ≥When you record a moving subject while tracking it 3 Press and hold the [PHOTO SHOT] button - Panasonic NV-GS500 | Operating Instructions - Page 37
ski slopes and beaches ª To cancel the scene mode function Set [BASIC] >> [SCENE MODE] >> [OFF] or set the [AUTO/MANUAL/FOCUS] switch to [AUTO]. Sports mode ≥For slow-motion playback or playback pause of recorded pictures, this mode presents free of camera shakes. ≥During normal playback, the image - Panasonic NV-GS500 | Operating Instructions - Page 38
incandescent lamps) [ ] 3) Outdoor mode [ ] 4) Manual adjustment mode [ ] ª To restore to the automatic adjustment Move the joystick left or right until the [ AWB ] indication appears. Or, set the [AUTO/MANUAL/ FOCUS] switch to [AUTO]. ≥When the camera is turned on with the lens cap fitted, the - Panasonic NV-GS500 | Operating Instructions - Page 39
≥Set to Tape/Card Recording Mode. 1 Set the [AUTO/MANUAL/FOCUS] switch to [MANUAL]. AUTO MANUAL FOCUS 2 Move the joystick left wide angle, the subject may not be in focus when zoomed in. First, zoom in on the subject, and then focus on it. ª To restore to the automatic adjustment Set the [AUTO/MANUAL - Panasonic NV-GS500 | Operating Instructions - Page 40
. MF ≥If the scene is low in brightness or contrast, the subject may not be focused in on. ≥While the movie camera is focusing on the subject, you cannot operate any control on it with the exception of [OFF/ON] switch, mode dial, [AUTO/MANUAL/FOCUS] switch and [POWER LCD] button. 40 VQT0T47 - Panasonic NV-GS500 | Operating Instructions - Page 41
[ ] indication appears. (In order to cancel the repeat playback mode, set [REPEAT PLAY] >> [OFF] or turn off the power.) ≥When you set [USB FUNCTION] >> [WEBCAM] and then connect the USB connection cable, the repeat playback mode is cancelled. ª Settings on the audio ≥If you cannot listen - Panasonic NV-GS500 | Operating Instructions - Page 42
) of this camera during playback pause also turns into the frame-by-frame playback. If you keep pushing the lever, then the images will continuously be played back frame by frame. 42 VQT0T47 2 Press the [3] or [4] button to vary the speed. ≥The speeds for cue/review playback are 1/5k (SP mode slow - Panasonic NV-GS500 | Operating Instructions - Page 43
Playback mode Playback on TV Images recorded by this camera can be played back on a TV. ≥Insert a recorded tape or card into this camera. 1 Connect the movie camera and a TV. [AUDIO IN] A/V 1 2 [S-VIDEO IN] [VIDEO IN] ≥Connect the movie camera and a TV by using the Multi cable 1. ≥If the TV has - Panasonic NV-GS500 | Operating Instructions - Page 44
≥When playing back still pictures recorded in 4:3 mode ( 4M , 2M , 1M , 0.3M ) on a wide-screen TV, the picture quality may deteriorate. ≥When playing back ≥The file format supported by this movie camera is JPEG. (Not all JPEG formatted files will be played back.) ≥If an out-of-specs file is played - Panasonic NV-GS500 | Operating Instructions - Page 45
battery PC, it cannot be used on the movie camera. Format the SD Memory Card on the movie camera, in this case. ≥Do not remove the card or turn off the power while formatting. ≥The movie camera supports SD Memory Cards formatted in FAT12 system and FAT16 system based on SD Memory Card Specifications - Panasonic NV-GS500 | Operating Instructions - Page 46
to Card Playback Mode. 1 Set [ camera. ª To set so that all pictures are not printed Select [CANCEL ALL] in Step 1. ª What is DPOF? DPOF stands for Digital Print Order Format. This enables the printing information to be added to the pictures on the card so that it can be used on a system supporting - Panasonic NV-GS500 | Operating Instructions - Page 47
may be recorded. ≥Connect the movie camera and the recorder by using the Multi cable 1. ≥If the recorder has an S-Video terminal, then also connect to this terminal 2. It allows you to copy clearer image. Connecting with the optional DV cable (Only for equipment with a DV terminal) S / 2 (L2 - Panasonic NV-GS500 | Operating Instructions - Page 48
Playback Mode. (Player/recorder) 1 Connect the movie camera and digital video equipment with the DV cable. ≥If you record (dub) images onto another video device and then play them back on a widescreen TV, the images may be stretched vertically. In this case, refer to the operating instructions for - Panasonic NV-GS500 | Operating Instructions - Page 49
a device equipped with DV terminals such as IEEE1394, you may not be able to perform digital dubbing in some cases. For more information, see the instructions for equipment connected. ≥Regardless of the menu settings on the recorder, digital dubbing is carried out in the same mode as the [AUDIO REC - Panasonic NV-GS500 | Operating Instructions - Page 50
printer, use a printer compatible with PictBridge. (Read the operating instructions for the printer.) ≥Insert a card and set to Card Playback Mode. 1 Connect the movie camera and the printer with the supplied USB cable. 1 1 USB cable PictBridge ≥The [PictBridge] indication appears on the screen of - Panasonic NV-GS500 | Operating Instructions - Page 51
may not be printed. ≥When the movie camera and the printer are connected in the Tape Recording/Playback Mode, the [ ] Indication may appear on the LCD monitor. However, pictures cannot be printed. ≥The sides of pictures recorded when [16:9]/ [PRO-CINEMA] is set may be cut at printing. (When - Panasonic NV-GS500 | Operating Instructions - Page 52
different from the actual menu indications. ª [TAPE RECORDING MENU] ª [TAPE PLAYBACK MENU] 1) [BASIC] [DATE/TIME] -54[USB FUNCTION] (Refer to the operating instructions for PC connection.) 1) [BASIC] [SCENE MODE] -37[REC SPEED] -24[WIND CUT] -32[REC ASPECT] -35[CLOCK SET] -11- 2) [ADVANCED] [PICT - Panasonic NV-GS500 | Operating Instructions - Page 53
.QUALITY] -28[PICTURE SIZE] -28[REC ASPECT] -35[CLOCK SET] -11- 2) [ADVANCED] [BURST MODE] -36[FLASH] -33[RED EYE] -34[FLASH LEVEL] -34[O.I.S.] -36[REC LAMP] -54[SHTR [REMOTE] -22[LCD SET] -20[EVF SET] -20[LCD AI] -20[POWER SAVE] -54[TV ASPECT] -43[JOYSTICK LED] -55- 4) [LANGUAGE] -18- 53 VQT0T47 - Panasonic NV-GS500 | Operating Instructions - Page 54
the battery from running down. When you use the movie camera, turn it on again. ≥In the following cases, the power may not turn off even when setting [POWER SAVE] >> [5 MINUTES]. ≥When connecting to the AC outlet (When using the AC adaptor) ≥When connecting the USB cable or the DV cable to - Panasonic NV-GS500 | Operating Instructions - Page 55
etc.) used during the recordings are displayed during playback. ≥If the [AUTO/MANUAL/FOCUS] switch was set to [AUTO] when recording, [AUTO] appears on the MODE] If you set to [DEMO MODE] >> [ON] without inserting a cassette and a card, the movie camera is automatically set to the demonstration mode - Panasonic NV-GS500 | Operating Instructions - Page 56
PRO : Recording check -26Pro-Cinema Function -35- 16:9 : AUTO : MNL : MF: 5k: Wide mode -35Automatic mode -24Manual mode -37Manual focus -39Zoom magnification indication -29- : 1/500: Backlight mode -30Shutter speed -39- F2.4: 6dB: F number -39Gain value -39- : WEB CAMERA mode (Recording - Panasonic NV-GS500 | Operating Instructions - Page 57
digital dubbing on a tape with the accidental erasure prevention slider placed in the [SAVE] position. CHECK REMOTE MODE: An incorrect remote control mode different TV system. This cassette is incompatible. UNPLAYABLE CARD: You are attempting to play back data not compatible with this movie camera. - Panasonic NV-GS500 | Operating Instructions - Page 58
the connected printer. PC DOES NOT SUPPORT USB2.0: The movie camera is connected to a personal computer that does not support USB 2.0. (Refer to the operating instructions for PC connection.) CAN NOT USE USB: You are connecting the USB cable with the DV cable connected. CHANGE TO MANUAL MODE: You - Panasonic NV-GS500 | Operating Instructions - Page 59
recorded in LP mode ≥The blank section of a tape ≥Sounds sent through the DV terminal Before requesting repair (Problems and solutions) Power/Body 1: The movie camera power cannot be turned on. • Is the battery fully charged? Use a fully charged battery. • The battery protection circuit may have - Panasonic NV-GS500 | Operating Instructions - Page 60
Make sure that the battery and the AC adaptor are properly connected. (-9-) • Is the battery in use discharged? Charge the battery and remove the cassette. the manual mode. • Is the card slow shutter mode activated? In card slow shutter mode, focusing shifts into the manual mode. 5: The camera - Panasonic NV-GS500 | Operating Instructions - Page 61
used for the connection. • Is the [TV ASPECT] setting correct? Change the setting to match the aspect ratio of the TV. [SETUP] >> [TV ASPECT] >> [16:9] or [4:3]. 2: Mosaic-pattern noise appears on images during cue or review playback. • This phenomenon is characteristic of digital video systems. It - Panasonic NV-GS500 | Operating Instructions - Page 62
the USB cable safely, doubleclick the [ ] icon in the task tray and follow the instructions on the screen. 5: The movie camera malfunctions on editing, dubbing from digital video equipment, or using "MotionDV STUDIO 5.6E LE for DV" or "SweetMovieLife". • If a tape is recorded in multiple modes such - Panasonic NV-GS500 | Operating Instructions - Page 63
with the tape) become dirty, normal recording and playback are not properly performed. Clean the heads with the digital video head cleaner. ≥Insert the head cleaner into the movie camera, set it to the Tape Playback Mode, and play it back for about 10 seconds. (If you do not stop the playback, it - Panasonic NV-GS500 | Operating Instructions - Page 64
cloth, follow the instructions. Do not use this movie camera for surveillance purposes or other business use. ≥If you use the movie camera for a long time it. ª About the battery The battery used in the movie camera is a rechargeable lithium ion battery. This battery is susceptible to temperature and - Panasonic NV-GS500 | Operating Instructions - Page 65
left connected, a minute amount of current is consumed.) ≥Always keep the electrodes of the AC adaptor and battery clean. do not pull out the card, rotate the mode dial, turn off the power, or cause any the card formatted by the movie camera will be displayed on the PC as the illustration below. 256 - Panasonic NV-GS500 | Operating Instructions - Page 66
will become a pure white. The movie camera determines the hue of light that comes through the lens and white balance sensor, thereby judging the use the manual white balance adjustment mode. 1) The effective range of automatic white balance adjustment on this movie camera 2) Blue sky 3) TV screen 4) - Panasonic NV-GS500 | Operating Instructions - Page 67
Auto focus Auto focus automatically moves the focusing lens forward and backward inside the movie camera to bring the subject into focus. Auto situations. Record pictures in the manual focus mode. Recording a subject with one end located closer to the movie camera and the other end farther away - Panasonic NV-GS500 | Operating Instructions - Page 68
Specifications Specifications Digital Video Camera Information for your safety Power source: DC 7.9/7.2 V Power consumption: Recording 4.2 W (When using viewfinder) 4.5 W (When using LCD monitor) Recording format: Mini DV (Consumer-use digital video SD format) Tape used: 6.35 mm digital video - Panasonic NV-GS500 | Operating Instructions - Page 69
0.65 A (Battery charging) Dimensions: Approx. 61 mm (W) k32 mm (H) k91 mm (D) Mass: Approx. 110 g Mass and dimensions are approximate values. Specifications may change without prior notice. Maximum number of still pictures recordable on an SD Memory Card (optional) 16:9/PRO-CINEMA mode: PICTURE - Panasonic NV-GS500 | Operating Instructions - Page 70
70 VQT0T47 - Panasonic NV-GS500 | Operating Instructions - Page 71
71 VQT0T47 - Panasonic NV-GS500 | Operating Instructions - Page 72
A VQT0T47 F0106Nw0 ( 1000 A ) C Matsushita Electric Industrial Co., Ltd. Web site: http://www.panasonic.co.jp/global/
-
 1
1 -
 2
2 -
 3
3 -
 4
4 -
 5
5 -
 6
6 -
 7
7 -
8
-
9
-
10
-
11
-
12
-
13
-
14
-
15
-
16
-
17
-
18
-
19
-
20
-
21
-
22
-
23
-
24
-
25
-
26
-
27
-
28
-
29
-
30
-
31
-
32
-
33
-
34
-
35
-
36
-
37
-
38
-
39
-
40
-
41
-
42
-
43
-
44
-
45
-
46
-
47
-
48
-
49
-
50
-
51
-
52
-
53
-
54
-
55
-
56
-
57
-
58
-
59
-
60
-
61
-
62
-
63
-
64
-
65
-
66
-
67
-
68
-
69
-
70
-
71
-
72
 |
 |

GN
Before use, please read these instructions completely.
VQT0T47
Operating Instructions
Digital Video Camera
Model No.
NV-GS500