Panasonic NV-GS500 Operating Instructions - Page 12
Using the LCD monitor, Using the viewfinder
 |
View all Panasonic NV-GS500 manuals
Add to My Manuals
Save this manual to your list of manuals |
Page 12 highlights
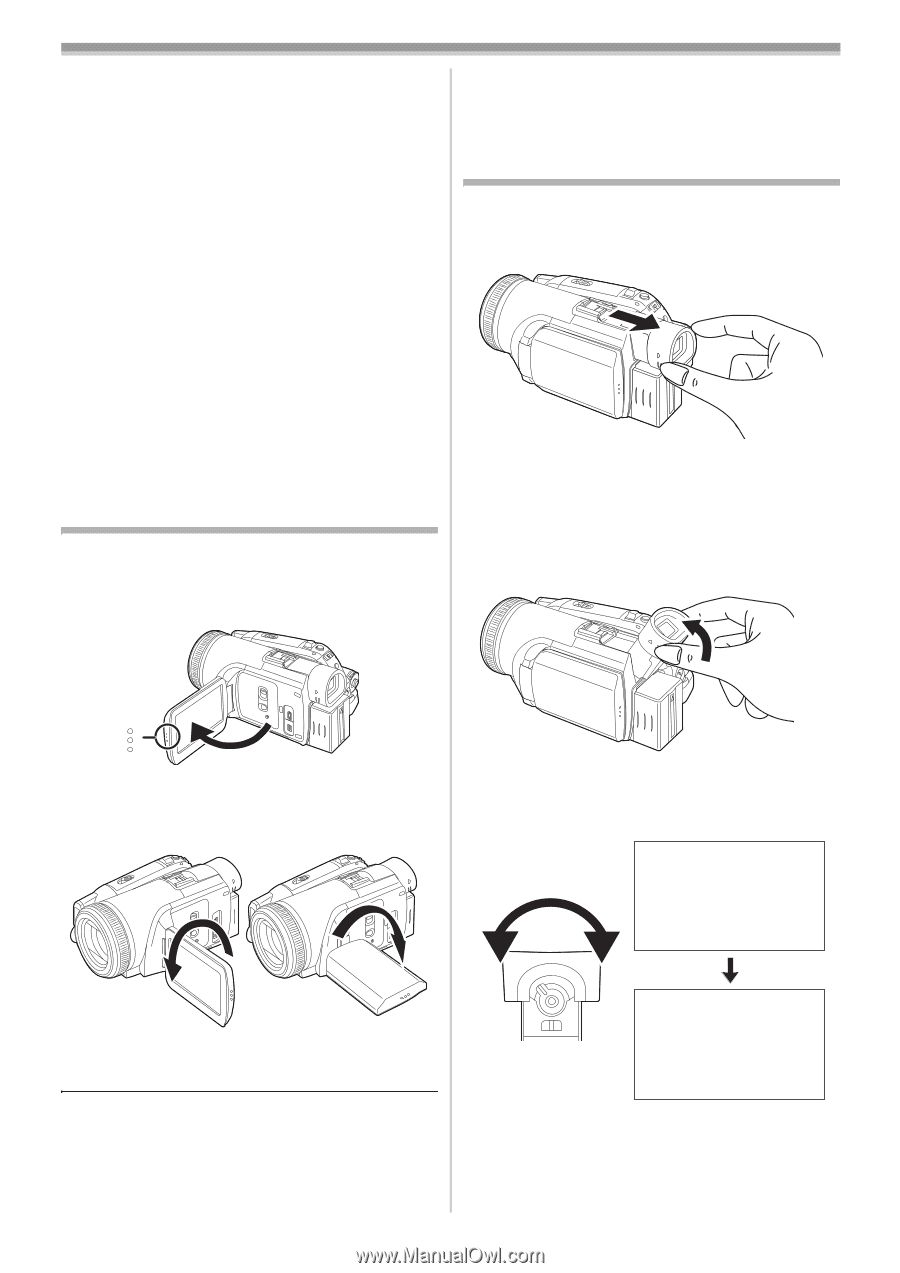
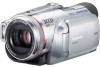
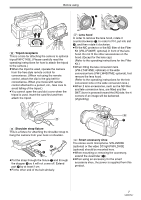
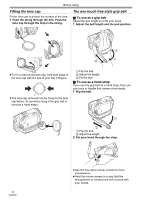
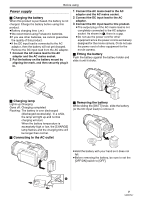
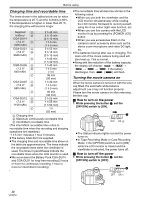
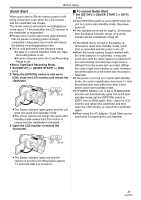
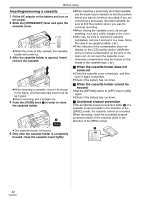
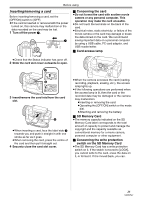
Before using ª Recharging the built-in lithium battery ≥If [0] or [--] appears when the camera is turning on, then the built-in lithium battery has run down. Use the steps below to charge the battery. When turn on the power for the first time after charging, [SET DATE AND TIME] will appear. Select [YES] and set the date and time. Connect the AC adaptor to the camera or attach the battery to the camera, and the built-in lithium battery will be recharged. Leave the camera as is for approx. 24 hours, and the battery will drive the date and time for approx. 6 months. (Even if the [OFF/ON] switch is set to [OFF], the battery is still being recharged.) WARNING THE LITHIUM BATTERY IN THIS UNIT MUST ONLY BE REPLACED BY QUALIFIED PERSONNEL. IF THIS IS NECESSARY, CONTACT THE PANASONIC CUSTOMER CARE CENTRE ON 132600 FOR YOUR NEAREST AUTHORIZED SERVICE CENTRE. Using the LCD monitor You can record the image while viewing it on the opened LCD monitor. 1 Place your finger on OPEN and pull the LCD monitor out in the direction of the arrow. ≥If the LCD monitor is rotated by 180o towards the lens and the viewfinder is extended (when recording yourself), the LCD monitor and the viewfinder simultaneously light. Using the viewfinder ª Extending the viewfinder 1 Pull out the viewfinder and extend it by pinching the extension knob. ≥The viewfinder will be activated. (If the LCD monitor is opened, the viewfinder will be deactivated.) ª Lifting up the viewfinder 1 Lift it up by pinching the viewfinder extension knob. OPEN ≥It can open up to 90o. 2 Adjust the angle of the LCD monitor as you prefer. ª Adjusting the field of view 1 Adjust the focus by sliding the eyepiece corrector knob. 1122::3300::4455 11.. 44..22000066 1 180o 2 90o ≥It can rotate up to 180o 1 towards the lens or 90o 2 towards the viewfinder. ≥The brightness and colour level of the LCD monitor can be adjusted from the menu. ≥If it is forcibly opened or rotated, the camera may be damaged or fail. 12:30:45 1. 4. 2006 ≥You can adjust the brightness of the viewfinder from the menu. 12 VQT0T47
-
 1
1 -
2
-
3
-
4
-
5
-
6
-
 7
7 -
 8
8 -
 9
9 -
 10
10 -
 11
11 -
 12
12 -
 13
13 -
 14
14 -
 15
15 -
 16
16 -
 17
17 -
18
-
19
-
20
-
21
-
22
-
23
-
24
-
25
-
26
-
27
-
28
-
29
-
30
-
31
-
32
-
33
-
34
-
35
-
36
-
37
-
38
-
39
-
40
-
41
-
42
-
43
-
44
-
45
-
46
-
47
-
48
-
49
-
50
-
51
-
52
-
53
-
54
-
55
-
56
-
57
-
58
-
59
-
60
-
61
-
62
-
63
-
64
-
65
-
66
-
67
-
68
-
69
-
70
-
71
-
72
 |
 |