Panasonic PT AX100U Hd Home Cinema Projector - Page 32
ASPECT, Aspect ratio options and projection example
 |
UPC - 791871111383
View all Panasonic PT AX100U manuals
Add to My Manuals
Save this manual to your list of manuals |
Page 32 highlights
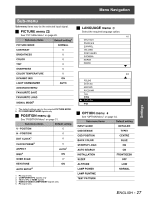
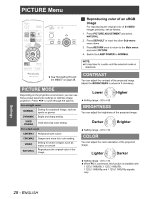
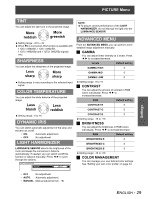
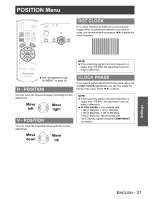
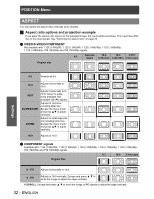
POSITION Menu ASPECT You can switch the aspect ratio manually when needed. J Aspect ratio options and projection example If you apply the aspect ratio options to the projected image, the result will be as follows. The result may differ due to the input signals. See "Switching the aspect ratio" on page 23. Q VIDEO/S-VIDEO/COMPONENT Not available with 1 125 (1 080)/50i, 1 125 (1 080)/60i, 1 125 (1 080)/50p, 1 125 (1 080)/60p, 1 125 (1 080)/24p, 750 (720)/50p and 750 (720)/60p signals. 4:3 Squeeze 16:9 14:9 2.35:1 signal Letter box Letter Box Cinescope Original size Settings 4:3 Projects at 4:3. 16:9 Adjusts horizontally to 16:9. JUST ZOOM/ZOOM1 ZOOM2 Adjusts horizontally to fit 16:9. Closer to edge, more enlarged. Not available with PC signals. Adjusts to 16:9 size including letter box. Escape the menu mode and press FG to adjust vertically. Adjusts to cinescope size not including letter box. Escape the menu mode and press FG to adjust vertically. 14:9 Adjusts to 14:9. Q COMPONENT signals Available with 1 125 (1 080)/50i, 1 125 (1 080)/60i, 1 125 (1 080)/50p, 1 125 (1 080)/60p, 1 125 (1 080)/24p, 750 (720)/50p and 750 (720)/60p signals 4:3 16:9 Cinescope Original Size H - FIT Adjusts horizontally to 16:9. V - FIT Adjusts to 16:9 vertically. Escape and press F G to scroll the image to adjust the edge vertically. V SCROLL: Escape and press F G to scroll the image of PC signals to adjust the edge vertically. 32 - ENGLISH
-
 1
1 -
2
-
3
-
4
-
5
-
6
-
7
-
8
-
9
-
10
-
11
-
12
-
13
-
14
-
15
-
16
-
17
-
18
-
19
-
20
-
21
-
22
-
23
-
24
-
25
-
26
-
 27
27 -
 28
28 -
 29
29 -
 30
30 -
 31
31 -
 32
32 -
 33
33 -
 34
34 -
 35
35 -
 36
36 -
 37
37 -
38
-
39
-
40
-
41
-
42
-
43
-
44
-
45
-
46
-
47
-
48
-
49
-
50
-
51
-
52
 |
 |
