Pantech Pocket English - Manual - Page 14
Gripping the phone, Activating the phone - accessories
 |
View all Pantech Pocket manuals
Add to My Manuals
Save this manual to your list of manuals |
Page 14 highlights
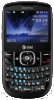
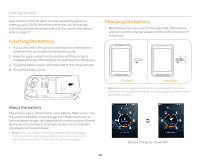
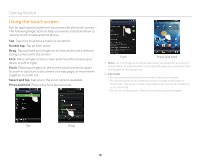
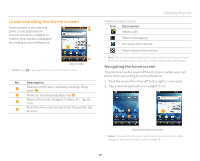
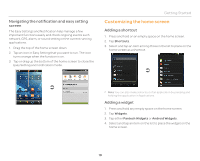
Getting Started Gripping the phone Hold the phone in the right position for a call as indicated below: Correct Incorrect xx Make sure not to block the internal antenna embedded in the phone. Check the location of the antenna on the illustration on page 13. xx Metal accessories can affect the quality of calls. Note If you place your hand over the area where the internal antenna is installed during a call or transmission/reception of data, the signals may be poor and the battery life may drain very fast Activating the phone Go through the following steps when you turn on the phone for the first time. Learning how to use the phone 1. Press and hold the LOCK/PWR key to turn on the phone. 2. Tap the android. 3. Select and tap a language for the phone and tap Next. 4. Tap either Mobile network or Wi-Fi or Wi-Fi only, for Internet connection and tap Next. 5. Tap Connect to Wi-Fi network > Next if you want to establish a connection to the Wi-Fi network. Or tap Next if you want to connect to the network later. 6. Select and tap an available Wi-Fi network if you have tapped Connect to Wi-Fi network > Next in step 2. Follow the necessary steps to connect to the Wi-Fi network. For more information, refer to page 94. 7. Check the mobile network or Wi-Fi network and tap Next. 8. Tap See location in applications (such as Maps) using wireless networks to Use Google location, tap Agree for Location consent, and tap Next. 9. Tap Google account if you want to set up a Google account and follow the necessary steps, or just tap Next. For more information on creating a Google account, refer to the next section. 10. Check how to unlock screen and tap Next in the middle of the screen. 11. Check how to view new events in the notification bar and tap Next. 12. Tap Sync now for Address Book sync. You should insert a SIM/USIM card in the phone. Tap Skip if you want to sync later and tap OK. Note You can do all of these steps later by tapping Tutorial. 14
-
 1
1 -
2
-
3
-
4
-
5
-
6
-
7
-
8
-
 9
9 -
 10
10 -
 11
11 -
 12
12 -
 13
13 -
 14
14 -
 15
15 -
 16
16 -
 17
17 -
 18
18 -
 19
19 -
20
-
21
-
22
-
23
-
24
-
25
-
26
-
27
-
28
-
29
-
30
-
31
-
32
-
33
-
34
-
35
-
36
-
37
-
38
-
39
-
40
-
41
-
42
-
43
-
44
-
45
-
46
-
47
-
48
-
49
-
50
-
51
-
52
-
53
-
54
-
55
-
56
-
57
-
58
-
59
-
60
-
61
-
62
-
63
-
64
-
65
-
66
-
67
-
68
-
69
-
70
-
71
-
72
-
73
-
74
-
75
-
76
-
77
-
78
-
79
-
80
-
81
-
82
-
83
-
84
-
85
-
86
-
87
-
88
-
89
-
90
-
91
-
92
-
93
-
94
-
95
-
96
-
97
-
98
-
99
-
100
-
101
-
102
-
103
-
104
-
105
-
106
-
107
-
108
-
109
-
110
 |
 |
