Pfaff creative sensation Owner's Manual - Page 101
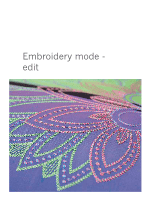
Embroidery Mode - Preparations
 |
View all Pfaff creative sensation manuals
Add to My Manuals
Save this manual to your list of manuals |
Page 101 highlights
6. Thread the machine with the Àrst color in the color list (C). C Embroidery Mode - Preparations 7. Clear sufÀcient space to accommodate D movement of the embroidery arm and the hoop. Hold the needle thread and touch the start/stop button (D) or the foot control. The machine starts embroidering. Note: This machine features the automatic function Cut jump stitches. When activated the machine trims the top jump stitch threads and pulls the thread ends to the underside of the fabric. The default setting is on. To turn it off, go to the Settings menu, Machine settings and deselect Cut jump stitches. Read more about Cut jump stitches in chapter 3. 8. If Cut jump stitches is not activated the machine will stop after stitching a few stitches. A popup appears on the screen asking you to cut the thread end. Cut the thread and press start/stop to continue embroidering. 7:7
-
 1
1 -
2
-
3
-
4
-
5
-
6
-
7
-
8
-
9
-
10
-
11
-
12
-
13
-
14
-
15
-
16
-
17
-
18
-
19
-
20
-
21
-
22
-
23
-
24
-
25
-
26
-
27
-
28
-
29
-
30
-
31
-
32
-
33
-
34
-
35
-
36
-
37
-
38
-
39
-
40
-
41
-
42
-
43
-
44
-
45
-
46
-
47
-
48
-
49
-
50
-
51
-
52
-
53
-
54
-
55
-
56
-
57
-
58
-
59
-
60
-
61
-
62
-
63
-
64
-
65
-
66
-
67
-
68
-
69
-
70
-
71
-
72
-
73
-
74
-
75
-
76
-
77
-
78
-
79
-
80
-
81
-
82
-
83
-
84
-
85
-
86
-
87
-
88
-
89
-
90
-
91
-
92
-
93
-
94
-
95
-
 96
96 -
 97
97 -
 98
98 -
 99
99 -
 100
100 -
 101
101 -
 102
102 -
 103
103 -
 104
104 -
 105
105 -
 106
106 -
107
-
108
-
109
-
110
-
111
-
112
-
113
-
114
-
115
-
116
-
117
-
118
-
119
-
120
-
121
-
122
-
123
-
124
-
125
-
126
-
127
-
128
-
129
-
130
-
131
-
132
-
133
-
134
-
135
-
136
-
137
-
138
-
139
-
140
-
141
-
142
-
143
-
144
-
145
-
146
-
147
-
148
-
149
-
150
-
151
-
152
-
153
-
154
-
155
-
156
-
157
-
158
-
159
-
160
-
161
-
162
-
163
-
164
 |
 |
