Pioneer AVHP6000DVD Owner's Manual - Page 109
Adjusting the response, positions of the touch panels, Touch Panel Calibration, Displaying the AVG-
 |
UPC - 012562890685
View all Pioneer AVHP6000DVD manuals
Add to My Manuals
Save this manual to your list of manuals |
Page 109 highlights
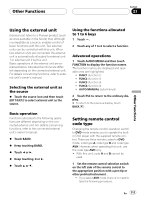
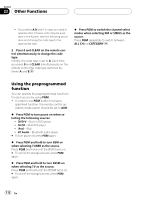
Other Functions Section 23 Other Functions Adjusting the response positions of the touch panels (Touch Panel Calibration) If you feel that the touch panel keys on the screen deviate from the actual positions that respond to your touch, adjust the response positions of the touch panel. There are two adjustment methods: 4-point adjustment, in which you touch four corners of the screen; and 16-point adjustment, in which you make fine-adjustments on the entire screen. ! Make sure to use the supplied pen for ad- justment, and gently touch the screen. If you press the touch panel forcefully, the touch panel may be damaged. Do not use a sharp pointed tool such as ballpoint pen or a mechanical pen. Otherwise the screen is damaged. 1 Touch the source icon and then touch OFF to turn this unit off. # When the source icon is not displayed, you can display it by touching the screen. 2 Press and hold BAND. The 4-point touch panel adjustment screen appears. 3 Touch each of the arrows on the four corners of the screen with the touch panel adjustment pen. Arrows you touch turn red. # If the arrows are not turned red, the 4-point adjustment cannot be complete. Touch each arrow for adjustment and complete, or cancel the adjustment to return to the OFF display. # To cancel the adjustment, press V.ADJ. 4 Press BAND to complete the 4-point adjustment. The adjusted position data is saved. ! Do not turn off the engine while saving the adjusted position data. 5 Press BAND to proceed to the 16-point adjustment. The 16-point touch panel adjustment screen appears. # To cancel the adjustment, press V.ADJ. 6 Gently touch the center of the + mark displayed on the screen with the touch panel adjustment pen. After you touch all the marks, the adjusted position data is saved. ! Do not turn off the engine while saving the adjusted position data. 7 To complete the adjustment, press V.ADJ. # To restart the 16-point adjustment, press BAND. Note If touch panel adjustment cannot be performed properly, consult your local Pioneer dealer. Displaying the AVG-VDP1 (Pioneer Vehicle Dynamics Processor) This unit can be used as the display unit for the AVG-VDP1 (sold separately) product. ! You can operate this function only when a Pioneer Vehicle Dynamics Processor (AVGVDP1) is connected to this unit. % Press V.ADJ to switch the display to the AVG-VDP1. # To return to the video of sources, press V.ADJ again. En 109
-
 1
1 -
2
-
3
-
4
-
5
-
6
-
7
-
8
-
9
-
10
-
11
-
12
-
13
-
14
-
15
-
16
-
17
-
18
-
19
-
20
-
21
-
22
-
23
-
24
-
25
-
26
-
27
-
28
-
29
-
30
-
31
-
32
-
33
-
34
-
35
-
36
-
37
-
38
-
39
-
40
-
41
-
42
-
43
-
44
-
45
-
46
-
47
-
48
-
49
-
50
-
51
-
52
-
53
-
54
-
55
-
56
-
57
-
58
-
59
-
60
-
61
-
62
-
63
-
64
-
65
-
66
-
67
-
68
-
69
-
70
-
71
-
72
-
73
-
74
-
75
-
76
-
77
-
78
-
79
-
80
-
81
-
82
-
83
-
84
-
85
-
86
-
87
-
88
-
89
-
90
-
91
-
92
-
93
-
94
-
95
-
96
-
97
-
98
-
99
-
100
-
101
-
102
-
103
-
 104
104 -
 105
105 -
 106
106 -
 107
107 -
 108
108 -
 109
109 -
 110
110 -
 111
111 -
 112
112 -
 113
113 -
 114
114 -
115
-
116
-
117
-
118
-
119
-
120
-
121
-
122
-
123
-
124
-
125
-
126
-
127
-
128
-
129
 |
 |
