Pioneer AVHP6000DVD Owner's Manual - Page 110
Using the AUX source, Other Functions - installation manual
 |
UPC - 012562890685
View all Pioneer AVHP6000DVD manuals
Add to My Manuals
Save this manual to your list of manuals |
Page 110 highlights
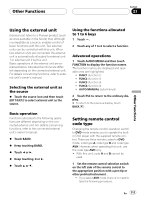
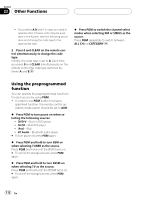
Section 23 Other Functions Using the AUX source A separately sold auxiliary device such as VCR or portable device can be connected to this unit. When connected, auxiliary device is automatically recognized as AUX source and assigned to AUX. About AUX connection method You have two methods to connect auxiliary device to this unit. Stereo mini pin plug cable (AUX1) When connecting auxiliary device using a stereo mini plug cable % Insert the stereo mini plug into the AUX input jack on this unit. For more details, refer to the installation manual. IP-BUS-RCA interconnector (AUX2) When connecting auxiliary device using an IPBUS-RCA Interconnector (sold separately) % Use an IP-BUS-RCA Interconnector such as the CD-RB20/CD-RB10 (sold separetely) to connect this unit to auxiliary device featuring RCA output. For more details, refer to the IP-BUS-RCA Interconnector owner's manual. # You can only make this type of connection if the auxiliary device has RCA outputs. Selecting AUX as the source % Touch the source icon and then touch AUX to select AUX as the source. # When the source icon is not displayed, you can display it by touching the screen. # If the auxiliary setting is not turned on, AUX cannot be selected. For more details, see Switching the auxiliary setting on page 103. Setting the AUX title The title displayed for the AUX source can be changed. 1 After you have selected AUX as the source, press A.MENU button and touch FUNCTION and then touch EDIT. 2 Touch ABC to select the desired character type. Touch ABC repeatedly to switch between the following character types: Alphabet (upper case), numbers and symbols -alphabet (lower case)-European letters, such as those with accents (e.g You can select to input numbers and symbols by touching 123. 3 Touch a or b to select a letter of the alphabet. Each time you touch a it will display alphabet, numbers or symbols in ascending order (A B C ...). Each time you touch b it will display a letter in descending order. 4 Touch d to move the cursor to the next character position. When the desired letter is displayed, touch d to move the cursor to the next position and then select the next letter. Touch c to move backwards in the display. 5 Touch OK to store the entered title in memory. 6 Touch ESC to return to the playback display. 110 En
-
 1
1 -
2
-
3
-
4
-
5
-
6
-
7
-
8
-
9
-
10
-
11
-
12
-
13
-
14
-
15
-
16
-
17
-
18
-
19
-
20
-
21
-
22
-
23
-
24
-
25
-
26
-
27
-
28
-
29
-
30
-
31
-
32
-
33
-
34
-
35
-
36
-
37
-
38
-
39
-
40
-
41
-
42
-
43
-
44
-
45
-
46
-
47
-
48
-
49
-
50
-
51
-
52
-
53
-
54
-
55
-
56
-
57
-
58
-
59
-
60
-
61
-
62
-
63
-
64
-
65
-
66
-
67
-
68
-
69
-
70
-
71
-
72
-
73
-
74
-
75
-
76
-
77
-
78
-
79
-
80
-
81
-
82
-
83
-
84
-
85
-
86
-
87
-
88
-
89
-
90
-
91
-
92
-
93
-
94
-
95
-
96
-
97
-
98
-
99
-
100
-
101
-
102
-
103
-
104
-
 105
105 -
 106
106 -
 107
107 -
 108
108 -
 109
109 -
 110
110 -
 111
111 -
 112
112 -
 113
113 -
 114
114 -
 115
115 -
116
-
117
-
118
-
119
-
120
-
121
-
122
-
123
-
124
-
125
-
126
-
127
-
128
-
129
 |
 |
