Pioneer AVHP6000DVD Owner's Manual - Page 23
Adjusting the flap angle, Adjusting the volume, Turning the unit off, Basic Operations
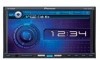 |
UPC - 012562890685
View all Pioneer AVHP6000DVD manuals
Add to My Manuals
Save this manual to your list of manuals |
Page 23 highlights
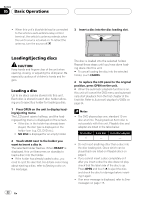
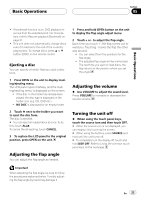
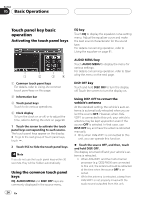
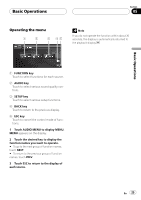
Basic Operations Section 05 Basic Operations ! If bookmark function is on, DVD playback resumes from the selected point. For more details, refer to Resume playback (Bookmark) on page 31. ! This unit does not automatically change discs even if it reaches to the end of the currently playing disc. To change discs, press a or b button (DISC) on the remote control. Ejecting a disc You can specify a holder that you eject a disc from. 1 Press OPEN on the unit to display loading/ejecting menu. The LCD panel opens halfway, and the loading/ejecting menu is displayed on the screen. ! If the disc in the holder has already been played, the disc type is displayed on the holder icon (e.g. CD, DVD etc.). ! NO DISC is displayed for an empty holder. 2 Touch h next to the holder you want to eject the disc from. The disc is ejected. # You can eject all loaded discs at once. To do this, touch ALLh. To cancel the all ejecting, touch CANCEL. 3 To replace the LCD panel to the original position, press OPEN on the unit. Adjusting the flap angle You can adjust the flap angle as needed. 1 Press and hold OPEN button on the unit to display the flap angle adjust menu. 2 Touch + or - to adjust the flap angle. Each time you touch +, the flap comes out toward you. Touching - moves the flap the other way around. ! You can select from five positions for the flap angle. ! The adjusted flap angle will be memorized. The next time you eject or load discs, the flap returns to the position where you set the angle. Adjusting the volume % Use VOLUME to adjust the sound level. Press VOLUME to increase or decrease the source volume. Turning the unit off % When using the touch panel keys, touch the source icon and then touch OFF. # When the source icon is not displayed, you can display it by touching the screen. # When using the buttons, press SOURCE and hold until the unit turns off. # To completely turn the display off, touch and hold DISP. OFF. Refer to Using the common touch panel keys on the next page. Important When adjusting the flap angle, be sure to follow the procedures explained below. Forcibly adjusting the flap angle by hand may damage it. En 23
-
 1
1 -
2
-
3
-
4
-
5
-
6
-
7
-
8
-
9
-
10
-
11
-
12
-
13
-
14
-
15
-
16
-
17
-
 18
18 -
 19
19 -
 20
20 -
 21
21 -
 22
22 -
 23
23 -
 24
24 -
 25
25 -
 26
26 -
 27
27 -
 28
28 -
29
-
30
-
31
-
32
-
33
-
34
-
35
-
36
-
37
-
38
-
39
-
40
-
41
-
42
-
43
-
44
-
45
-
46
-
47
-
48
-
49
-
50
-
51
-
52
-
53
-
54
-
55
-
56
-
57
-
58
-
59
-
60
-
61
-
62
-
63
-
64
-
65
-
66
-
67
-
68
-
69
-
70
-
71
-
72
-
73
-
74
-
75
-
76
-
77
-
78
-
79
-
80
-
81
-
82
-
83
-
84
-
85
-
86
-
87
-
88
-
89
-
90
-
91
-
92
-
93
-
94
-
95
-
96
-
97
-
98
-
99
-
100
-
101
-
102
-
103
-
104
-
105
-
106
-
107
-
108
-
109
-
110
-
111
-
112
-
113
-
114
-
115
-
116
-
117
-
118
-
119
-
120
-
121
-
122
-
123
-
124
-
125
-
126
-
127
-
128
-
129
 |
 |
