Pioneer AVHP6000DVD Owner's Manual - Page 94
Using the auto-equalizer, Auto TA and EQ auto-time, alignment and auto, equalizing, Digital Signal
 |
UPC - 012562890685
View all Pioneer AVHP6000DVD manuals
Add to My Manuals
Save this manual to your list of manuals |
Page 94 highlights
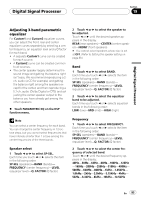
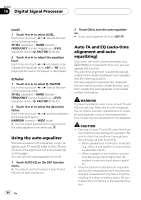
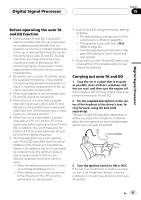
Section 19 Digital Signal Processor Level 1 Touch c or d to select LEVEL. Each time you touch c or d selects the item in the following order: SP-SEL (speakers)-BAND (bands)- FREQUENCY (center frequency)-LEVEL (equalizer level)-Q. FACTOR (Q factor) 2 Touch c or d to adjust the equalizer level. Each time you touch c or d increases or decreases the equalizer level. +06 to -06 is displayed as the level is increased or decreased. Q factor 1 Touch c or d to select Q. FACTOR. Each time you touch c or d selects the item in the following order: SP-SEL (speakers)-BAND (bands)- FREQUENCY (center frequency)-LEVEL (equalizer level)-Q. FACTOR (Q factor) 2 Touch c or d to select the desired Q factor. Each time you touch c or d switches between the following Q factor: NARROW (narrow)-WIDE (wide) # You can adjust parameters for each band of the other speakers in the same way. Using the auto-equalizer The auto-equalizer is the equalizer curve created by auto TA and EQ (refer to Auto TA and EQ (auto-time alignment and auto-equalizing) on this page). You can turn the auto-equalizer on or off. 1 Touch AUTO EQ on the DSP function menu. # You cannot use this function if auto TA and EQ has not been carried out. 2 Touch ON to turn the auto-equalizer on. # To turn auto-equalizer off, touch OFF. Auto TA and EQ (auto-time alignment and autoequalizing) Only when the multi-channel processor (e.g., DEQ-P8000) is connected to this unit, you can operate this function. The auto-time alignment is automatically adjusted for the distance between each speaker and the listening position. The auto-equalizer automatically measures the car interior acoustic characteristics, and then creates the auto-equalizer curve based on that information. WARNING To prevent accidents, never carry out auto TA and EQ while driving. When this function measures the car interior acoustic characteristics to create an auto-equalizer curve, a loud measurement tone (noise) may be outputted from the speakers. CAUTION ! Carrying out auto TA and EQ under the follow- ing conditions may damage the speakers. Be sure to check the conditions thoroughly before carrying out auto TA and EQ. - When speakers are incorrectly connected. (e.g., When a rear speaker is connected to a subwoofer output.) - When a speaker is connected to a power amp delivering output higher than the speaker's maximum input power capability. ! If the microphone is placed in an unsuitable position the measurement tone may become loud and measurement may take a long time, resulting in a drain on battery power. Be sure to place the microphone in the specified location. 94 En
-
 1
1 -
2
-
3
-
4
-
5
-
6
-
7
-
8
-
9
-
10
-
11
-
12
-
13
-
14
-
15
-
16
-
17
-
18
-
19
-
20
-
21
-
22
-
23
-
24
-
25
-
26
-
27
-
28
-
29
-
30
-
31
-
32
-
33
-
34
-
35
-
36
-
37
-
38
-
39
-
40
-
41
-
42
-
43
-
44
-
45
-
46
-
47
-
48
-
49
-
50
-
51
-
52
-
53
-
54
-
55
-
56
-
57
-
58
-
59
-
60
-
61
-
62
-
63
-
64
-
65
-
66
-
67
-
68
-
69
-
70
-
71
-
72
-
73
-
74
-
75
-
76
-
77
-
78
-
79
-
80
-
81
-
82
-
83
-
84
-
85
-
86
-
87
-
88
-
 89
89 -
 90
90 -
 91
91 -
 92
92 -
 93
93 -
 94
94 -
 95
95 -
 96
96 -
 97
97 -
 98
98 -
 99
99 -
100
-
101
-
102
-
103
-
104
-
105
-
106
-
107
-
108
-
109
-
110
-
111
-
112
-
113
-
114
-
115
-
116
-
117
-
118
-
119
-
120
-
121
-
122
-
123
-
124
-
125
-
126
-
127
-
128
-
129
 |
 |
