Pioneer VSX-520-K Owner's Manual
Pioneer VSX-520-K Manual
 |
UPC - 884938108843
View all Pioneer VSX-520-K manuals
Add to My Manuals
Save this manual to your list of manuals |
Pioneer VSX-520-K manual content summary:
- Pioneer VSX-520-K | Owner's Manual - Page 1
AUDIO/VIDEO MULTI-CHANNEL RECEIVER RECEPTEUR AUDIOVISUEL A VOIES MULTIPLES RECEPTOR MULTICANAL DE AUDIO/VÍDEO VSX-520 Register your product on http://www.pioneerelectronics.com (US) http://www.pioneerelectronics.ca (Canada) • Protect your new investment The details of your purchase will be on file - Pioneer VSX-520-K | Owner's Manual - Page 2
, including interference that may cause undesired operation. Product Name: AUDIO/VIDEO MULTI-CHANNEL RECEIVER Model Number: VSX-520 Responsible Party Name: PIONEER ELECTRONICS (USA) INC. SERVICE SUPPORT DIVISION Address: 1925 E. DOMINGUEZ ST. LONG BEACH, CA 90810-1003, U.S.A. Phone: 1-800-421 - Pioneer VSX-520-K | Owner's Manual - Page 3
COVER (OR BACK). NO USER-SERVICEABLE PARTS INSIDE. REFER SERVICING TO QUALIFIED SERVICE PERSONNEL. The exclamation point within an equilateral triangle is intended to alert the user to the presence of important operating and maintenance (servicing) instructions in the literature accompanying the - Pioneer VSX-520-K | Owner's Manual - Page 4
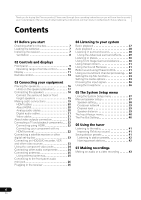
Thank you for buying this Pioneer product. Please read through these operating instructions so you will know how to operate your model properly. After you have finished reading the instructions, put them away in a safe place for future reference. Contents 01 Before you start Checking what's in the - Pioneer VSX-520-K | Owner's Manual - Page 5
Troubleshooting 47 HDMI 50 Important information regarding the HDMI connection 51 Resetting the main unit 51 Specifications and the Symbol are registered trademarks, & DTS-HD, DTS-HD Master Audio, and the DTS logos are trademarks of DTS, Inc. Product includes software. © DTS, Inc. All - Pioneer VSX-520-K | Owner's Manual - Page 6
modes • Using the Sound Retriever (page 31) • Better sound using Phase Control (page 31) • Using surround back channel processing (page 32) • Setting the Up Mix function (page 33) • Setting the Audio options (page 33) • Choosing the input signal (page 36) • Manual speaker setup (page 37) 6 En - Pioneer VSX-520-K | Owner's Manual - Page 7
received the following supplied accessories: • Remote control • AAA size IEC R03 dry cell batteries (to confirm system operation) x2 • AM loop antenna • FM wire antenna • These operating instructions use new and old magnetic field). This may interfere with the sound. - in direct sunlight - in damp - Pioneer VSX-520-K | Owner's Manual - Page 8
space is provided between the unit and walls or other equipment, heat will build up inside, interfering with performance and/or causing malfunctions. Receiver 40 cm (16 inches) Slot and openings in the cabinet are provided for ventilation and to protect the equipment from overheating. To prevent - Pioneer VSX-520-K | Owner's Manual - Page 9
7 AUDIO/ VIDEO MULTI- CHANNEL RECEIVER VSX-520 TUNE TUNER EDIT PRESET ENTER MASTER VOLUME PHONES AUTO/DIRECT LISTENING MODE STEREO/ALC STANDARD ADV SURROUND SOUND RETRIEVER PORTABLE 8 9 10 11 1 STANDBY/ON 2 INPUT SELECTOR dial Selects an input source. 3 Remote sensor Receives the - Pioneer VSX-520-K | Owner's Manual - Page 10
quality sound to compressed audio sources (page 31). 11 PORTABLE audio input jack Connect an auxiliary component using a stereo mini-jack cable (page 26). Operating range of remote control The remote control may not work properly if: • There are obstacles between the remote control and the receiver - Pioneer VSX-520-K | Owner's Manual - Page 11
is detected. ES Lights to indicate DTS-ES decoding. 96/24 Lights when a source with DTS 96/24 encoded audio signals is detected. NEO:6 When one of the NEO:6 modes of the receiver is on, this lights to indicate NEO:6 processing (page 28). 11 Dolby Digital indicators 2D Lights when a Dolby Digital - Pioneer VSX-520-K | Owner's Manual - Page 12
when a source with Dolby TrueHD encoded audio signals is detected. EX Lights to indicate Dolby Digital EX decoding. 2PLll(x) Lights to indicate 2 Pro Logic II / 2 Pro Logic IIx decoding. Light will go off during 2 Pro Logic IIz decoding. (see Listening in surround sound on page 28 for more on this - Pioneer VSX-520-K | Owner's Manual - Page 13
pressing SLEEP once. 2 RECEIVER Switches the receiver between standby and on. 3 RECEIVER Switches the remote to control the receiver (used to select the white commands above the number buttons (TEST TONE, etc)). Also use this button to set up surround sound (page 37) or Audio parameters (page 33 - Pioneer VSX-520-K | Owner's Manual - Page 14
RECEIVER first to access: AUDIO PARAMETER Use to access the Audio options (page 33). SETUP Press to access the System Setup the arrow buttons when setting up your surround sound system (page 37). Also used to control be accessed after the RECEIVER button is pressed. (For example TEST TONE, etc.) HDD - Pioneer VSX-520-K | Owner's Manual - Page 15
TEST TONE again exits the test tone sound is output from the speakers connected to this receiver used with Pioneer flat panel sound volume, Pre Out setting or input name can be checked by selecting an input source.1 17 SHIFT Press to access the 'boxed' commands (above the buttons) on the remote - Pioneer VSX-520-K | Owner's Manual - Page 16
speaker (C), the left and right surround speakers (SL/SR), and the subwoofer (SW), a 5.1 ch surround system can be enjoyed. Further, speaker (SB) and enjoy a 6.1 ch surround system. To achieve the best possible surround sound, install your speakers as shown below. 5.1 channel surround system: 6.1 - Pioneer VSX-520-K | Owner's Manual - Page 17
effect on the quality of the sound. The following guidelines should help you to get the best sound from your system. • The subwoofer can be placed on the face each other. For DVD-Audio, the speakers should be more directly behind the listener than for home theater playback. • If the surround - Pioneer VSX-520-K | Owner's Manual - Page 18
setup is best for surround sound. Make sure you connect the speaker on the right to the right (R) terminal and the speaker on the left to the left (L) terminal. Also make sure the positive and negative (+/-) terminals on the receiver match those on the speakers. If you're not using a subwoofer - Pioneer VSX-520-K | Owner's Manual - Page 19
the power and disconnect the power cord from the AC outlet. • Before unplugging the power cord, switch the power into standby. ANALOG INPUT L R SUBWOOFER PRE OUT CD-R/TAPE DVR/VCR SURR BACK / FRONT BD HEIGHT ADAPTER (OUTPUT 5 V 1 L (Single) OUT R DVD PRE OUT CD CD-R/TAPE DVR/VCR - Pioneer VSX-520-K | Owner's Manual - Page 20
Audio (see below for limitations), Video CD/Super VCD and CD. This receiver incorporates High-Definition Multimedia Interface (HDMI™) technology. This receiver supports to hear HDMI audio output from your TV or flat panel TV (no sound will be heard from this receiver). • If the video signal does not - Pioneer VSX-520-K | Owner's Manual - Page 21
connection and are used to connect to the composite video terminals. The yellow plugs distinguish them from cables for audio. About video outputs connection This receiver is not loaded with a video converter. When you use component video cables or HDMI cables for connecting to the input device - Pioneer VSX-520-K | Owner's Manual - Page 22
connections of a TV and DVD player (or other playback component) with no HDMI terminal to the receiver. Select one DIGITAL AUDIO OUT ANALOG AUDIO OUT OPTICAL COAXIAL R L DVD player VIDEO OUT SUBWOOFER PRE OUT CD-R/TAPE DVR/VCR SURR BACK / FRONT BD HEIGHT L (Single) OUT R DVD PRE - Pioneer VSX-520-K | Owner's Manual - Page 23
FM OU UNBAL 75 IN (D AM LOOP COMPONENT VIDEO IN (B ASSIGNAB 1 1 2 OPTICAL R L DIGITAL AUDIO OUT ANALOG AUDIO OUT Select one VIDEO OUT Connecting an HDD/DVD recorder, VCR and other video sources This receiver has audio/video inputs and outputs suitable for connecting analog or digital - Pioneer VSX-520-K | Owner's Manual - Page 24
TV connected to this receiver's COMPONENT VIDEO OUT jacks. Connecting other audio components The number and kind of connections depends on the kind of component you're connecting.1 Follow the steps below to connect a CD-R, MD, DAT, tape recorder or other audio component.2 SUBWOOFER PRE OUT CD - Pioneer VSX-520-K | Owner's Manual - Page 25
wire antenna as shown below. To improve reception and sound quality, connect external antennas (see Using external antennas AM antenna terminal without disconnecting the supplied AM loop antenna. For the best possible reception, suspend horizontally outdoors. Outdoor antenna ANTENNA FM UNBAL 75 - Pioneer VSX-520-K | Owner's Manual - Page 26
remote control. Use a stereo mini-jack cable to connect a digital audio player, etc. MASTER VOLUME PORTABLE AUDIO OUT Digital audio player, etc. Plugging in the receiver , ask your nearest Pioneer authorized independent service company for a replacement. • The receiver should be disconnected by - Pioneer VSX-520-K | Owner's Manual - Page 27
. Basic playback Here are the basic instructions for playing a source (such as a DVD disc) with your home theater system. 1 Switch on your system components and receiver. Start by switching on the playback component (for example a DVD player), your TV1 and subwoofer (if you have one), then the - Pioneer VSX-520-K | Owner's Manual - Page 28
sound Using this receiver, you can listen to any source in surround sound. However, the options available will depend on your speaker setup further parameters you can adjust: C.WIDTH, DIMEN., and PNRM.. See Setting the Audio options on page 33 to adjust them. 4 When listening to 2-channel sources - Pioneer VSX-520-K | Owner's Manual - Page 29
suited to music sources3 • DOLBY PLIIx GAME - Up to 7.1 channel sound, especially suited to video games • NEO:6 CINEMA - Up to 6.1 channel sound, especially suited to movie sources • NEO:6 MUSIC - Up to 6.1 channel sound, especially suited to music sources4 • DOLBY PRO LOGIC - 4.1 channel surround - Pioneer VSX-520-K | Owner's Manual - Page 30
possibly your subwoofer depending on your speaker settings). Dolby Digital and DTS multichannel sources are downmixed to stereo. In the Auto level control stereo mode (ALC), this unit equalizes playback sound levels if each sound level varies with the music source recorded in a portable audio player - Pioneer VSX-520-K | Owner's Manual - Page 31
receiver can reproduce powerful bass sound without deteriorating the quality of the original sound (see illustration below). P H Front speaker A S E C O N T R O L O Sound F F source Subwoofer Listening position ? P Front speaker H A S E C O N T R O L Sound O N source Subwoofer - Pioneer VSX-520-K | Owner's Manual - Page 32
surround system, audio signals that sound image will be produced. • If your subwoofer has a phase control switch, set it to the plus (+) sign (or 0°). However, the effect you can actually feel when PHASE CONTROL is set to ON on this receiver depends on the type of your subwoofer. Set your subwoofer - Pioneer VSX-520-K | Owner's Manual - Page 33
on page 26. • Depending on the positions of the speakers and the sound source, in some cases it may not be possible to achieve good results. RECEIVER INPUT SELECT DTV/TV INPUT BD DVD TV CH ENTER HOME MENU SETUP TUNE BAND RETURN 1 Press RECEIVER on the remote control, then press AUDIO - Pioneer VSX-520-K | Owner's Manual - Page 34
sound quality often suffers from an uneven sound image. The Sound Retriever feature employs new DSP ON technology that helps bring CD quality sound back to compressed 2-channel audio by restoring sound the HDMI audio signal out of this receiver (amp) or through to a TV or flat panel TV. When THRU - Pioneer VSX-520-K | Owner's Manual - Page 35
TrueHD. e. You shouldn't have any problems using this with most SACD discs, but if the sound distorts, it is best to switch the gain setting back to 0 dB. f. This feature is only available when the connected display supports the automatic audio/video synchronizing capability ('lip-sync') for HDMI - Pioneer VSX-520-K | Owner's Manual - Page 36
to C1/O1/O2 (DIGITAL). • Some DVD players don't output DTS signals. For more details, refer to the instruction manual supplied with your DVD player. 2 When the HDMI option in Setting the Audio options on page 33 is set to THRU, the sound will be heard through your TV, not from this receiver. 36 En - Pioneer VSX-520-K | Owner's Manual - Page 37
individual speaker system settings. RECEIVER SLEEP TV SOURCE CONTROL AUDIO PARAMETER TOP MENU TUNE TUNER EDIT MASTER TOOLS VOLUME MENU PRESET RECEIVER INPUT SELECT DTV/TV INPUT BD DVD TV ENTER HOME MENU SETUP TUNE BAND RETURN 1 Press RECEIVER on the remote control, then press the - Pioneer VSX-520-K | Owner's Manual - Page 38
1 Select 'SP SET' from the SP SETUP menu. 2 Use / to choose the speaker subwoofer set to PLUS and YES or the front speakers set to LARGE and SMALL alternatively and let your ears judge which sounds best. If you're having problems, the easiest option is to route all the bass sounds to the subwoofer - Pioneer VSX-520-K | Owner's Manual - Page 39
will be sent to the subwoofer (or LARGE speakers). Channel level Using these settings, you can adjust the overall balance of your speaker system. 1 Select 'CH LEVEL' from the SP SETUP menu. 2 Use / to select a setup option. • T. TONE M - Move the test tone manually from speaker to speaker and - Pioneer VSX-520-K | Owner's Manual - Page 40
that function will automatically be switched off. • Make sure you have connected the audio from the component to the corresponding inputs on the rear of the receiver. • If you connect any source component to the receiver using a component video input, you should also have your TV connected to this - Pioneer VSX-520-K | Owner's Manual - Page 41
the effort of manually tuning in each time. This unit can memorize up to 30 stations.1 RECEIVER SLEEP TV SOURCE CONTROL RECEIVER INPUT SELECT BD DVD TV DTV/TV INPUT DVR CD CD-R CH AUDIO PARAMETER TOP MENU TUNE TUNER EDIT MASTER TOOLS VOLUME MENU ENTER HOME MENU SETUP TUNE BAND - Pioneer VSX-520-K | Owner's Manual - Page 42
ENTER. After pressing ENTER, the preset number stop blinking and the receiver stores the station. Listening to station presets You will need to have you want. • You can also use the number buttons on the remote control to recall the station preset. Naming preset stations For easier identification - Pioneer VSX-520-K | Owner's Manual - Page 43
if you are unsure how to do this. Most video recorders set the audio recording level automatically-check the component's instruction manual if you're unsure. 5 Start recording, then start playback of the source component. Note 1 If you are recording a video source, you need to use the same type of - Pioneer VSX-520-K | Owner's Manual - Page 44
technology. The AS-BT100 model supports SCMS-T contents protection, so music can also be enjoyed on devices equipped with SCMS-T type Bluetooth wireless technology. Music data This receiver Bluetooth® ADAPTER Remote control operation Remote control operation The remote control supplied with this - Pioneer VSX-520-K | Owner's Manual - Page 45
. SUBWOOFER PRE AUDIO IN BD IN ADAPTER PORT (OUTPUT 5 V 100 mA MAX) VIDEO DVR/VCR OUT IN MONITOR OUT DVD ANTENNA PR PB FM UNBAL 75 AM LOOP COMPONENT VID This receiver Bluetooth® ADAPTER 1 Switch the receiver receiver. 3 Press ADAPTER on the remote control to switch the receiver instructions - Pioneer VSX-520-K | Owner's Manual - Page 46
device with Your System 1 Press ADAPTER on the remote control to switch the receiver to ADAPTER input mode. 2 Connect the Bluetooth wireless any use of such marks by Pioneer Corporation is under license. Other trademarks and trade names are those of their respective owners. Note 1 PIN code may in - Pioneer VSX-520-K | Owner's Manual - Page 47
receiver to shut off automatically. • If the power shuts off automatically, take the unit to your nearest Pioneer authorized service center or your dealer for servicing. No sound input. • The video input selected on the TV monitor is incorrect. Refer to the instruction manual supplied with the TV - Pioneer VSX-520-K | Owner's Manual - Page 48
(or depending on the subwoofer, the setting where you think it has the best overall effect on the sound). • Make sure the speaker distance setting is correct for all speakers (see Speaker distance on page 39). Noise during playback of a • Move the cassette deck further from your receiver, until the - Pioneer VSX-520-K | Owner's Manual - Page 49
the wireless technology device electromagnetic waves. is not emitted or the sound • Check that the Bluetooth wireless technology device is not too far technology device. Reset the pairing. • Check that the profile is correct. Use a Bluetooth wireless technology device that supports A2DP profile - Pioneer VSX-520-K | Owner's Manual - Page 50
Symptom No picture or sound. No picture. No sound, or sound suddenly ceases. Remedy • If the problem still persists when connecting your HDMI component directly to your monitor, please consult the component or monitor manual or contact the manufacturer for support. • Video signals that are input - Pioneer VSX-520-K | Owner's Manual - Page 51
(digital is recommended) for sending audio to the receiver. See the operating instructions for more on audio connections. Set the display volume to minimum when using this configuration. Resetting the main unit Use this procedure to reset all the receiver's settings to the factory default - Pioneer VSX-520-K | Owner's Manual - Page 52
rule on Power Output Claims for Amplifiers ** Measured by Audio Spectrum Analyzer Audio Section Input (Sensitivity/Impedance) LINE 200 mV/47 kΩ Parts Remote control 1 Dry cell batteries (AAA size IEC R03 2 AM loop antenna 1 FM wire antenna 1 These operating instructions Note • Specifications and - Pioneer VSX-520-K | Owner's Manual - Page 53
ais Español Selecting fine audio equipment such as the the surface. We Want You Listening For A Lifetime Used wisely, your new sound equipment will provide a lifetime of fun and enjoyment. Since hearing damage Pioneer Corporation. Copyright © 2009 Pioneer Corporation. All rights reserved. 53 En - Pioneer VSX-520-K | Owner's Manual - Page 54
AVERTISSEMENT Cet appareil n'est pas étanche. Pour éviter les risques d'incendie et de décharge électrique, ne placez près de lui un récipient rempli d'eau, tel qu'un vase ou un pot de fleurs, et ne l'exposez pas à des gouttes d'eau, des éclaboussures, de la pluie ou de l'humidité. D3-4-2-1-3_A1_Fr - Pioneer VSX-520-K | Owner's Manual - Page 55
appropriée. Ce remplacement et la fixation d'une fiche secteur sur le cordon d'alimentation de cet appareil doivent être effectués par un personnel de service qualifié. En cas de branchement sur une prise secteur, la fiche de coupure peut provoquer une sérieuse décharge électrique. Assurez-vous qu - Pioneer VSX-520-K | Owner's Manual - Page 56
cet achat d'un produit Pioneer. Nous vous demandons de 30 Utilisation des modes Stream Direct 31 Utilisation de la fonction Sound Retriever . . . 31 Un son meilleur grâce à 32 Réglage de la fonction Up Mix 33 Réglage des options audio 33 Choix du signal d'entrée 36 Utilisation du casque d'écoute - Pioneer VSX-520-K | Owner's Manual - Page 57
Bluetooth avec votre système 46 09 Informations complémentaires Guide de dépannage 47 HDMI 50 Information importante concernant la symbole sont des marques déposées, et DTS-HD, DTS-HD Master Audio et les logos DTS sont des marques commerciales de DTS, Inc. Logiciel inclus dans ce produit. - Pioneer VSX-520-K | Owner's Manual - Page 58
récepteur AV à droite (FHR) *Avant-haut gauche (FHL) Subwoofer (SW) Avant droite (R) Avant gauche (L) Utilisation des divers modes d'écoute • Utilisation de la fonction Sound Retriever (page 31) • Un son meilleur grâce à des options audio (page 33) • Choix du signal d'entrée (page 36) • Réglage - Pioneer VSX-520-K | Owner's Manual - Page 59
Chapitre 1 : Avant de commencer English Français Español Vérification des accessoires livrés avec l'appareil Veuillez vérifier que les accessoires suivants sont livrés avec l'appareil : • Télécommande • Piles à anode sèche AAA IEC R03 (pour vérifier le bon fonctionnement du système) x 2 • Antenne - Pioneer VSX-520-K | Owner's Manual - Page 60
- à la poussière - à la fumée ou aux émanations graisseuses (cuisine par ex.) Ventilation En installant cet appareil, veuillez vous assurer de bien laisser un espace de ventilation suffisant autour afin de permettre une meilleur dispersion de la chaleur (au moins 40 cm sur le dessus). Si l'espace - Pioneer VSX-520-K | Owner's Manual - Page 61
SELECTOR PHASE CONTROL SPEAKERS DIMMER DISPLAY BAND 5 6 7 AUDIO/ VIDEO MULTI- CHANNEL RECEIVER VSX-520 TUNE TUNER EDIT PRESET ENTER MASTER VOLUME PHONES AUTO/DIRECT LISTENING MODE STEREO/ALC STANDARD ADV SURROUND SOUND RETRIEVER PORTABLE 8 9 10 11 1 STANDBY/ON 2 Cadran - Pioneer VSX-520-K | Owner's Manual - Page 62
Permet de naviguer entre les divers modes surround (page 29). 10 SOUND RETRIEVER Appuyez sur cette touche pour restaurer un son de qualité CD vers des sources audio compressées (page 31). 11 PORTABLE prise d'entrée audio Connectez un composant auxiliaire à l'aide d'un câble pour mini-prise st - Pioneer VSX-520-K | Owner's Manual - Page 63
ou DTSHD encodés est détectée. ES S'allume pour indiquer que le décodage DTS-ES est activé. 96/24 S'allume lorsqu'une source comportant des signaux audio DTS 96/24 encodés est détectée. NEO:6 Lorsque l'un des modes NEO:6 du récepteur est sélectionné, ce voyant s'allume pour indiquer qu'un traitement - Pioneer VSX-520-K | Owner's Manual - Page 64
surround avancés, page 29). 13 Voyants SIGNAL SELECT DIGITAL S'allume lorsqu'un signal audio numérique est sélectionné. Clignote lorsqu'un signal audio numérique est sélectionné et que l'entrée audio sélectionnée n'existe pas. HDMI S'allume lorsqu'un signal HDMI est sélectionné. Clignote lorsqu - Pioneer VSX-520-K | Owner's Manual - Page 65
AUTO/ STEREO/ BD MENU 7 DIRECT A.L.C. STANDARD ADV SURR AUDIO PARAMETER TOP 8 MENU TUNE TUNER EDIT MASTER TOOLS VOLUME MENU PRESET 9 HOME MENU SETUP ENTER TUNE BAND RETURN MUTE 10 BASS TRE 14 15 11 HDD DVD VCR 1 2 3 DISP TEST TONE SB CH CH SELECT 4 5 6 CH MIDNIGHT SPEAKERS - Pioneer VSX-520-K | Owner's Manual - Page 66
RECEIVER pour accéder au menu : AUDIO PARAMETER Permet d'accéder aux options audio (page 33). SETUP menu 'supérieur' d'un BD/DVD. HOME MENU Permet d'afficher l'écran HOME MENU. RETURN Permet de confirmer et de en pressant d'abord sur la touche RECEIVER . (Par exemple, TEST TONE, etc.) HDD*, DVD*, - Pioneer VSX-520-K | Owner's Manual - Page 67
le niveau de chaque canal. Appuyez à nouveau sur TEST TONE pour quitter le mode Tonalité de test. SB CH Appuyez sur cette touche pour sélectionner le télévision numérique et TV analogique pour les téléviseurs à écran plat Pioneer. 14 MASTER VOLUME +/- Permet de régler le volume d'écoute. 15 MUTE - Pioneer VSX-520-K | Owner's Manual - Page 68
être obtenu en connectant les enceintes avant gauche et droite (L/R), l'enceinte centrale (C), les enceintes surround gauche et droite (SL/SR) et le subwoofer (SW). De plus, à l'aide d'un amplificateur externe, vous pouvez connecter les enceintes surround gauche et droite (SBL/SBR) et les enceintes - Pioneer VSX-520-K | Owner's Manual - Page 69
haut que vos oreilles et légèrement inclinées vers le bas. Assurez-vous que les enceintes ne sont pas face à face. Pour les signaux DVD-Audio, les enceintes doivent être plus rapprochées de l'auditeur que lors de la lecture sur un appareil de cinéma à domicile. • Si les enceintes surround - Pioneer VSX-520-K | Owner's Manual - Page 70
CD-R/TAPE DVR/VCR L E IN IN ADAPTER PORT (OUTPUT 5 V 100 mA MAX) VIDEO DVR/VCR OUT IN TV/SAT IN MONITOR OUT DVD IN BD IN P P Y R FRONT L SPEAKERS A SURROUND R L Class 2 Wiring CENTER SW Subwoofer amplifié L R Enceintes avant C Enceinte centrale SL SR Enceintes surround 18 Fr - Pioneer VSX-520-K | Owner's Manual - Page 71
et débranchez le cordon d'alimentation de la prise secteur. • Avant de débrancher le cordon d'alimentation, mettez l'appareil en veille. ANALOG INPUT L R SUBWOOFER PRE OUT CD-R/TAPE DVR/VCR SURR BACK / FRONT BD HEIGHT ADAPTER (OUTPUT 5 V 1 L (Single) OUT R DVD PRE OUT CD CD-R/TAPE - Pioneer VSX-520-K | Owner's Manual - Page 72
THRU (THROUGH) et le signal d'entrée, comme expliqué dans la section Choix du signal d'entrée, page 36, sur HDMI, si vous souhaitez entendre la sortie audio HDMI de votre téléviseur ou téléviseur à écran plat (aucun son ne sera transmis par ce récepteur). • Si le signal vidéo n'apparaît sur votre - Pioneer VSX-520-K | Owner's Manual - Page 73
utilisés pour raccorder les appareils numériques au récepteur.1 Câble audio numérique coaxial Câble optique Câbles vidéo Câbles vidéo RCA (Y) Bleu (PB) Rouge (PR) HDMI IN COMPONENT VIDEO IN VIDEO IN PR PB Y HDMI OUT COMPONENT VIDEO OUT MONITOR OUT Borne pour le raccordement d'un téléviseur - Pioneer VSX-520-K | Owner's Manual - Page 74
lecteur DVD (ou autre équipement de lecture) dépourvus de borne HDMI à cet appareil. Sélectionnez-en une DIGITAL AUDIO OUT ANALOG AUDIO OUT OPTICAL COAXIAL R L Lecteur de DVD VIDEO OUT SUBWOOFER PRE OUT CD-R/TAPE DVR/VCR SURR BACK / FRONT BD HEIGHT L (Single) OUT R DVD PRE OUT CD - Pioneer VSX-520-K | Owner's Manual - Page 75
analogique. SUBWOOFER PRE OUT SURR BACK / FRONT HEIGHT L (Single) CD-R/TAPE DVR/VCR OUT R PRE OUT CD CD-R/TAPE DVR/VCR L COAXIAL ASSIGNABLE IN 1 (CD) OPTICAL IN 2 (DVR/VCR) IN 1 (CD-R/TAPE) ASSIGNABLE 12 IN R TV/SAT DVD L IN R AUDIO IN BD IN ADAPTER PORT (OUTPUT 5 V 100 mA MAX) VIDEO DVR - Pioneer VSX-520-K | Owner's Manual - Page 76
respectent pas les raccordements par défaut suivants : • COMPONENT VIDEO IN 1 - BD • COMPONENT VIDEO IN 2 - DVD Consultez Menu d'affectation d'entrée, page un lecteur CD-R, MD, DAT, un magnétophone ou tout autre appareil audio.2 SUBWOOFER PRE OUT CD-R/TAPE DVR/VCR SURR BACK / FRONT BD HEIGHT L - Pioneer VSX-520-K | Owner's Manual - Page 77
English Français Español Raccordement des antennes Raccordez l'antenne cadre AM et l'antenne filaire FM comme indiqué ci-dessous. Pour améliorer la réception et la qualité du son, raccordez les antennes externes (consultez Utilisation des antennes externes ci-dessous). Utilisation des antennes - Pioneer VSX-520-K | Owner's Manual - Page 78
miniprise stéréo pour raccorder un lecteur audio numérique, etc. MASTER VOLUME PORTABLE AUDIO OUT Lecteur audio numérique, etc. Branchement du Si le cordon est endommagé, demandez-en le remplacement auprès du service aprèsvente agréé Pioneer le plus proche. • Lorsque le récepteur n'est pas utilisé - Pioneer VSX-520-K | Owner's Manual - Page 79
base Voici les instructions de base pour lire une source (telle qu'un DVD) avec votre système home cinéma. VIDEO est bien sélectionnée). 2 Si vous devez modifier manuellement le type de signal d'entrée, appuyez sur SIGNAL SEL (page 36). 3 • Vous devrez peut-être vérifier les réglages de sortie audio - Pioneer VSX-520-K | Owner's Manual - Page 80
mode DOLBY PLII MUSIC, vous pouvez régler trois paramètres supplémentaires : C.WIDTH, DIMEN., et PNRM.. Reportez-vous à la section Réglage des options audio, page 33 pour les régler. 4 Lorsque vous écoutez des sources à 2 canaux en mode NEO:6 CINEMA ou NEO:6 MUSIC, vous avez également la possibilit - Pioneer VSX-520-K | Owner's Manual - Page 81
. Remarque 1 Lors de l'écoute de sources à 2 canaux en mode DOLBY PLIIz HEIGHT, il est aussi possible de régler l'effet H.GAIN (voir Réglage des options audio, page 33). 2 • Si le traitement de canal surround arrière (page 32) est désélectionné ou si les enceintes surround arrière sont réglées sur - Pioneer VSX-520-K | Owner's Manual - Page 82
et gauche (et éventuellement sur votre caisson de basses (subwoofer) selon vos réglages d'enceintes). Les sources multicanaux Dolby Digital STEREO - L'audio est reproduit selon vos réglages surround et vous pouvez toujours utiliser les fonctions Midnight, Loudness, Phase Control, Sound Retriever et - Pioneer VSX-520-K | Owner's Manual - Page 83
des enceintes) définis lors de l'étape Surround Setup sont appliqués à la source, ainsi que Utilisation de la fonction Sound Retriever Lorsque des données audio sont supprimées lors Subwoofer N Position d'écoute Remarque 1 En mode DIRECT, les fonctions Phase Control (contrôle de phase), Sound - Pioneer VSX-520-K | Owner's Manual - Page 84
codage 6.1 ou 7.1 (par exemple, avec les supports 5.1 encodés). Avec les sources 5.1 encodées RECEIVER SLEEP TV SOURCE CONTROL RECEIVER INPUT SELECT DTV/TV INPUT HDD DVD VCR 1 2 3 DISP TEST -dessus), le son sera 'déphasé' et l'image audio produite sera de mauvaise qualité. • Si votre caisson - Pioneer VSX-520-K | Owner's Manual - Page 85
comme il devrait l'être normalement.1 • La fonction Up Mix s'avère d'une grande efficacité lorsque les enceintes du système RECEIVER INPUT SELECT DTV/TV INPUT BD DVD TV CH ENTER HOME MENU SETUP TUNE BAND RETURN 1 Appuyez sur la touche RECEIVER de la télécommande, puis sur la touche AUDIO - Pioneer VSX-520-K | Owner's Manual - Page 86
du son est souvent amoindrie du fait de l'inégalité de l'image sonore. La fonction Sound ON Retriever a recours à une nouvelle technologie DSP pour restaurer un son de qualité CD vers des sources audio compressées à 2 canaux en rétablissant la pression sonore et en lissant les artéfacts dentel - Pioneer VSX-520-K | Owner's Manual - Page 87
Le délai d'attente vidéo est ajusté automatiquement selon le délai d'attente audio.f Étire le canal central entre les enceintes avant droite et gauche ; la touche MIDNIGHT. b. Vous pouvez modifier à tout moment la fonction Sound Retriever à l'aide de la touche S.RETRIEVER. c. Ce réglage fonctionne - Pioneer VSX-520-K | Owner's Manual - Page 88
entrées, comme décrit ci-dessous.1 1 Appuyez sur la touche RECEIVER de la télécommande. 2 Appuyez sur la touche SIGNAL SEL pour sé 192 kHz), Dolby TrueHD, Dolby Digital Plus, DTS-EXPRESS, DTS-HD Master Audio et DVD-Audio (192 kHz compris). Pour les autres formats de signaux numériques, spécifiez - Pioneer VSX-520-K | Owner's Manual - Page 89
INPUT SELECT DTV/TV INPUT BD DVD TV AUDIO PARAMETER TOP MENU TUNE TUNER EDIT MASTER TOOLS VOLUME MENU PRESET ENTER HOME MENU SETUP TUNE BAND RETURN 1 Appuyez sur la touche RECEIVER de la télécommande, puis sur la touche SETUP. 2 Utilisez / pour sélectionner le réglage que vous désirez - Pioneer VSX-520-K | Owner's Manual - Page 90
nombre d'enceintes). 1 Sélectionnez "SP SET" à partir du menu SP SETUP. 2 Utilisez / pour choisir la ou les enceinte(s) que vous désirez es sur SMALL. Dans ce cas, toutes les fréquences graves sont envoyées vers le subwoofer. 2 • Ce paramètre peut-être ajusté uniquement lorsque PRE OUT est réglé - Pioneer VSX-520-K | Owner's Manual - Page 91
1 Sélectionnez "X.OVER" à partir du menu SP SETUP. 2 Utilisez / pour choisir le point de coupure de de ce point de coupure seront envoyées vers le subwoofer (ou les enceintes LARGE). Niveau des canaux À l' des canaux en appuyant d'abord sur RECEIVER puis sur TEST TONE. Utilisez alors les touches - Pioneer VSX-520-K | Owner's Manual - Page 92
1 Sélectionnez "IN ASSIG" à partir du menu System Setup. 2 Sélectionnez "COMP. IN" dans le menu IN Assurez-vous d'avoir bien raccordé les câbles audio de l'appareil aux entrées correspondantes à l'arri également être raccordé aux prises COMPONENT VIDEO OUT du récepteur. Configuration de l'option - Pioneer VSX-520-K | Owner's Manual - Page 93
Cet appareil peut mémoriser jusqu'à 30 stations.1 RECEIVER SLEEP TV SOURCE CONTROL RECEIVER INPUT SELECT DTV/TV INPUT BD DVD TV DVR CD CD-R CH AUDIO PARAMETER TOP MENU TUNE TUNER EDIT MASTER TOOLS VOLUME MENU ENTER HOME MENU SETUP TUNE BAND RETURN MUTE ADAPTER TUNER PORTABLE BASS - Pioneer VSX-520-K | Owner's Manual - Page 94
1 Pour régler une station de radio que vous désirez mémoriser. Consultez Pour écouter la radio, page 41 pour de plus amples informations à ce sujet. 2 Appuyez sur la touche TUNER EDIT. L'écran affiche PRESET, puis un MEM clignotant et une station préréglée. 3 Appuyez sur la touche PRESET / pour sé - Pioneer VSX-520-K | Owner's Manual - Page 95
Sélectionnez le signal d'entrée (si nécessaire). Appuyez sur la touche RECEIVER puis sur SIGNAL SEL pour sélectionner le signal d'entrée correspondant au composant des enregistreurs vidéo règlent le niveau d'enregistrement audio automatiquement-consultez le mode d'emploi de l'appareil enregistreur - Pioneer VSX-520-K | Owner's Manual - Page 96
technologie sans fil Bluetooth : Lecteur de musique numérique + Émetteur audio Bluetooth (vendu dans le commerce) ADAPTATEUR Bluetooth® pour profiter de peut s'avérer nécessaire que le périphérique optimisé pour la technologie sans fil Bluetooth prenne en charge les profils A2DP. • Pioneer ne - Pioneer VSX-520-K | Owner's Manual - Page 97
hors tension et débranchez le cordon d'alimentation de la prise secteur. SUBWOOFER PRE OUT CD-R/TAPE DVR/VCR SURR BACK / FRONT BD HEIGHT HDMI ASSIGNABLE 12 IN R TV/SAT DVD L IN R AUDIO IN BD IN ADAPTER PORT (OUTPUT 5 V 100 mA MAX) VIDEO DVR/VCR OUT IN MONITOR OUT DVD ANTENNA PR PB FM - Pioneer VSX-520-K | Owner's Manual - Page 98
pour passer en lecture rapide. La marque et les logos Bluetooth® sont des marques déposées appartenant à Bluetooth SIG, Inc. et Pioneer Corporation utilise ces marques sous licence. Les autres marques commerciales et noms commerciaux appartiennent à leurs propriétaires respectifs. Remarque 1 • Le - Pioneer VSX-520-K | Owner's Manual - Page 99
Español Chapitre 9 : Informations complémentaires Guide de dépannage Une utilisation incorrecte de l'appareil pas être résolu grâce à la liste de contrôles ci-dessous, consultez le service après-vente Pioneer agréé le plus proche de chez vous ou votre revendeur pour effectuer la réparation. • - Pioneer VSX-520-K | Owner's Manual - Page 100
DTS que vous écoutez peut ne pas avoir de canal LFE. • Réglez le subwoofer dans Réglage des enceintes, page 38 sur YES ou PLUS. • Réglez la fonction rifiez que le commutateur du filtre passe-bas de votre caisson de basses (subwoofer) est désactivé, ou que le point de coupure du filtre est réglé - Pioneer VSX-520-K | Owner's Manual - Page 101
English Français Español Problème éventuel Réparation possible Lors de la lecture d'un • Réglez le niveau du volume numérique du lecteur à fond, ou en position logiciel avec le système neutre. DTS, aucun son n'est émis • Assurez-vous que les réglages du lecteur sont corrects et/ou que la ou - Pioneer VSX-520-K | Owner's Manual - Page 102
-vous au manuel du composant ou du moniteur ou prenez contact avec le service après-vente du fabricant. Pas d'image. • Les signaux vidéo qui Color. Pas de son, ou interruption • Si vous avez établi des connexions audio séparées, vérifiez que vous soudaine du son. avez affecté la/les sortie - Pioneer VSX-520-K | Owner's Manual - Page 103
deux secondes environ et maintenez-la enfoncée. 3 Lorsque l'indication RESET? apparaît dans l'affichage, appuyez sur AUTO SURROUND/STREAM DIRECT. affichage connectée (par exemple, la sortie audio est limitée à 2 canaux pour un moniteur avec limitations audio stéréo). • Si vous souhaitez changer - Pioneer VSX-520-K | Owner's Manual - Page 104
analyseur de spectre audio Section audio Entrée (Sensibilit Vp-p (75 ) Résolution maximum correspondante Component Video 1080i (1125i)/720p (750p) Section Entrée/Sortie la surface de l'appareil est sale, essuyez-la en utilisant un Pioneer Corporation. © 2009 Pioneer Corporation. Tous droits réservés. 52 - Pioneer VSX-520-K | Owner's Manual - Page 105
53 Fr English Français Español - Pioneer VSX-520-K | Owner's Manual - Page 106
ADVERTENCIA Este aparato no es impermeable. Para evitar el riesgo de incendio y de descargas eléctricas, no ponga ningún recipiente lleno de líquido (como pueda ser un vaso o un florero) cerca del aparato ni lo exponga a goteo, salpicaduras, lluvia o humedad. D3-4-2-1-3_A1_Es ADVERTENCIA Antes de - Pioneer VSX-520-K | Owner's Manual - Page 107
IMPORTANTE La luz intermitente con el símbolo de punta de flecha dentro un triángulo equilátero. Está convenido para avisar el usuario de la presencia de "voltaje peligrosa" no aislada dentro el producto que podría constituir un peligro de choque eléctrico para las personas. CAUTION RISK OF - Pioneer VSX-520-K | Owner's Manual - Page 108
. . . . 30 Uso de Stream Direct 31 Uso de Sound Retriever 31 Sonido mejorado con Phase Control 31 Uso del procesamiento del canal opciones de Audio 33 Selección de la señal de entrada 36 Uso de los auriculares 36 05 El menú System Setup Uso del menú System Setup 37 Configuración manual de los - Pioneer VSX-520-K | Owner's Manual - Page 109
; 7,272,567 y otras patentes de los EE.UU. y el resto del mundo emitidas y pendientes. DTS y el símbolo son marcas registradas, y DTS-HD, DTS-HD Master Audio y los logotipos DTS son marcas de fábrica de DTS, Inc. El producto incluye software. © DTS, Inc. Todos los derechos reservados. 5 Es - Pioneer VSX-520-K | Owner's Manual - Page 110
receptor AV completo Delantero Derecho Altura (FHR) Subwoofer (SW) Delantero Posición sonido • Uso de varios modos de escucha • Uso de Sound Retriever (página 31) • Sonido mejorado con Phase Control Audio (página 33) • Selección de la señal de entrada (página 36) • Configuración manual de los altavoces - Pioneer VSX-520-K | Owner's Manual - Page 111
• Pilas secas AAA, IEC R03 (para confirmar el funcionamiento del sistema) x2 • Antena de cuadro de AM • Antena alámbrica de FM • Este manual de instrucciones Colocación de las pilas • Aunque distintas pilas tengan la misma forma, pueden tener tensiones diferentes. No mezcle pilas de distinto tipo - Pioneer VSX-520-K | Owner's Manual - Page 112
Ventilación Al instalar esta unidad, asegúrese de dejar espacio alrededor de la unidad a fin de que la ventilación mejore la dispersión de calor (al menos 40 cm. en la parte superior). Si no se deja suficiente espacio entre la unidad y las paredes u otros equipos, la acumulación de calor en el - Pioneer VSX-520-K | Owner's Manual - Page 113
SELECTOR PHASE CONTROL SPEAKERS DIMMER DISPLAY BAND 5 6 7 AUDIO/ VIDEO MULTI- CHANNEL RECEIVER VSX-520 TUNE TUNER EDIT PRESET ENTER MASTER VOLUME PHONES AUTO/DIRECT LISTENING MODE STEREO/ALC STANDARD ADV SURROUND SOUND RETRIEVER PORTABLE 8 9 10 11 1 STANDBY/ON 2 Dial - Pioneer VSX-520-K | Owner's Manual - Page 114
Alterna entre los diversos modos de sonido envolvente (página 29). 10 SOUND RETRIEVER Pulse para restaurar el sonido con calidad de CD a fuentes de audio comprimidas (página 31). 11 Conector de entrada de audio PORTABLE Conecte un componente auxiliar mediante un cable de miniconector estéreo - Pioneer VSX-520-K | Owner's Manual - Page 115
de visualización de caracteres Muestra diversos datos del sistema. 10 Indicadores de DTS DTS Se ilumina cuando se detecta una fuente con señales de audio codificadas en DTS. HD Se ilumina cuando se detecta una fuente con señales de sonido codificadas DTSEXPRESS o DTS-HD. ES Se ilumina para indicar - Pioneer VSX-520-K | Owner's Manual - Page 116
señal DIGITAL Se ilumina cuando se selecciona una señal de sonido digital. Parpadea cuando se ha seleccionado una señal de audio digital y la entrada de audio seleccionada no está disponible. HDMI Se ilumina cuando se selecciona una señal HDMI. Parpadea cuando se ha seleccionado una señal HDMI - Pioneer VSX-520-K | Owner's Manual - Page 117
AUTO/ STEREO/ BD MENU 7 DIRECT A.L.C. STANDARD ADV SURR AUDIO PARAMETER TOP 8 MENU TUNE TUNER EDIT MASTER TOOLS VOLUME MENU PRESET 9 HOME MENU SETUP ENTER TUNE BAND RETURN MUTE 10 BASS TRE 14 15 11 HDD DVD VCR 1 2 3 DISP TEST TONE SB CH CH SELECT 4 5 6 CH MIDNIGHT SPEAKERS - Pioneer VSX-520-K | Owner's Manual - Page 118
RECEIVER primero para acceder: AUDIO PARAMETER Utilícelo para acceder a las opciones de Audio (página 33). SETUP Pulse para acceder al menú System Setup sintonizador. Se puede acceder a otros botones después de pulsar RECEIVER . (Por ejemplo, TEST TONE, etc.) HDD*, DVD*, VCR* Estos botones alternan - Pioneer VSX-520-K | Owner's Manual - Page 119
use los botones / para ajustar el nivel en cada canal. Vuelva a pulsar TEST TONE para salir del modo de tono de prueba. SB CH Púlselo para seleccionar de entrada de TV analógica y DTV para los televisores de pantalla plana Pioneer. 14 MASTER VOLUME +/- Utilice este botón para ajustar el nivel de - Pioneer VSX-520-K | Owner's Manual - Page 120
conecta los altavoces delanteros izquierdo y derecho (L/R), el altavoz central (C), los altavoces de sonido envolvente derecho e izquierdo (SL/SR), y el subwoofer (SW), podrá disfrutar de un sistema de sonido envolvente de 5.1 canales. Si, además, utiliza un amplificador externo, podrá conectar los - Pioneer VSX-520-K | Owner's Manual - Page 121
las siguientes pautas para obtener el mejor sonido del sistema. • El subwoofer se puede colocar en el suelo. Lo ideal es que los otros Asegúrese de que los altavoces no queden frente a frente. Para DVD-Audio, los altavoces deben situarse más directamente detrás del oyente que para la reproducci - Pioneer VSX-520-K | Owner's Manual - Page 122
TAPE DVR/VCR L E IN IN ADAPTER PORT (OUTPUT 5 V 100 mA MAX) VIDEO DVR/VCR OUT IN TV/SAT IN MONITOR OUT DVD IN BD IN P P Y R FRONT L SPEAKERS A SURROUND R L Class 2 Wiring CENTER SW Subwoofer activo L R Altavoces frontales C Altavoz central SL SR Altavoces de sonido envolvente - Pioneer VSX-520-K | Owner's Manual - Page 123
el cable de alimentación de la toma de CA. • Antes de desenchufar el cable de alimentación, ponga el aparato en modo de espera. ANALOG INPUT L R SUBWOOFER PRE OUT CD-R/TAPE DVR/VCR SURR BACK / FRONT BD HEIGHT ADAPTER (OUTPUT 5 V 1 L (Single) OUT R DVD PRE OUT CD CD-R/TAPE DVR/VCR - Pioneer VSX-520-K | Owner's Manual - Page 124
digital con el que sea compatible el componente conectado, incluido DVD-Video, DVD-Audio, SACD, Dolby Digital Plus, Dolby TrueHD, DTS-HD Master Audio (consulte las limitaciones más adelante), Video CD/Super VCD y CD. Este receptor incorpora tecnología Interfaz Multimedia de Alta Definición (HDMI - Pioneer VSX-520-K | Owner's Manual - Page 125
vídeo compuesto. Los conectores amarillos los distinguen de los cables de audio. Acerca de la conexión de salidas de vídeo Este receptor no (Y) Azul (PB) Rojo (PR) HDMI IN COMPONENT VIDEO IN VIDEO IN PR PB Y HDMI OUT COMPONENT VIDEO OUT MONITOR OUT Terminal para conectar con el monitor de - Pioneer VSX-520-K | Owner's Manual - Page 126
de un reproductor de DVD (u otro componente de reproducción) sin un terminal HDMI. Seleccione una DIGITAL AUDIO OUT ANALOG AUDIO OUT OPTICAL COAXIAL R L Reproductor DVD VIDEO OUT HDMI IN SUBWOOFER PRE OUT CD-R/TAPE DVR/VCR SURR BACK / FRONT BD HEIGHT L (Single) OUT R DVD PRE OUT - Pioneer VSX-520-K | Owner's Manual - Page 127
de HDD/DVD. • Sólo las señales que entren a través del terminal de VIDEO IN podrán salir por el terminal de VIDEO OUT. • Las señales de audio que entren a través del terminal digital no saldrán por el terminal analógico. SUBWOOFER PRE OUT SURR BACK / FRONT HEIGHT L (Single) CD-R/TAPE DVR/VCR OUT - Pioneer VSX-520-K | Owner's Manual - Page 128
exploración progresiva, consulte los manuales correspondientes. • En caso o cinta u otro componente de audio.2 SUBWOOFER PRE OUT CD-R/TAPE DVR/VCR VIDEO IN TV PR PB Y COMPONENT VIDEO OUT Reproductor BD/DVD R REC L ANALOG AUDIO IN OPTICAL COAXIAL R PLAY L DIGITAL AUDIO OUT ANALOG AUDIO - Pioneer VSX-520-K | Owner's Manual - Page 129
English Français Español Conexión de antenas Conecte la antena de cuadro de AM y la antena alámbrica de FM como se indica a continuación. Para mejorar la recepción y la calidad de sonido, conecte antenas exteriores (consulte Uso de antenas exteriores más abajo). fig. a fig. b 4 ANTENNA AM LOOP - Pioneer VSX-520-K | Owner's Manual - Page 130
miniconector para conectar un reproductor de audio digital, etc. MASTER VOLUME PORTABLE AUDIO OUT Reproductor de audio digital, etc. Conexión del que está dañado, pida un cable de recambio al representante autorizado de Pioneer más cercano. • Cuando no esté en uso (por ejemplo, durante las - Pioneer VSX-520-K | Owner's Manual - Page 131
de DVD), el televisor1 y el subwoofer (si tiene uno) y, a continuación, encienda el receptor (pulse RECEIVER). • Asegúrese de que el VIDEO). 2 Si tiene que cambiar manualmente el tipo de señal de entrada, pulse SIGNAL SEL (página 36). 3 • Es aconsejable que compruebe los ajustes de salida de audio - Pioneer VSX-520-K | Owner's Manual - Page 132
está escuchando fuentes de dos canales en modo NEO:6 CINEMA o NEO:6 MUSIC, también puede ajustar el efecto C.IMG (consulte Ajuste de las opciones de Audio en la página 33). 5 Cuando escuche fuentes de 2 canales en el modo DOLBY PLIIz HEIGHT, también puede ajustar el efecto H.GAIN (consulte Ajuste de - Pioneer VSX-520-K | Owner's Manual - Page 133
de 2 canales en el modo DOLBY PLIIx MUSIC, hay tres parámetros adicionales que puede ajustar: C.WIDTH, DIMEN., y PNRM.. Consulte Ajuste de las opciones de Audio en la página 33 para modificarlos. 4 Si está escuchando fuentes de dos canales en modo NEO:6 CINEMA o NEO:6 MUSIC, también puede ajustar el - Pioneer VSX-520-K | Owner's Manual - Page 134
través de los altavoces frontales izquierdo y derecho (y, posiblemente, del subwoofer, según la configuración de los altavoces). Las fuentes multicanal Dolby y también están disponibles las funciones Midnight, Loudness, Phase Control, Sound Retriever y Tone. • ALC - Para escuchar en el modo est - Pioneer VSX-520-K | Owner's Manual - Page 135
escuchan de acuerdo con los ajustes de Surround Setup (configuración de altavoces, volumen de canal, ún procesamiento digital. Uso de Sound Retriever Al quitar los datos de audio durante el proceso de compresión, ñales de baja frecuencia se asignan al subwoofer y al altavoz más adecuado. Sin embargo - Pioneer VSX-520-K | Owner's Manual - Page 136
altavoces de sonido envolvente traseros. RECEIVER SLEEP TV SOURCE CONTROL RECEIVER INPUT SELECT DTV/TV INPUT HDD DVD VCR 1 2 3 DISP TEST TONE SB CH CH SELECT y se generará una imagen no fiable del sonido. • Si su subwoofer cuenta con un interruptor de control de fase, ajústelo al signo más - Pioneer VSX-520-K | Owner's Manual - Page 137
TOP MENU TUNE TUNER EDIT MASTER TOOLS VOLUME MENU PRESET RECEIVER INPUT SELECT DTV/TV INPUT BD DVD TV CH ENTER HOME MENU SETUP TUNE BAND RETURN 1 Pulse RECEIVER en el mando a distancia y, a continuación, AUDIO PARAMETER. 2 Utilice / para seleccionar el ajuste que desea modificar. Seg - Pioneer VSX-520-K | Owner's Manual - Page 138
La función Sound Retriever ON utiliza la nueva tecnología DSP, que le ayuda a devolver el sonido en calidad CD al audio de 2 canales lo ajusta a -15 dB, el LFE queda limitado por el grado respectivo. Cuando se selecciona OFF no sale sonido por el canal de LFE. 0 (0 dB) 5 (-5 dB) 10 (-10 dB) 15 (- - Pioneer VSX-520-K | Owner's Manual - Page 139
(Bajo) M (Medio) H (Alto) a. Puede cambiar las opciones MIDNIGHT/LOUDNESS en cualquier momento con el botón MIDNIGHT. b. Puede modificar la función Sound Retriever en cualquier momento con el botón S.RETRIEVER. c. Este ajuste sólo funciona con bandas sonoras Dolby Digital y DTS codificadas en modo - Pioneer VSX-520-K | Owner's Manual - Page 140
tal como se describe abajo.1 1 Pulse RECEIVER en el mando a distancia. 2 Pulse emitirán ningún sonido. Cuando el sonido sale por los auriculares, sólo se puede elegir el manual de instrucciones suministrado con el reproductor de DVD. 2 Cuando la opción HDMI de Ajuste de las opciones de Audio en - Pioneer VSX-520-K | Owner's Manual - Page 141
RECEIVER SLEEP TV SOURCE CONTROL RECEIVER INPUT SELECT DTV/TV INPUT BD DVD TV AUDIO PARAMETER TOP MENU TUNE TUNER EDIT MASTER TOOLS VOLUME MENU PRESET ENTER HOME MENU SETUP TUNE BAND RETURN 1 Pulse RECEIVER en la página 40). Configuración manual de los altavoces Este ajuste optimiza - Pioneer VSX-520-K | Owner's Manual - Page 142
ño, número de altavoces). 1 Seleccione "SP SET" en el menú SP SETUP. 2 Utilice / para elegir los altavoces que desee ajustar y seleccione un tama ajustados a SMALL. En este caso, todas las frecuencias bajas son enviadas al subwoofer. 2 • Sólo puede ajustar esta configuración cuando PRE OUT se ha - Pioneer VSX-520-K | Owner's Manual - Page 143
LFE. 1 Seleccione "X.OVER" en el menú SP SETUP. 2 Utilice / para elegir el punto de corte de debajo del punto de corte serán enviadas al subwoofer (o a los altavoces LARGE). Nivel de canales puede cambiar los niveles de canal pulsando RECEIVER primero y luego TEST TONE. En este caso, utilice los - Pioneer VSX-520-K | Owner's Manual - Page 144
la página 24. 1 Seleccione "IN ASSIG" en el menú System Setup. 2 Seleccione "COMP. IN" del menú IN ASSIG. 3 Utilice Asegúrese de que ha conectado el audio del componente a las entradas correspondientes de también su televisor a los conectores COMPONENT VIDEO OUT de este receptor. La configuración - Pioneer VSX-520-K | Owner's Manual - Page 145
operación para buscar otras emisoras. Sintonización manual Para cambiar la frecuencia un intervalo cada RECEIVER SLEEP TV SOURCE CONTROL RECEIVER INPUT SELECT BD DVD TV DTV/TV INPUT DVR CD CD-R CH AUDIO PARAMETER TOP MENU TUNE TUNER EDIT MASTER TOOLS VOLUME MENU ENTER HOME MENU SETUP - Pioneer VSX-520-K | Owner's Manual - Page 146
1 Sintonice la emisora que desea memorizar. Para más detalles, consulte Recepción de radio en la página 41. 2 Pulse TUNER EDIT. La pantalla muestra PRESET, luego MEM parpadeante y una presintonía. 3 Pulse PRESET / para seleccionar la presintonización de emisoras deseada. También se pueden usar los - Pioneer VSX-520-K | Owner's Manual - Page 147
obtener más información sobre las conexiones de vídeo). RECEIVER SLEEP TV SOURCE CONTROL RECEIVER INPUT SELECT DTV/TV INPUT BD DVD TV DVR CD de las videograbadoras el nivel de grabación de audio se ajusta automáticamente-consulte el manual de instrucciones del componente si tiene dudas. 5 - Pioneer VSX-520-K | Owner's Manual - Page 148
Bluetooth inalámbrica: Reproductor de música digital + Transmisor de audio con Bluetooth (de venta en tiendas) ADAPTADOR Bluetooth® para el Reproducción inalámbrica de música Cuando el ADAPTADOR Bluetooth (Modelo de Pioneer Nº AS-BT100) está conectado a esta unidad, puede utilizarse un producto - Pioneer VSX-520-K | Owner's Manual - Page 149
alimentación y desenchufe el cable de alimentación de la toma de CA. SUBWOOFER PRE OUT CD-R/TAPE DVR/VCR SURR BACK / FRONT BD HEIGHT L ( HDMI ASSIGNABLE 12 IN R TV/SAT DVD L IN R AUDIO IN BD IN ADAPTER PORT (OUTPUT 5 V 100 mA MAX) VIDEO DVR/VCR OUT IN MONITOR OUT DVD ANTENNA PR PB FM - Pioneer VSX-520-K | Owner's Manual - Page 150
. La marca literal y los logotipos Bluetooth® son marcas registradas propiedad de Bluetooth SIG, Inc., y cualquier uso de dichas marcas por Pioneer Corporation se hace bajo licencia. Otras marcas y nombres comerciales son propiedad de sus respectivos propietarios. Nota 1 En algunos casos, puede - Pioneer VSX-520-K | Owner's Manual - Page 151
ón se apaga automáticamente, lleve el equipo al centro de servicio técnico Pioneer autorizado más cercano o a su distribuidor para que lo reparen. No hay de vídeo incorrecta en el monitor de TV. Consulte el manual de instrucciones suministrado con el televisor. Las emisiones de radio contienen - Pioneer VSX-520-K | Owner's Manual - Page 152
fuente Dolby Digital o DTS que escucha no tenga un canal LFE. • Ajuste el subwoofer en Ajuste de altavoz en la página 38 en YES o PLUS. • Pase el correctos y/o que la salida de señal DTS esté activada. Consulte el manual de instrucciones suministrado con el reproductor de DVD. • Ajuste el tipo de se - Pioneer VSX-520-K | Owner's Manual - Page 153
English Français Español Problema Solución El mando a distancia no funciona. • Sustituya las pilas (consulte la página 10). • Utilícelo en un rango de 7 m, 30º del sensor remoto del panel frontal (consulte la página 7). • Retire el obstáculo o utilícelo desde otra posición. • Evite exponer el - Pioneer VSX-520-K | Owner's Manual - Page 154
componente HDMI directamente al monitor, consulte el manual del componente o del monitor, o bien del terminal de video analógico no saldrán por el terminal HDMI. Las señales de video procedentes del terminal • Si ha realizado conexiones separadas para el audio, asegúrese de que ha asignado el/los - Pioneer VSX-520-K | Owner's Manual - Page 155
, pulse el botón STANDBY/ON durante unos dos segundos. 3 Cuando vea RESET? en la pantalla, pulse AUTO SURROUND/STREAM DIRECT. OK? se visualizará en pantalla conectada (por ejemplo, la salida de audio se reduce a 2 canales para una pantalla con limitaciones de audio estéreo). • Si desea cambiar la - Pioneer VSX-520-K | Owner's Manual - Page 156
** Medida con analizador de espectro de audio Sección de audio Entrada (sensibilidad/impedancia) LINE 200 mV/ AM 1 Antena alámbrica de FM 1 Este manual de instrucciones Nota • Con el propósito de introducir Publicado por Pioneer Corporation. Copyright © 2009 Pioneer Corporation. Reservados todos - Pioneer VSX-520-K | Owner's Manual - Page 157
53 Es English Français Español - Pioneer VSX-520-K | Owner's Manual - Page 158
PERIOD Home Audio and Video ... SERVICE PUSA and POC have appointed a number of Authorized Service Companies throughout the U.S.A. and Canada should your product require service. To receive warranty service you need to present your sales Support, should a dispute arise between you and Pioneer, Pioneer - Pioneer VSX-520-K | Owner's Manual - Page 159
ÉTÉ EFFECTUÉ. PÉRIODE DE GARANTIE DES PRODUITS Pièces Main-d'œuvre Produits audio et vidéo pour la maison ... Micros, écouteurs, stylets et cartouches phono AUPRÈS D'UNE SOURCE AUTRE QU'UNE SOCIÉTÉ DE SERVICE OU AUTRE AUTORISÉE OU DÉSIGNÉE PAR PIONEER. LA PRÉSENTE GARANTIE NE COUVRE PAS LES DÉ - Pioneer VSX-520-K | Owner's Manual - Page 160
service location, to purchase replacement parts, operating instructions, or accessories, please go to one of following URLs : Pour enregistrer votre produit, trouver le service 479-4411 PIONEER EUROPE NV Haven 1087, Keetberglaan 1, B-9120 Melsele, Belgium TEL: 03/570.05.11 PIONEER ELECTRONICS
-
 1
1 -
 2
2 -
 3
3 -
 4
4 -
 5
5 -
 6
6 -
 7
7 -
8
-
9
-
10
-
11
-
12
-
13
-
14
-
15
-
16
-
17
-
18
-
19
-
20
-
21
-
22
-
23
-
24
-
25
-
26
-
27
-
28
-
29
-
30
-
31
-
32
-
33
-
34
-
35
-
36
-
37
-
38
-
39
-
40
-
41
-
42
-
43
-
44
-
45
-
46
-
47
-
48
-
49
-
50
-
51
-
52
-
53
-
54
-
55
-
56
-
57
-
58
-
59
-
60
-
61
-
62
-
63
-
64
-
65
-
66
-
67
-
68
-
69
-
70
-
71
-
72
-
73
-
74
-
75
-
76
-
77
-
78
-
79
-
80
-
81
-
82
-
83
-
84
-
85
-
86
-
87
-
88
-
89
-
90
-
91
-
92
-
93
-
94
-
95
-
96
-
97
-
98
-
99
-
100
-
101
-
102
-
103
-
104
-
105
-
106
-
107
-
108
-
109
-
110
-
111
-
112
-
113
-
114
-
115
-
116
-
117
-
118
-
119
-
120
-
121
-
122
-
123
-
124
-
125
-
126
-
127
-
128
-
129
-
130
-
131
-
132
-
133
-
134
-
135
-
136
-
137
-
138
-
139
-
140
-
141
-
142
-
143
-
144
-
145
-
146
-
147
-
148
-
149
-
150
-
151
-
152
-
153
-
154
-
155
-
156
-
157
-
158
-
159
-
160
 |
 |
Register your product on
http://www.pioneerelectronics.ca (Canada)
http://www.pioneerelectronics.ca (Canada)
•
Protect your new investment
The details of your purchase will be on file for reference in the event of an
insurance claim such as loss or theft.
•
Improve product development
Your input helps us continue to design products that meet your needs.
•
Receive a free Pioneer newsletter
Registered customers can opt in to receive a monthly newsletter.
•
Receive free tips, updates and service bulletins on
your new product
AUDIO/VIDEO MULTI-CHANNEL RECEIVER
RECEPTEUR AUDIOVISUEL A
VOIES MULTIPLES
RECEPTOR MULTICANAL DE AUDIO/VÍDEO
VSX-520
Operating Instructions
Mode d
’
emploi
Manual de instrucciones