Pioneer VSX-520-K Owner's Manual - Page 51
Important information regarding the HDMI connection, Resetting the main unit, display - factory reset
 |
UPC - 884938108843
View all Pioneer VSX-520-K manuals
Add to My Manuals
Save this manual to your list of manuals |
Page 51 highlights
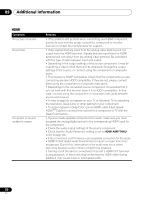
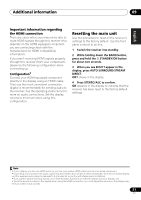
Additional information 09 English Français Español Important information regarding the HDMI connection There are cases where you may not be able to route HDMI signals through this receiver (this depends on the HDMI equipped component you are connecting-check with the manufacturer for HDMI compatibility information). If you aren't receiving HDMI signals properly through this receiver (from your component), please try the following configuration when connecting up. Configuration1 Connect your HDMI-equipped component directly to the display using an HDMI cable. Then use the most convenient connection (digital is recommended) for sending audio to the receiver. See the operating instructions for more on audio connections. Set the display volume to minimum when using this configuration. Resetting the main unit Use this procedure to reset all the receiver's settings to the factory default. Use the front panel controls to do this. 1 Switch the receiver into standby. 2 While holding down the BAND button, press and hold the STANDBY/ON button for about two seconds. 3 When you see RESET? appear in the display, press AUTO SURROUND/STREAM DIRECT. OK? shows in the display. 4 Press STEREO/ALC to confirm. OK appears in the display to indicate that the receiver has been reset to the factory default settings. Note 1 • If your display only has one HDMI terminal, you can only receive HDMI video from the connected component. • Depending on the component, audio output may be limited to the number of channels available from the connected display unit (for example audio output is reduced to 2 channels for a monitor with stereo audio limitations). • If you want to switch the input source, you'll have to switch functions on both the receiver and your display unit. • Since the sound is muted on the display when using the HDMI connection, you must adjust the volume on the display every time you switch input sources. 51 En
-
 1
1 -
2
-
3
-
4
-
5
-
6
-
7
-
8
-
9
-
10
-
11
-
12
-
13
-
14
-
15
-
16
-
17
-
18
-
19
-
20
-
21
-
22
-
23
-
24
-
25
-
26
-
27
-
28
-
29
-
30
-
31
-
32
-
33
-
34
-
35
-
36
-
37
-
38
-
39
-
40
-
41
-
42
-
43
-
44
-
45
-
 46
46 -
 47
47 -
 48
48 -
 49
49 -
 50
50 -
 51
51 -
 52
52 -
 53
53 -
 54
54 -
 55
55 -
 56
56 -
57
-
58
-
59
-
60
-
61
-
62
-
63
-
64
-
65
-
66
-
67
-
68
-
69
-
70
-
71
-
72
-
73
-
74
-
75
-
76
-
77
-
78
-
79
-
80
-
81
-
82
-
83
-
84
-
85
-
86
-
87
-
88
-
89
-
90
-
91
-
92
-
93
-
94
-
95
-
96
-
97
-
98
-
99
-
100
-
101
-
102
-
103
-
104
-
105
-
106
-
107
-
108
-
109
-
110
-
111
-
112
-
113
-
114
-
115
-
116
-
117
-
118
-
119
-
120
-
121
-
122
-
123
-
124
-
125
-
126
-
127
-
128
-
129
-
130
-
131
-
132
-
133
-
134
-
135
-
136
-
137
-
138
-
139
-
140
-
141
-
142
-
143
-
144
-
145
-
146
-
147
-
148
-
149
-
150
-
151
-
152
-
153
-
154
-
155
-
156
-
157
-
158
-
159
-
160
 |
 |