Pioneer X-SMC4-K Operating Instructions - Page 31
Timer Setting
 |
View all Pioneer X-SMC4-K manuals
Add to My Manuals
Save this manual to your list of manuals |
Page 31 highlights
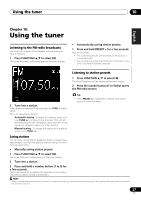
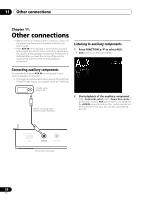
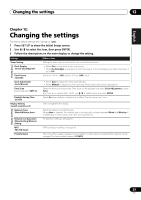
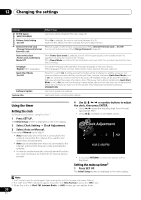
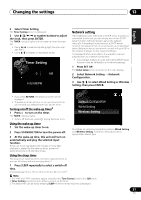
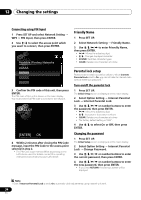
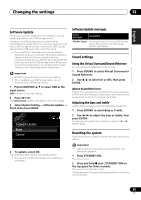
Changing the settings 12 English Français Español 2 Select Timer Setting. The Timer Setting screen is displayed. 3 Use or number buttons to adjust the clock, then press ENTER. The TIMER indicator lights and the wake-up timer has been set. • Using / moves the adjusting digit (hour/minute/ AM, PM1). • Using / increases or decreases values. Timer Setting 7 0 AM H:M AM/PM Network setting If a broadband router (with built-in DHCP server function) is connected to this unit, you can simply turn on the DHCP server function without having to set up the network manually. A broadband router without a DHCP server function connected to this unit must be set up as described below. Before you set up the network, consult with your ISP or the network manager for the required settings. It is advised that you also refer to the operation manual supplied with your network component. • Any changes made to a router without the DHCP server function must be reflected to unit network settings. 1 Press SET UP. The Initial Setup screen is shown on the main display. 2 Select Network Setting Network Configuration. 3 Use / to select Wired Setting or Wireless Setting, then press ENTER. • If you press RETURN, the previous screen will be displayed. • The wake-up timer will turn on an input source at the volume level you selected when you set the timer. Turning on/off the wake-up timer2 1 Press to turn on the timer. The TIMER indicator lights. • To turn off the timer, press during the timer is on. Network Configuration Wired Setting Wireless Setting Using the wake-up timer 1 Set the wake-up timer to on. 2 Press STANDBY/ON to turn the power off. 3 At the wake-up time, this unit will turn on automatically and play the selected input function. If this unit is not operated for 60 minutes or more after playback is started by the wake-up timer, power will automatically turn off (standby mode). Next steps are described separately between Wired Setting and Wireless Setting. Follow the instructions of the appropriate network type. Using the sleep timer The sleep timer switches off the unit after a specified time so you can fall asleep without worrying about it. 1 Press SLEEP repeatedly to select a switch off time. Choose between 5 min, 15 min, 30 min, 60 min, 90 min or Off.3 Note 1 The "AM" and "PM" indicators appear only when the Time Format is set to the 12H mode. 2 Timer Setting need to be done before you turn on the timer. 3 The sleep timer can be set by pressing SLEEP while the remaining time is displayed. 31 En
-
 1
1 -
2
-
3
-
4
-
5
-
6
-
7
-
8
-
9
-
10
-
11
-
12
-
13
-
14
-
15
-
16
-
17
-
18
-
19
-
20
-
21
-
22
-
23
-
24
-
25
-
 26
26 -
 27
27 -
 28
28 -
 29
29 -
 30
30 -
 31
31 -
 32
32 -
 33
33 -
 34
34 -
 35
35 -
 36
36 -
37
-
38
-
39
-
40
-
41
-
42
-
43
-
44
-
45
-
46
-
47
-
48
-
49
-
50
-
51
-
52
-
53
-
54
-
55
-
56
-
57
-
58
-
59
-
60
-
61
-
62
-
63
-
64
-
65
-
66
-
67
-
68
-
69
-
70
-
71
-
72
-
73
-
74
-
75
-
76
-
77
-
78
-
79
-
80
-
81
-
82
-
83
-
84
-
85
-
86
-
87
-
88
-
89
-
90
-
91
-
92
 |
 |
