Ricoh IS330DC User Manual - Page 30
Customizing the Scan Size
 |
UPC - 026649006722
View all Ricoh IS330DC manuals
Add to My Manuals
Save this manual to your list of manuals |
Page 30 highlights
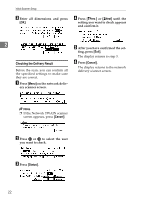
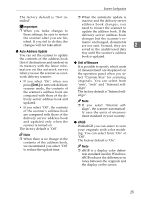
Initial Scanner Setup D F Press [↑Prev.] or [↓Next] until the Repeat steps D to E and set the item you want to set appears, then press [OK]. next item. Reference For details on the operation when Scan size is "Custom 2 E Make the necessary settings. Example: image density setting Size", see P.20 "Customizing the Scan Size". G When all your settings are done, press [PrevMenu]. The display returns to the step B screen. Example: resolution setting • When you need to enter values, enter the digits with the number keys. If you press the {#} key after you have entered information, you can enter values in the next column. You can change the input position by pressing 0 or 1. • To scroll up or down the list of settings, press [↑] or [↓] until the item you want to set appears. Note ❒ For more details about the con- tent of each setting, see P.17 "Settings". ❒ If you want to cancel a setting, press [Cancel]. The setting is not changed, and the screen returns to the display that appeared before you pressed [OK]. ❒ An "*" mark appears with the current setting. Note ❒ You can make "Network Setup" and "Config." settings from this display. H Press [Exit]. The new settings are saved and the display returns to the screen that was displayed before you started making settings. Customizing the Scan Size If you select "Custom Size" as your scan size, you can specify the dimensions of the scan area in millimeters or inches. Note ❒ Select the measurement units in "Configuration" in Scanner Features. A Display "Custom Size" in the Scan size selection screen, and press [OK]. 20
-
 1
1 -
2
-
3
-
4
-
5
-
6
-
7
-
8
-
9
-
10
-
11
-
12
-
13
-
14
-
15
-
16
-
17
-
18
-
19
-
20
-
21
-
22
-
23
-
24
-
 25
25 -
 26
26 -
 27
27 -
 28
28 -
 29
29 -
 30
30 -
 31
31 -
 32
32 -
 33
33 -
 34
34 -
 35
35 -
36
-
37
-
38
-
39
-
40
-
41
-
42
-
43
-
44
-
45
-
46
-
47
-
48
-
49
-
50
-
51
-
52
-
53
-
54
-
55
-
56
-
57
-
58
-
59
-
60
 |
 |
