Ricoh IS330DC User Manual - Page 38
PrevMenu, User Tools
 |
UPC - 026649006722
View all Ricoh IS330DC manuals
Add to My Manuals
Save this manual to your list of manuals |
Page 38 highlights
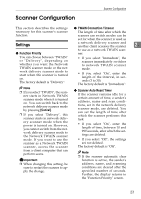
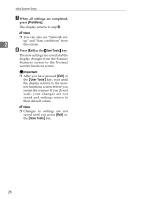
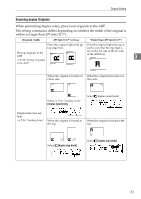
Initial Scanner Setup G When all settings are completed, press [PrevMenu]. The display returns to step B. Note ❒ You can also set "Network set- up" and "Scan conditions" from 2 this screen. H Press [Exit] or the {User Tools} key. The new settings are saved and the display changes from the Scanner Features screen to the Normal scanner functions screen. Important ❒ After you have pressed [Exit] or the {User Tools} key, wait until the display returns to the Scanner functions screen before you restart the scanner. If you do not wait, your changes are not saved and settings return to their default values. Note ❒ Changes to settings are not saved until you press [Exit] or the {User Tools} key. 28
-
 1
1 -
2
-
3
-
4
-
5
-
6
-
7
-
8
-
9
-
10
-
11
-
12
-
13
-
14
-
15
-
16
-
17
-
18
-
19
-
20
-
21
-
22
-
23
-
24
-
25
-
26
-
27
-
28
-
29
-
30
-
31
-
32
-
 33
33 -
 34
34 -
 35
35 -
 36
36 -
 37
37 -
 38
38 -
 39
39 -
 40
40 -
 41
41 -
 42
42 -
 43
43 -
44
-
45
-
46
-
47
-
48
-
49
-
50
-
51
-
52
-
53
-
54
-
55
-
56
-
57
-
58
-
59
-
60
 |
 |

Initial Scanner Setup
28
2
G
When all settings are completed,
press
[
PrevMenu
]
.
The display returns to step
B
.
Note
❒
You can also set "Network set-
up" and "Scan conditions" from
this screen.
H
Press
[
Exit
]
or the
{
User Tools
}
key.
The new settings are saved and the
display changes from the Scanner
Features screen to the Normal
scanner functions screen.
Important
❒
After you have pressed
[
Exit
]
or
the
{
User Tools
}
key, wait until
the display returns to the Scan-
ner functions screen before you
restart the scanner. If you do not
wait, your changes are not
saved and settings return to
their default values.
Note
❒
Changes to settings are not
saved until you press
[
Exit
]
or
the
{
User Tools
}
key.