Ricoh IS330DC User Manual - Page 49
Selecting Options after Scanning, When Show options after each scan, job. is selected
 |
UPC - 026649006722
View all Ricoh IS330DC manuals
Add to My Manuals
Save this manual to your list of manuals |
Page 49 highlights
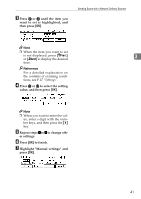
Sending Scans with a Network Delivery Scanner B Select the orientation of the original and One-sided or duplex. Reference For details on selecting original orientation and One-sided or duplex, see P.30 "Original Orientation and Scan Area Setting". C Press [OK]. The display returns to the step A screen. G Press the {Start} key. The scan starts. To stop scanning, press the {Clear/ Stop} key. If you stop the scan, the part of the original that has already been scanned is deleted and the original is not sent. The following screen appears as you place an original on the platen glass, after the first page was scanned. If you want to scan another page, place the original on the platen glass and press the {Start} key. When the scan is completed, press [End Job]. The operations you need to perform depend on the settings in "End of Scan Option" settings in Configuration. See P.39 "Selecting Options after Scanning". Selecting Options after Scanning End scan operations vary according to "End of Scan Option" settings in Configuration. ❖ When "Show options after each scan job." is selected When you place originals in the ADF, the screen below is displayed once the entire original has been scanned. 3 • If you press [Add], the original is scanned and added to the previously scanned document. Place the original you want to add in the ADF and press the {Start} key. • If you press [New Job], the original is scanned using the same scanning conditions as the previously scanned document, and the destination and sender settings are also preserved. You can continue and use the same settings, or change the settings as required, and scan the original as a separate document. If you set the original and press the {Start} key, the original starts scanning as a separate document. • If you press [Exit], the display returns to the network delivery scanner's Initial screen, and scanned data is sent to the delivery server. 39
-
 1
1 -
2
-
3
-
4
-
5
-
6
-
7
-
8
-
9
-
10
-
11
-
12
-
13
-
14
-
15
-
16
-
17
-
18
-
19
-
20
-
21
-
22
-
23
-
24
-
25
-
26
-
27
-
28
-
29
-
30
-
31
-
32
-
33
-
34
-
35
-
36
-
37
-
38
-
39
-
40
-
41
-
42
-
43
-
 44
44 -
 45
45 -
 46
46 -
 47
47 -
 48
48 -
 49
49 -
 50
50 -
 51
51 -
 52
52 -
 53
53 -
 54
54 -
55
-
56
-
57
-
58
-
59
-
60
 |
 |
