Ricoh Priport HQ7000 PostScript Supplement - Page 22
[Advanced] dialog box, Paper/Quality, Layout
 |
View all Ricoh Priport HQ7000 manuals
Add to My Manuals
Save this manual to your list of manuals |
Page 22 highlights
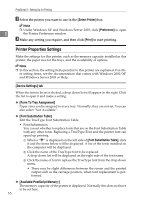
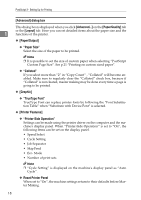
PostScript 3 - Setting Up for Printing [Advanced] dialog box This dialog box is displayed when you click [Advanced...] on the [Paper/Quality] tab or the [Layout] tab. Here you can set detailed items about the paper size and the 1 functions of the printer. ❖ [Paper/Output] ❖ "Paper Size" Select the size of the paper to be printed. Note ❒ It is possible to set the size of custom paper when selecting "PostScript Custom Page Size". See p.21 "Printing on custom sized paper". ❖ "Collated" If you select more than "2" in "Copy Count" , "Collated" will become enabled. Make sure to regularly clear the "Collated" check box, because if "Collated" is not cleared, master making may be done every time a page is going to be printed. ❖ [Graphic] ❖ "TrueType Font" TrueType Font can replace printer fonts by following the "Font Substitution Table" when "Substitute with Device Font" is selected. ❖ [Printer Features] ❖ "Printer-Side Operation" Settings can be made using the printer driver on the computer and the machine's display panel. When "Printer-Side Operation" is set to "On", the following items can be set on the display panel. • Speed Select • Cycle Setting • Job Separator • Skip Feed • Eco. Mode • Number of print sets Note ❒ "Cycle Setting" is displayed on the machine's display panel as "Auto Cycle". ❖ Reset Printer Panel When set to "On", the machine settings return to their defaults before Master Making. 18
-
 1
1 -
2
-
3
-
4
-
5
-
6
-
7
-
8
-
9
-
10
-
11
-
12
-
13
-
14
-
15
-
16
-
 17
17 -
 18
18 -
 19
19 -
 20
20 -
 21
21 -
 22
22 -
 23
23 -
 24
24 -
 25
25 -
 26
26 -
 27
27 -
28
-
29
-
30
-
31
-
32
-
33
-
34
-
35
-
36
-
37
-
38
-
39
-
40
-
41
-
42
-
43
-
44
-
45
-
46
-
47
-
48
-
49
-
50
-
51
-
52
-
53
-
54
-
55
-
56
-
57
-
58
-
59
-
60
-
61
-
62
-
63
-
64
-
65
 |
 |
