Ridgid MS255SR Operation Manual - Page 14
Adjustments - fence
 |
View all Ridgid MS255SR manuals
Add to My Manuals
Save this manual to your list of manuals |
Page 14 highlights
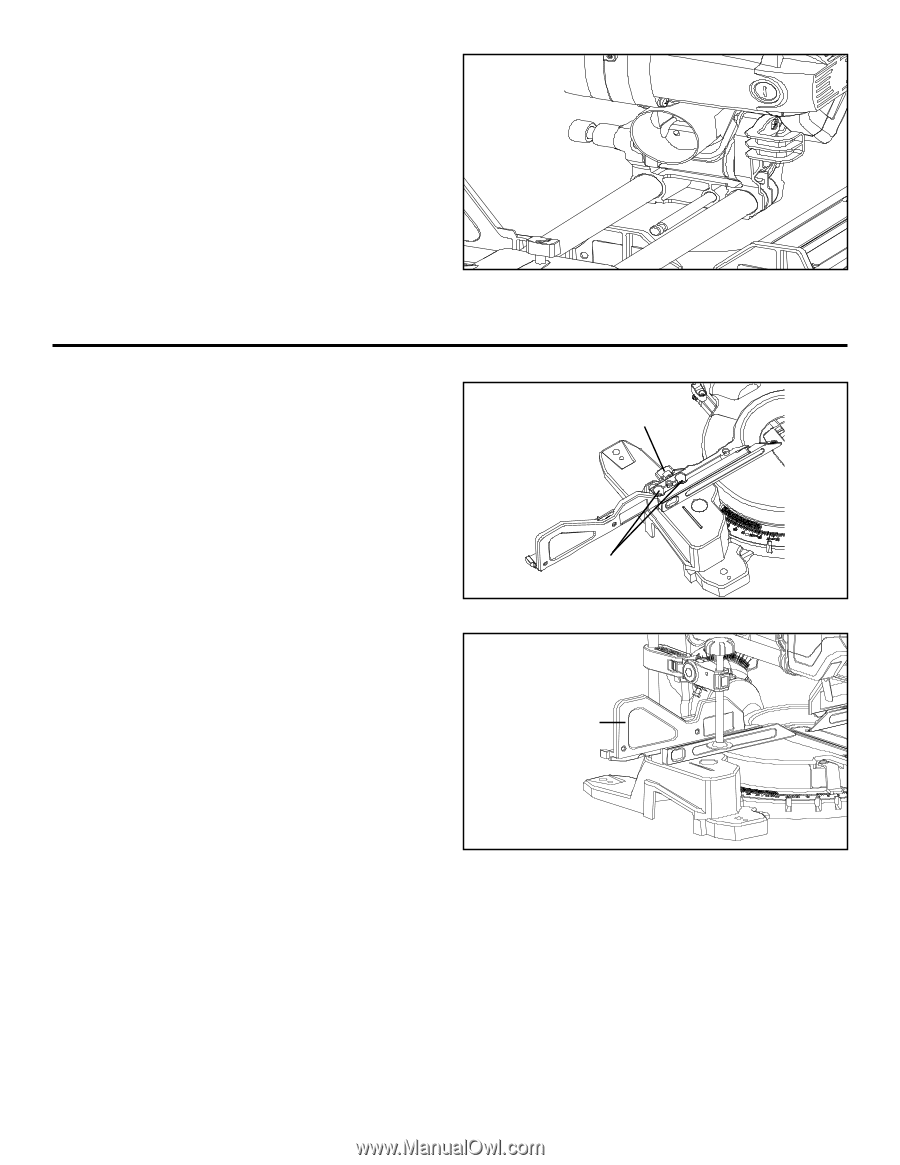
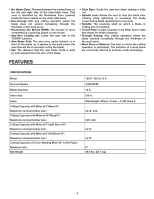
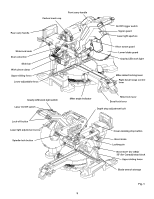
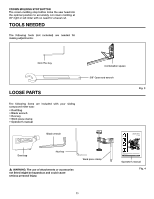
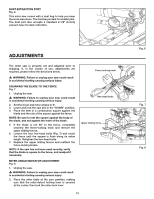
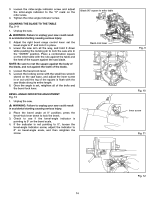
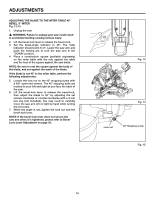
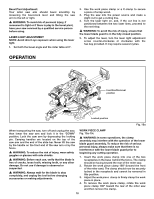
Dust-extraction port Fig. 6 This miter saw comes with a dust bag to help you keep the work area clean. The dust bag is ideal for smaller jobs. The dust port also accepts a standard 2-1/2" (6.4cm) vacuum hose for dust collection. adjustments The miter saw is properly set and adjusted prior to shipping. If, in the course of use, adjustments are required, please follow the directions below. � WARNING: Failure to unplug your saw could result in accidental starting causing serious injury. SQUARING THE BLADE TO THE FENCE Fig. 7 1. Unplug the saw. � WARNING: Failure to unplug your saw could result in accidental starting causing serious injury. 2. Set the bevel and miter angles to 0°. 3. Lower and lock the saw arm in the "DOWN" position. 4. Place the heel of a combination square against the blade and the rule of the square against the fence. NOTE: Be sure to rest the square against the body of the blade, and not against the teeth of the blade. 5. If the blade is not 90° to the fence, completely unscrew the fence-locking knob and remove the upper sliding fences. 6. Loosen the four hex-head bolts (Fig. 7) and rotate the fence until the square is flush along its entire length. Retighten the hex-head bolts. 7. Replace the upper sliding fences and reattach the fence-locking knobs. NOTE: If the saw has not been used recently, verify that the blade is square to the fence, and readjust if necessary. MITER-ANGLE INDICATOR ADJUSTMENT Fig. 8 1. Unplug the saw. � WARNING: Failure to unplug your saw could result in accidental starting causing serious injury. 2. Place the miter table at the zero position, making sure that the miter-detent locking lever is secured at the center, then lock the miter-lock lever. Fence locking knob Hex-head bolts Upper sliding fence 13 Fig. 6 Fig. 7 Fig. 8
-
 1
1 -
2
-
3
-
4
-
5
-
6
-
7
-
8
-
 9
9 -
 10
10 -
 11
11 -
 12
12 -
 13
13 -
 14
14 -
 15
15 -
 16
16 -
 17
17 -
 18
18 -
 19
19 -
20
-
21
-
22
-
23
-
24
-
25
-
26
-
27
-
28
-
29
-
30
-
31
-
32
-
33
-
34
-
35
-
36
 |
 |