Ridgid MS255SR Operation Manual - Page 29
Cutting Crown Molding With Crown Molding
 |
View all Ridgid MS255SR manuals
Add to My Manuals
Save this manual to your list of manuals |
Page 29 highlights
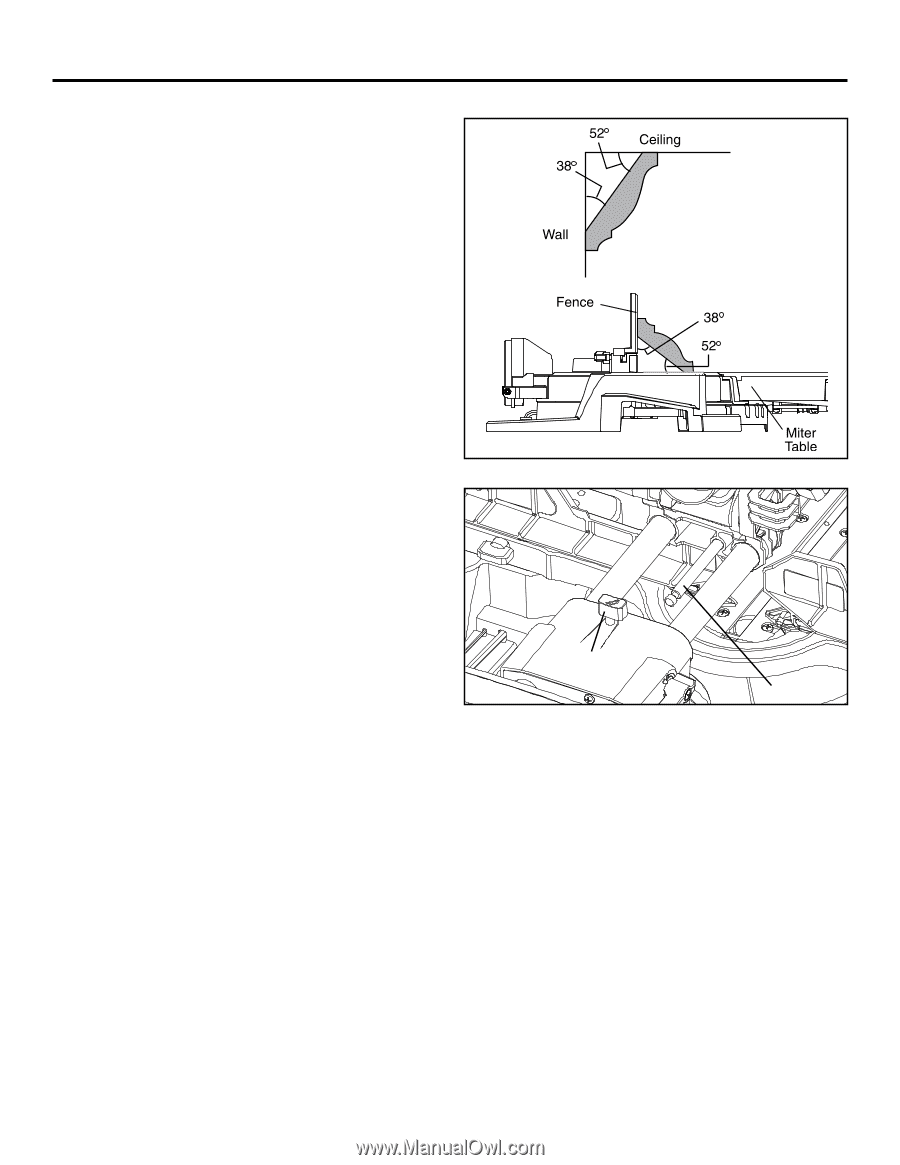
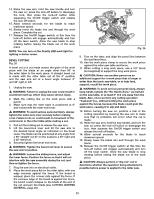
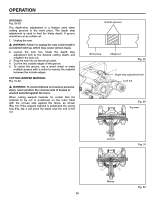
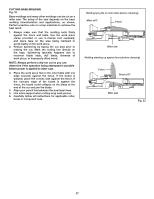
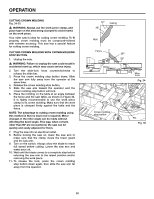
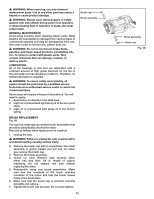
OPERATION CUTTING CROWN MOLDING Fig. 34-35 � WARNING: Always use the work piece clamp, and place tape on the area being clamped to avoid marks on the work piece. Your miter saw is ideal for cutting crown molding. To fit properly, crown molding must be compound-mitered with extreme accuracy. This saw has a special feature for cutting crown molding. CUTTING CROWN MOLDING WITH CROWN MOLDING STOP BUTTON 1. Unplug the saw. � WARNING: Failure to unplug the saw could result in accidental start up, which may cause serious injury. 2. Turn the slide-lock knob counterclockwise to release the slide bar. 3. Press the crown molding stop button down. Slide the saw arm fully away from the operator at the same time. 4. Release the crown molding stop button. 5. Slide the saw arm toward the operator and the crown molding stop button will lock. 6. Place the molding on the table at an angle between the fence and the saw table, as shown in Figure 34. It is highly recommended to use the work piece clamp to fix crown molding. Make sure that the work piece is clamped firmly against the table and the fence. NOTE: The advantage to cutting crown molding using this method is that no bevel cut is required. Minor changes in the miter angle can be made without affecting the bevel angle. This way, when corners other than 90º are encountered, the saw can be quickly and easily adjusted for them. 7. Plug the saw into an electrical outlet. 8. Before turning the saw on, lower the saw arm to make sure that the clamp clears the lower guard and the saw arm. 9. Turn on the switch. Always allow the blade to reach full speed before cutting. Lower the saw arm and make your cut. 10. Wait until the blade comes to a complete stop before returning the saw arm to the raised position and/or removing the work piece. 11. To release the lock, press the crown molding stop button down again, then slide the saw arm far away from the operator. Crown molding stop button Fig. 34 Pin Fig. 35 28
-
 1
1 -
2
-
3
-
4
-
5
-
6
-
7
-
8
-
9
-
10
-
11
-
12
-
13
-
14
-
15
-
16
-
17
-
18
-
19
-
20
-
21
-
22
-
23
-
 24
24 -
 25
25 -
 26
26 -
 27
27 -
 28
28 -
 29
29 -
 30
30 -
 31
31 -
 32
32 -
 33
33 -
 34
34 -
35
-
36
 |
 |