Ridgid MS255SR Operation Manual - Page 19
Operation
 |
View all Ridgid MS255SR manuals
Add to My Manuals
Save this manual to your list of manuals |
Page 19 highlights
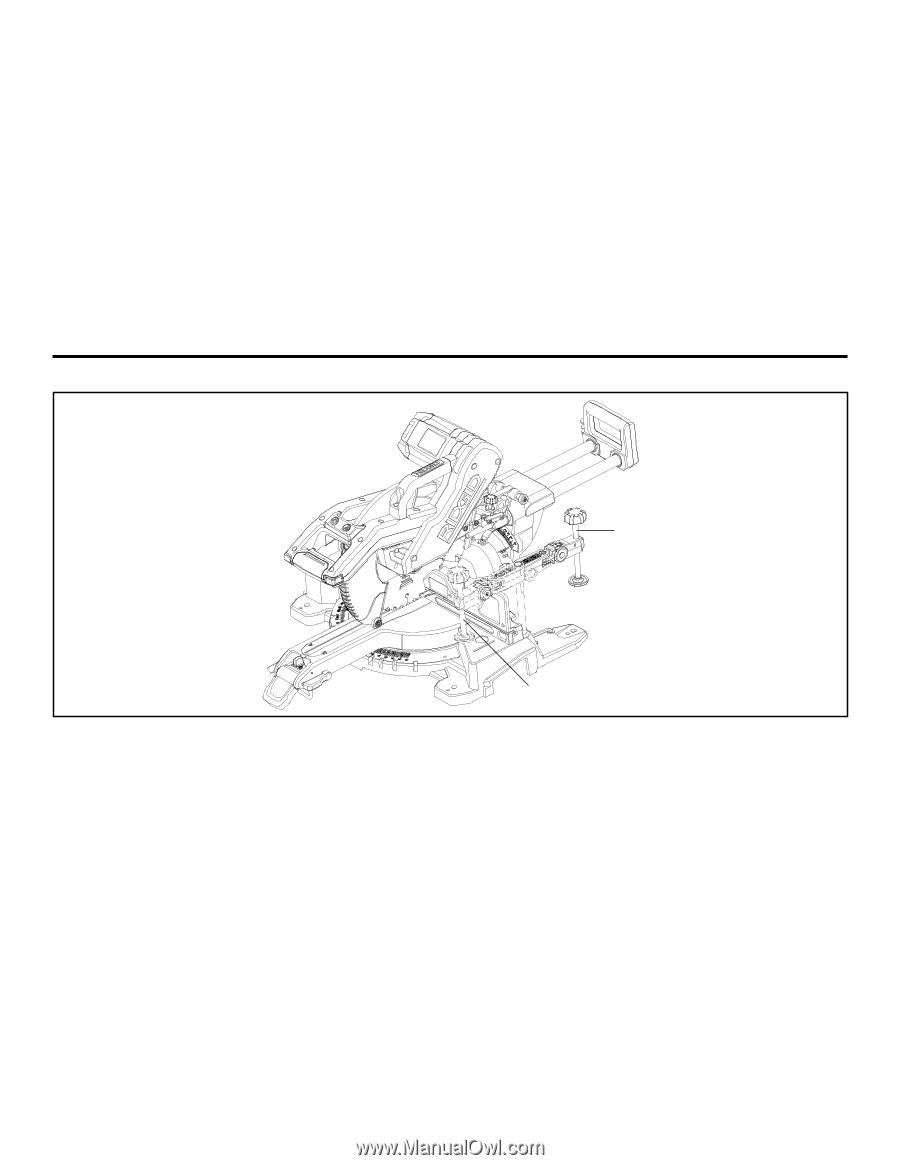
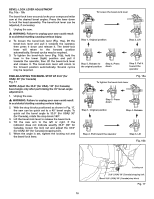
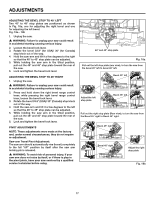
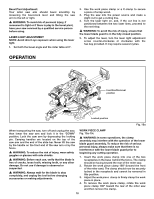
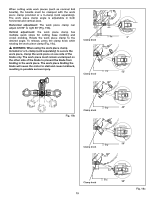
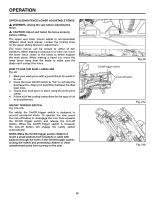
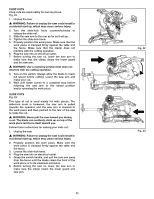
Bevel Pivot Adjustment: Your miter saw arm should bevel smoothly by loosening the bevel-lock lever and tilting the saw arm to the left or right. � WARNING: To avoid risk of personal injury, if movement is tight or if there is play in the bevel pivot, have your saw serviced by a qualified service person before using. Laser light adjustment NOTE: Avoid direct eye exposure when using the laser light. 1. Set both the bevel angle and the miter table at 0°. 2. Use the work piece clamp or a C-clamp to secure a piece of scrap wood. 3. Plug the saw into the power source and make a slight cut to get a cutting line. 4. Turn the laser light on, and, if the cut line is not positioned between the two laser lines, proceed to the next step. � WARNING: To avoid the risk of injury, ensure that the lower blade guard is in the fully closed position. 5. To adjust the laser, turn the laser light adjustment screw counter-clockwise or clockwise with the hex key provided. It may require several cycles. OPERATION Insertion/Removal position Locked position Fig. 19a When transporting the saw, turn off and unplug the saw, then lower the saw arm and lock it in the "DOWN" position. Lock the saw arm by depressing the locking pin. Carrying handles are located on the top of the saw arm and the end of the slide bar. Never lift the saw by the handle on the front end of the saw arm or by the fence. � WARNING: To reduce the risk of injury, wear safety goggles or glasses with side shields. � WARNING: Before each use, verify that the blade is free of cracks, loose teeth, missing teeth, or any other damage. Do not use if damage is observed or suspected. � WARNING: Always wait for the blade to stop completely, and unplug the tool before changing accessories or making adjustments. WORK PIECE CLAMP Fig. 19a-19c � WARNING: In some operations, the clamp assembly may interfere with the operation of the lower blade guard assembly. To reduce the risk of serious personal injury, always make sure that there is no interference with the lower blade guard prior to beginning any cutting operation. 1. Insert the work piece clamp into one of the two receptacles in the base behind the fence. The clamp should be facing toward the rear of the miter saw. 2. Rotate the work piece clamp 180º (toward the front of the miter saw). The clamp should now be securely locked in the receptacle and cannot be removed in this position. 3. Adjust the work piece clamp to firmly clamp the work piece in place. 4. To remove the work piece clamp, rotate the work piece clamp 180º toward the rear of the miter saw and then remove the clamp. 18
-
 1
1 -
2
-
3
-
4
-
5
-
6
-
7
-
8
-
9
-
10
-
11
-
12
-
13
-
 14
14 -
 15
15 -
 16
16 -
 17
17 -
 18
18 -
 19
19 -
 20
20 -
 21
21 -
 22
22 -
 23
23 -
 24
24 -
25
-
26
-
27
-
28
-
29
-
30
-
31
-
32
-
33
-
34
-
35
-
36
 |
 |