Ridgid MS255SR Operation Manual - Page 22
Slide Cuts
 |
View all Ridgid MS255SR manuals
Add to My Manuals
Save this manual to your list of manuals |
Page 22 highlights
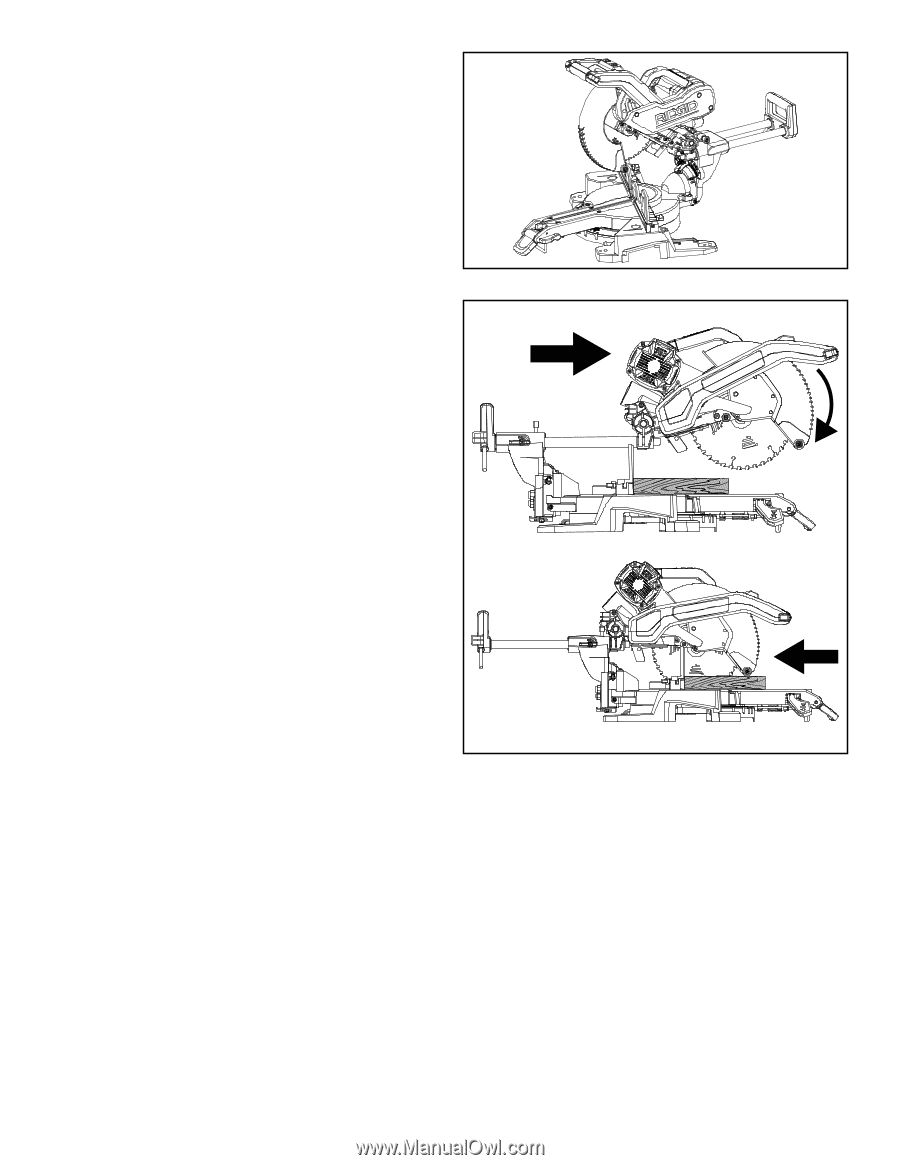
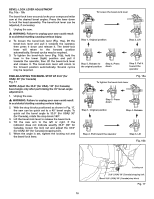
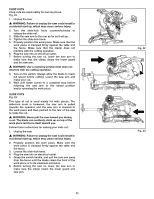
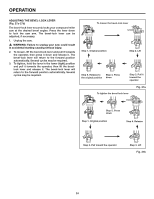
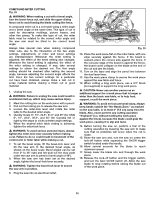
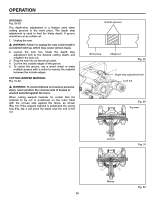
CHOP CUTS Chop cuts are used mainly for narrow pieces. Fig. 22 1. Unplug the saw. � WARNING: Failure to unplug the saw could result in accidental start up, which may cause serious injury. 2. Turn the slide-lock knob counterclockwise to release the slide rail. 3. Slide the saw arm to the rear as far as it will go. 4. Tighten the slide-lock knob. 5. Properly position the work piece. Make sure that the work piece is clamped firmly against the table and the fence. Make sure that the clamp does not interfere with the cutting operation. 6. Plug the saw into an electrical outlet. 7. Before turning the saw on, lower the saw arm to make sure that the clamp clears the lower guard and the saw arm. � WARNING: Use a clamping position that does not interfere with the cutting operation. 8. Turn on the switch. Always allow the blade to reach full speed before cutting. Lower the saw arm and make your cut. 9. Wait until blade comes to a complete stop before returning the saw arm to the raised position and/or removing the work piece. SLIDE CUTS Fig. 23 This type of cut is used mainly for wide pieces. The slide-lock knob is loosened, the saw arm is pulled towards the operator, and the saw arm is lowered to the work piece and then pushed to the rear of the saw to make the cut. � WARNING: Never pull the saw toward you during a cut. The blade can suddenly climb up on top of the work piece and force itself toward you. Follow these instructions for making your slide cut: 1. Unplug the saw. � WARNING: Failure to unplug the saw could result in accidental start up, which may cause serious injury. 2. Properly position the work piece. Make sure the work piece is clamped firmly against the table and the fence. 3. Loosen the slide-lock knob. 4. Plug the saw into an electrical outlet. 5. Grasp the switch handle, and pull the saw arm away from the fence until the blade clears the front of the work piece or to its maximum extension. 6. Before turning the saw on, lower the saw arm to make sure the clamp clears the lower guard and saw arm. 21 Fig. 22 Fig. 23
-
 1
1 -
2
-
3
-
4
-
5
-
6
-
7
-
8
-
9
-
10
-
11
-
12
-
13
-
14
-
15
-
16
-
 17
17 -
 18
18 -
 19
19 -
 20
20 -
 21
21 -
 22
22 -
 23
23 -
 24
24 -
 25
25 -
 26
26 -
 27
27 -
28
-
29
-
30
-
31
-
32
-
33
-
34
-
35
-
36
 |
 |