Ridgid MS255SR Operation Manual - Page 21
How To Use The Dual Laser Line
 |
View all Ridgid MS255SR manuals
Add to My Manuals
Save this manual to your list of manuals |
Page 21 highlights
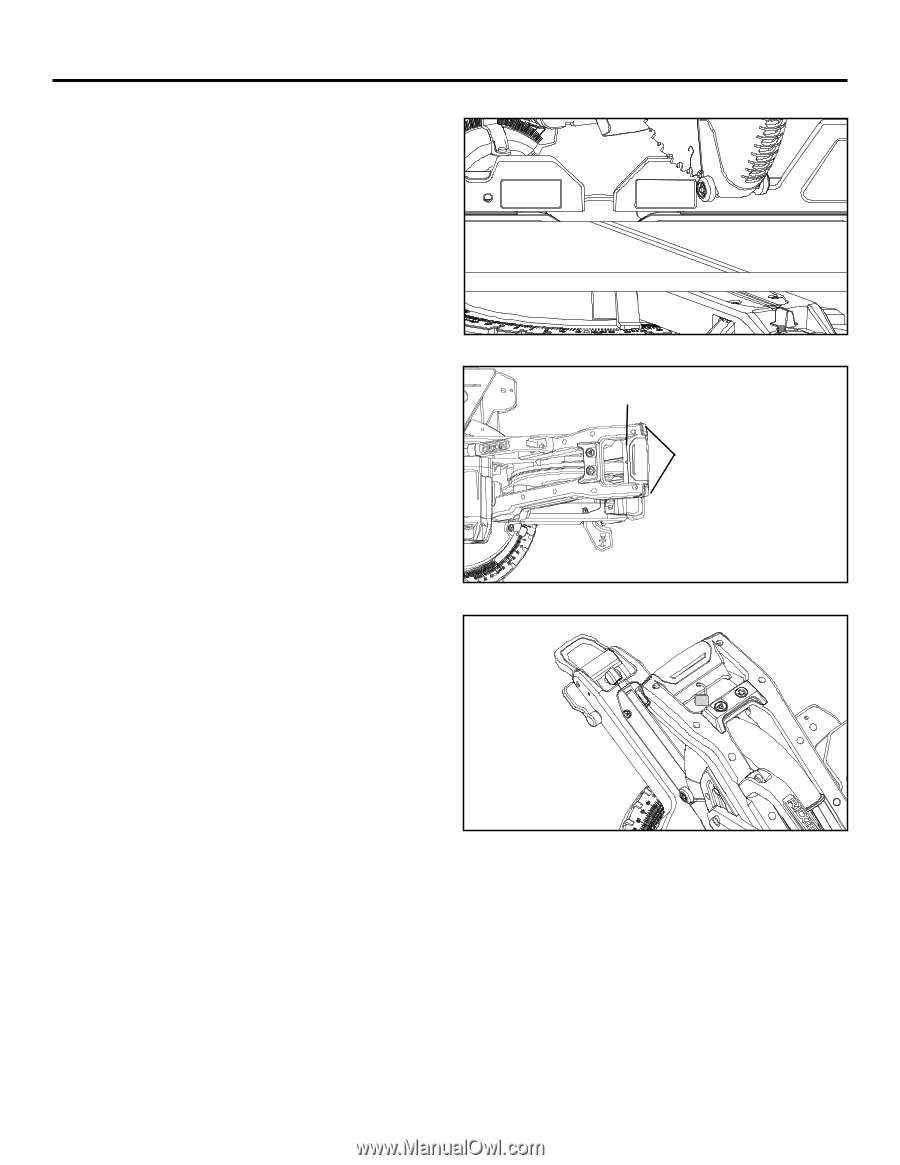
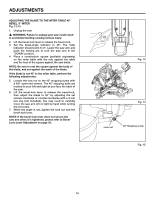
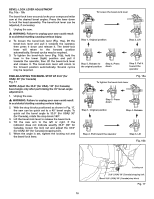
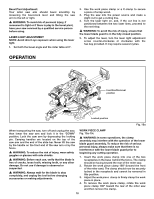
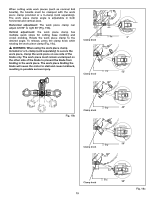
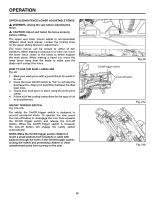
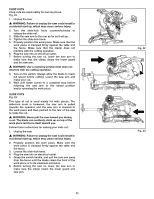
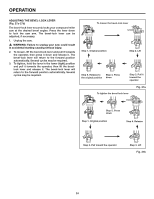
OPERATION UPPER SLIDING FENCE/LOWER ADJUSTABLE FENCE � WARNING: Unplug the saw before adjusting the fence. � CAUTION: Adjust and fasten the fence properly before cutting. The upper and lower fences adjust to accommodate different sized work pieces. Loosen the locking knob on the upper sliding fences to adjust them. The lower fences can be moved to either of two positions. When making a crosscut or a miter cut, move the lower fence closer to the blade to better support the work piece. When making a bevel cut, move the lower fence away from the blade to make sure the blade can't contact the fence. HOW TO USE THE DUAL LASER LINE Fig. 20 1. Mark your work piece with a pencil line at the point to be cut. 2. Press the laser On/Off switch to "On" to activate the dual laser line. Align your pencil line between the dual laser lines. 3. Clamp your work piece in place using the work piece clamp. 4. Follow all of the cutting instructions for the type of cut to be performed. ON/OFF TRIGGER SWITCH Fig. 21a-21b For safety, the On/Off trigger switch is designed to prevent accidental starts. To operate the saw, press the lock-off button to disengage the lock, then squeeze the On/Off trigger switch and release the lock-off button. When the On/Off trigger switch is released, the lock-off button will engage the safety switch automatically. NOTE: Make the On/Off trigger switch childproof. Insert a small padlock (not included) or cable with padlock through the holes in the On/Off trigger switch, locking the switch and preventing children or other unauthorized users from turning on the saw. On/Off trigger switch Fig. 20 Lock off button Fig. 21a Fig. 21b 20
-
 1
1 -
2
-
3
-
4
-
5
-
6
-
7
-
8
-
9
-
10
-
11
-
12
-
13
-
14
-
15
-
 16
16 -
 17
17 -
 18
18 -
 19
19 -
 20
20 -
 21
21 -
 22
22 -
 23
23 -
 24
24 -
 25
25 -
 26
26 -
27
-
28
-
29
-
30
-
31
-
32
-
33
-
34
-
35
-
36
 |
 |