Ridgid MS255SR Operation Manual - Page 28
Cutting Base Molding - stand
 |
View all Ridgid MS255SR manuals
Add to My Manuals
Save this manual to your list of manuals |
Page 28 highlights
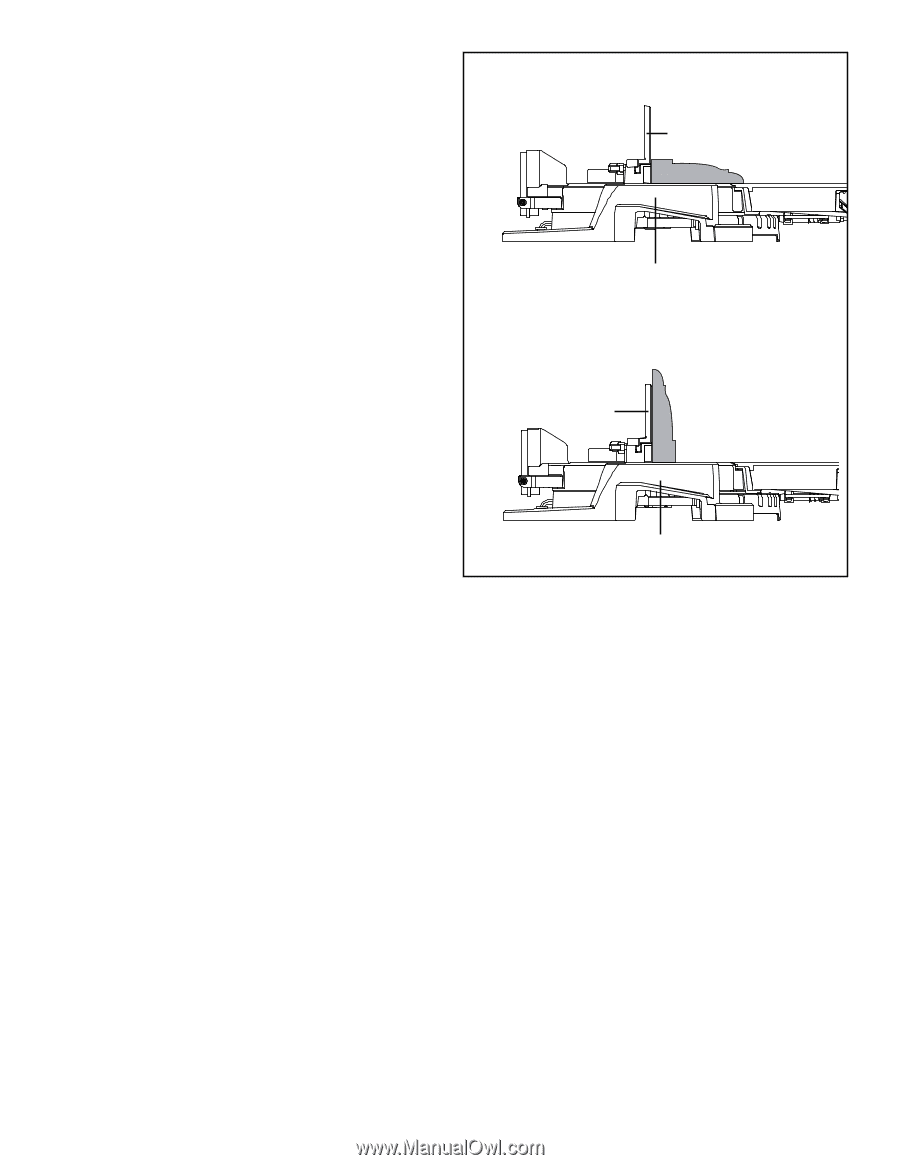
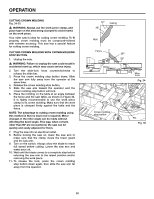
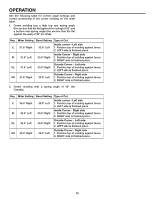
CUTTING BASE MOLDING Fig. 33 Base moldings and many other moldings can be cut on a miter saw. The setup of the saw depends on the base molding characteristics and applications, as shown. Perform practice cuts on scrap materials to achieve the best result. 1. Always make sure that the molding rests firmly against the fence and table. Use the work piece clamp provided or use C-clamps (not supplied), and place tape on the area being clamped to avoid marks on the work piece. 2. Reduce splintering by taping the cut area prior to making the cut. Mark the cutting line directly on the tape. Splintering typically happens due to incorrect blade style, dull blade, thinness of work piece, or improperly dried wood. NOTE: Always perform a dry-run cut so you can determine if the operation being attempted is possible before power is applied to miter saw. 3. Place the work piece flat on the miter table with one edge securely against the fence. If the board is warped, place the convex side against the fence. If the concave edge of the board is against the fence, the board could collapse on the blade at the end of the cut and jam the blade. 4. Align your pencil line between the dual laser lines. 5. Use extra support when cutting long work pieces. 6. Carefully follow all instructions for applicable miter, bevel or compound cuts. Molding lying flat on miter table (before clamping) Miter at 0° Fence Miter saw Molding standing up against fence (before clamping) Fence Bevel at 0° Miter saw Fig. 33 27
-
 1
1 -
2
-
3
-
4
-
5
-
6
-
7
-
8
-
9
-
10
-
11
-
12
-
13
-
14
-
15
-
16
-
17
-
18
-
19
-
20
-
21
-
22
-
 23
23 -
 24
24 -
 25
25 -
 26
26 -
 27
27 -
 28
28 -
 29
29 -
 30
30 -
 31
31 -
 32
32 -
 33
33 -
34
-
35
-
36
 |
 |