Ridgid MS255SR Operation Manual - Page 27
Cutting Warped Material
 |
View all Ridgid MS255SR manuals
Add to My Manuals
Save this manual to your list of manuals |
Page 27 highlights
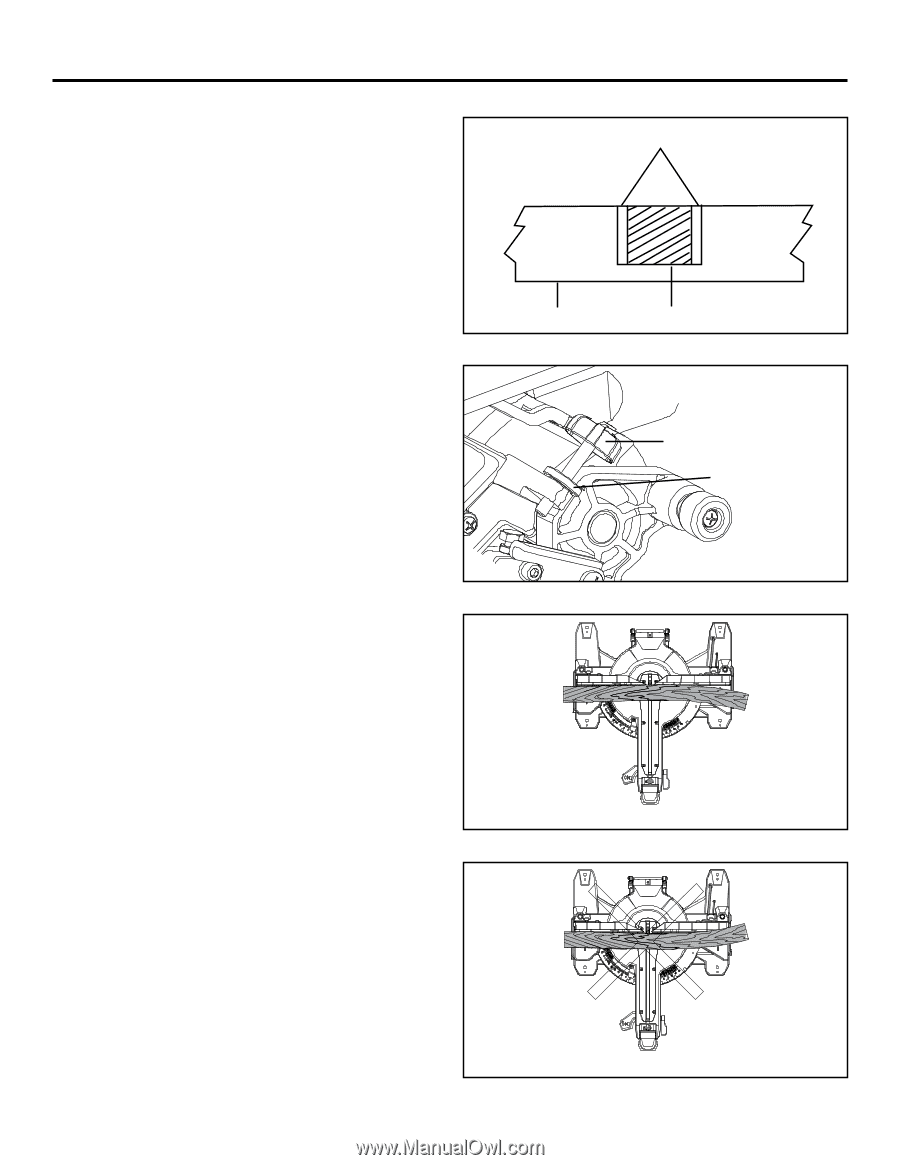
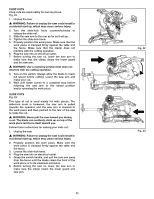
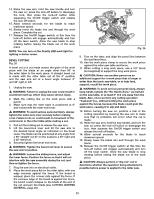
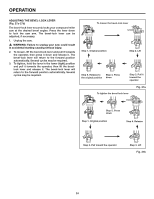
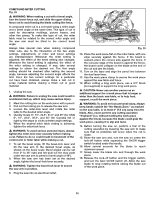
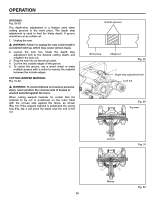
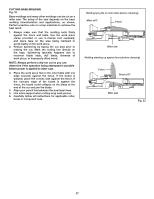
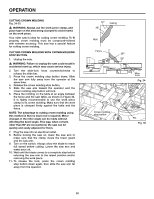
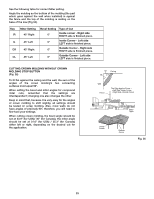
OPERATION GROOVES Fig. 29-30 The depth-stop adjustment is a feature used when cutting grooves in the work piece. The depth stop adjustment is used to limit the blade depth. A groove should be cut as a slide cut. 1. Unplug the saw. � WARNING: Failure to unplug the saw could result in accidental start up, which may cause serious injury. 2. Loosen the lock nut, rotate the depth stop adjustment bolt to the desired cutting depth, and retighten the lock nut. 3. Plug the saw into an electrical outlet. 4. Cut the two outside edges of the groove. 5. To create the groove, use a wood chisel or make multiple passes with a router to remove the material between the outside edges. CUTTING WARPED MATERIAL Fig. 31-32 � WARNING: To avoid kickback and serious personal injury, never position the concave side of bowed or warped material against the fence. When cutting warped material, be certain that the material to be cut is positioned on the miter table with the convex side against the fence, as shown (Fig. 31). If the warped material is positioned the wrong way (Fig. 32), it will pinch the blade near the end of the cut. Outside grooves Work piece Chisel cut Fig. 29 Depth stop adjustment bolt Lock nut Fig. 30 Top view Correct Fig. 31 Wrong Fig. 32 26
-
 1
1 -
2
-
3
-
4
-
5
-
6
-
7
-
8
-
9
-
10
-
11
-
12
-
13
-
14
-
15
-
16
-
17
-
18
-
19
-
20
-
21
-
 22
22 -
 23
23 -
 24
24 -
 25
25 -
 26
26 -
 27
27 -
 28
28 -
 29
29 -
 30
30 -
 31
31 -
 32
32 -
33
-
34
-
35
-
36
 |
 |