Samsung CLP-775 User Manual (user Manual) (ver.1.01) (English) - Page 41
Using power saving feature, Setting the default tray and paper, Changing font setting
 |
View all Samsung CLP-775 manuals
Add to My Manuals
Save this manual to your list of manuals |
Page 41 highlights
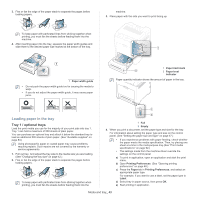
Using power saving feature When you are not using the machine for a while, use this feature to save power. 1. Press on the control panel. 2. Press up/down arrow to highlight System Setup and press OK. 3. Press up/down arrow to highlight Power Save and press OK. 4. Press up/down arrow to select the time you want. 5. press OK to save the selection. 6. Press to return to ready mode. When printing continuously (over 200 pages), power save mode is extended to about 30 minutes to adjust image. Setting the default tray and paper You can select the tray and paper you would like to keep using for printing job. (See "Paper" on page 57.) In the control panel 1. Press on the control panel. 2. Press up/down arrow to highlight Paper and press OK. 3. Press up/down arrow to select the paper tray you want press OK. 4. Press up/down arrow to highlight Paper Size and press OK. 5. Press up/down arrow to select the paper size you want. 6. Press OK to save the selection. 7. Press up/down arrow to highlight Paper Type and press OK. 8. Press up/down arrow to select the paper type you want. 9. Press OK to save the selection. 10. Press . 11. Press up/down arrow to highlight Paper Source and press OK. 12. Press up/down arrow to select the paper tray you want. 13. press OK to save the selection. 14. Press to return to ready mode. In the computer Windows 1. Click the Windows Start menu. 2. For Windows 2000, select Settings > Printers. • For Windows XP/2003, select Printers and Faxes. • For Windows 2008/Vista, select Control Panel > Hardware and Sound > Printers. • For Windows 7, select Control Panel > Hardware and Sound > Devices and Printers. • For Windows Server 2008 R2, select Control Panel > Hardware > Devices and Printers. 3. Right-click your machine. 4. For Windows XP/2003/2008/Vista, press Printing Preferences. For Windows 7 and Windows Server 2008 R2, from context menus, select the Printing Preferences. If Printing Preferences item has ► mark, you can select other printer drivers connected with selected printer. 5. Click Paper tab. 6. Select tray and its options, such as paper size and type. 7. Press OK. Macintosh Macintosh does not support this function. Macintosh users need to change the default setting manually each time they want to print using other settings. 1. Open a Macintosh application and select the file you want to print. 2. Open the File menu and click Print. 3. Go to Paper Feed pane. 4. Set appropriate tray from which you want to print. 5. Go to Paper pane. 6. Set paper type to correspond to the paper loaded in the tray from which you want to print. 7. Click Print to print. Changing font setting Your machine has preset the font for your region or country. If you want to change the font or set the font for special condition, such as the DOS environment, you can change the font setting from Device Settings or Emulation section. • For Windows user, see "Device Settings" on page 62. • For Macintosh, Linux, or Unix OS user, see "Using Smart Panel (Macintosh and Linux only)" on page 62. Following information shows the proper font list for corresponding languages. • Russian: CP866, ISO 8859/5 Latin Cyrillic • Hebrew: Hebrew 15Q, Hebrew-8, Hebrew-7 (Israel only) • Greek: ISO 8859/7 Latin Greek, PC-8 Latin/Greek • Arabic & Farsi: HP Arabic-8, Windows Arabic, Code Page 864, Farsi, ISO 8859/6 Latin Arabic • OCR: OCR-A, OCR-B Basic setup_ 41
-
 1
1 -
2
-
3
-
4
-
5
-
6
-
7
-
8
-
9
-
10
-
11
-
12
-
13
-
14
-
15
-
16
-
17
-
18
-
19
-
20
-
21
-
22
-
23
-
24
-
25
-
26
-
27
-
28
-
29
-
30
-
31
-
32
-
33
-
34
-
35
-
 36
36 -
 37
37 -
 38
38 -
 39
39 -
 40
40 -
 41
41 -
 42
42 -
 43
43 -
 44
44 -
 45
45 -
 46
46 -
47
-
48
-
49
-
50
-
51
-
52
-
53
-
54
-
55
-
56
-
57
-
58
-
59
-
60
-
61
-
62
-
63
-
64
-
65
-
66
-
67
-
68
-
69
-
70
-
71
-
72
-
73
-
74
-
75
-
76
-
77
-
78
-
79
-
80
-
81
-
82
-
83
-
84
-
85
-
86
-
87
-
88
-
89
-
90
-
91
-
92
-
93
-
94
-
95
-
96
-
97
-
98
-
99
-
100
-
101
 |
 |
