Samsung S34E790C User Manual - Page 42
PIP/PBP
 |
View all Samsung S34E790C manuals
Add to My Manuals
Save this manual to your list of manuals |
Page 42 highlights
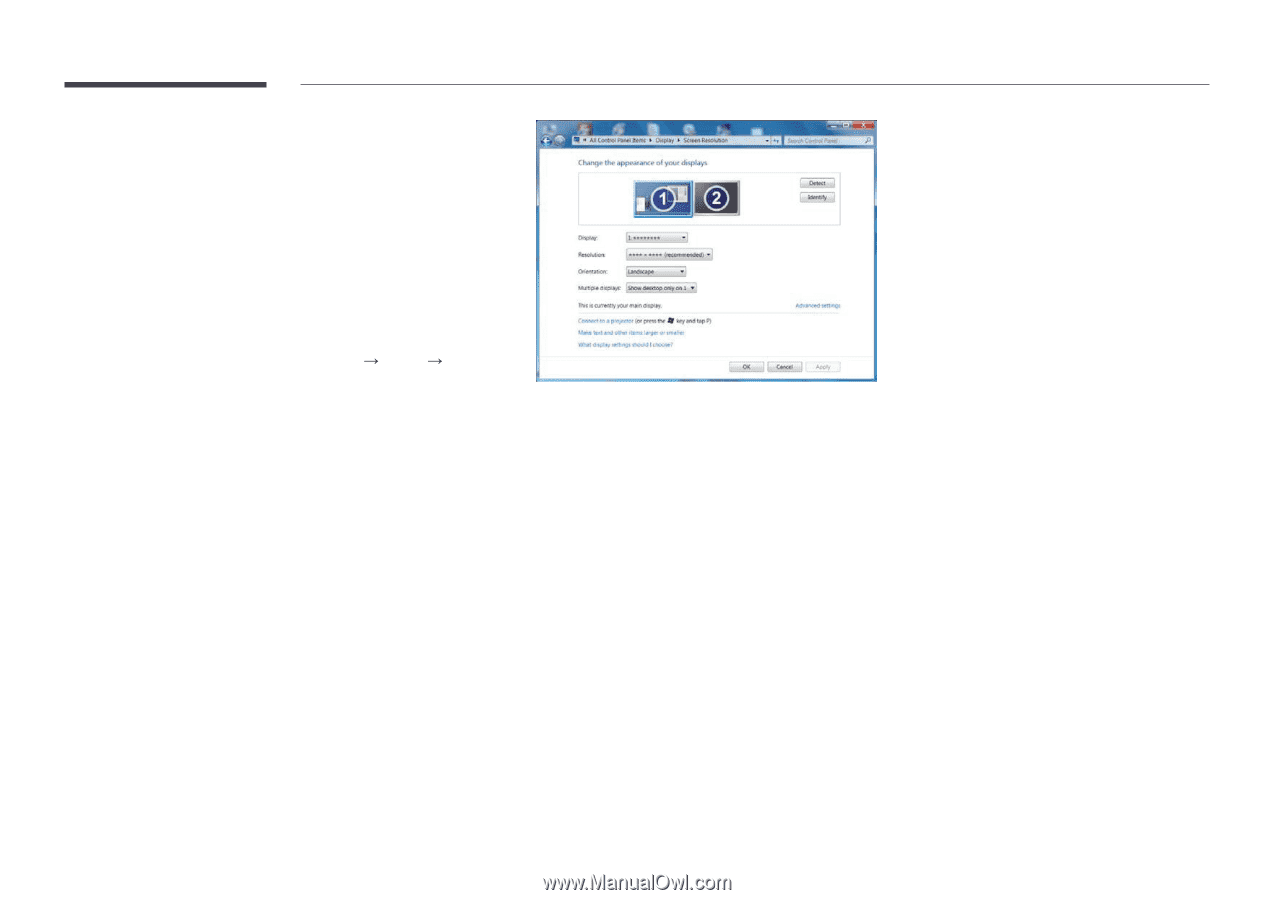
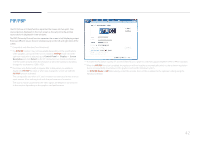
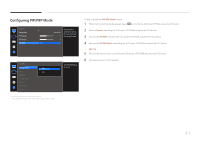
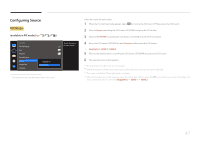
PIP/PBP The PIP (Picture in Picture) function separates the screen into two parts. One source device is displayed on the main screen at the same time the another source device is displayed in inset windows. The PBP (Picture by Picture) function separates the screen in half displaying output from two different source devices simultaneously on the left and right sides of the screen. ――Compatible with Windows7 and Windows8. ――The PIP/PBP function may not be available depending on the specifications of the graphics card used. If the screen is blank in PIP/PBP mode when the optimum resolution is selected, go to Control Panel Display Screen Resolution and click Detect on the PC. (Instructions are based on Windows 7.) If the screen is blank when the resolution is set to the optimum resolution, change the resolution to 1280 x 1024. ――The screen may flicker briefly or appear after a delay when you enable or disable the PIP/PBP function or when you change the screen size with the PIP/PBP function activated. This can typically arise when a PC and a monitor are connected to two or more input sources. It has nothing to do with the performance of a monitor. The issue is mainly caused when the video signals are delayed in transmission to the monitor depending on the graphics card performance. ――To maximize the picture quality, it is recommended to use a graphics card that supports WQHD+ (3440 x 1440) resolution. ――When the PIP/PBP function is enabled, the resolution will not be able to automatically switch to the optimum resolution due to a compatibility issue between the graphics card and the Windows system. Set PIP/PBP Mode to Off. Alternatively, restart the monitor, then set the resolution to the optimum setting using the Windows interface. 42
-
 1
1 -
2
-
3
-
4
-
5
-
6
-
7
-
8
-
9
-
10
-
11
-
12
-
13
-
14
-
15
-
16
-
17
-
18
-
19
-
20
-
21
-
22
-
23
-
24
-
25
-
26
-
27
-
28
-
29
-
30
-
31
-
32
-
33
-
34
-
35
-
36
-
 37
37 -
 38
38 -
 39
39 -
 40
40 -
 41
41 -
 42
42 -
 43
43 -
 44
44 -
 45
45 -
 46
46 -
 47
47 -
48
-
49
-
50
-
51
-
52
-
53
-
54
-
55
-
56
-
57
-
58
-
59
-
60
-
61
-
62
-
63
-
64
-
65
-
66
-
67
-
68
-
69
-
70
-
71
-
72
-
73
-
74
-
75
-
76
-
77
-
78
-
79
-
80
-
81
-
82
-
83
-
84
-
85
-
86
-
87
-
88
-
89
 |
 |