Samsung SGH-A107 User Manual (user Manual) (ver.f5) (English) - Page 40
Understanding Your Address Book, Using Contact List, Contacts from, Address, Select - sim card
 |
UPC - 411378099617
View all Samsung SGH-A107 manuals
Add to My Manuals
Save this manual to your list of manuals |
Page 40 highlights
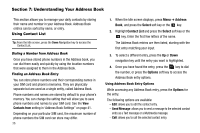
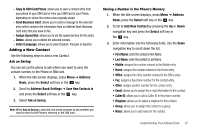
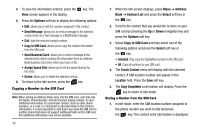
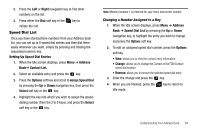
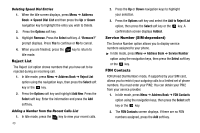
Section 7: Understanding Your Address Book This section allows you to manage your daily contacts by storing their name and number in your Address Book. Address Book entries can be sorted by name, or entry. Using Contact List Tip: From the Idle screen, press the Down Navigation key to access the Contact List. Dialing a Number from Address Book Once you have stored phone numbers in the Address book, you can dial them easily and quickly by using the location numbers that were assigned to them in the Address Book. Finding an Address Book Entry You can store phone numbers and their corresponding names in your SIM card and phone's memories. They are physically separate but are used as a single entity, called Address Book. Phone numbers and names are stored by default to your phone's memory. You can change the setting that will allow you to save phone numbers and names to your SIM card. See the View Contacts from setting in 'Address Book Settings" on page 41. Depending on your particular SIM card, the maximum number of phone numbers the SIM card can store may differ. 36 1. When the Idle screen displays, press Menu ➔ Address Book, and press the Select soft key or the key. 2. Highlight Contact List and press the Select soft key or the key. Enter the first few letters of the name. The Address Book entries are then listed, starting with the first entry matching your input. 3. To select a different entry, press the Up or Down navigation key until the entry you want is highlighted. 4. Once you have found the entry, press the key to dial the number, or press the Options soft key to access the Address Book entry options. Using Address Book Entry Options While accessing any Address Book entry, press the Options for the entry. The following options are available: - Edit: allows you to edit the contact entry. - Send Message: allows you to send a message to the selected contact entry as a Text message or a Multimedia message. - Call: allows you to call the selected contact entry.
-
 1
1 -
2
-
3
-
4
-
5
-
6
-
7
-
8
-
9
-
10
-
11
-
12
-
13
-
14
-
15
-
16
-
17
-
18
-
19
-
20
-
21
-
22
-
23
-
24
-
25
-
26
-
27
-
28
-
29
-
30
-
31
-
32
-
33
-
34
-
 35
35 -
 36
36 -
 37
37 -
 38
38 -
 39
39 -
 40
40 -
 41
41 -
 42
42 -
 43
43 -
 44
44 -
 45
45 -
46
-
47
-
48
-
49
-
50
-
51
-
52
-
53
-
54
-
55
-
56
-
57
-
58
-
59
-
60
-
61
-
62
-
63
-
64
-
65
-
66
-
67
-
68
-
69
-
70
-
71
-
72
-
73
-
74
-
75
-
76
-
77
-
78
-
79
-
80
-
81
-
82
-
83
-
84
-
85
-
86
-
87
-
88
-
89
-
90
-
91
-
92
-
93
-
94
-
95
-
96
-
97
-
98
-
99
-
100
-
101
-
102
-
103
-
104
-
105
 |
 |