Samsung SGH-A827 User Manual - Page 78
Connected, SGH-A827 - Phone, SGH-A827 Card, Start Sync, synchronization in progress
 |
View all Samsung SGH-A827 manuals
Add to My Manuals
Save this manual to your list of manuals |
Page 78 highlights
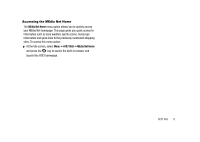
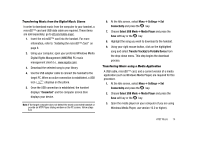
4. Use the USB adapter cable (sold separately) to connect the handset to the target PC. When an active connection is established, a USB icon ( ) displays on the screen. 5. Once the USB connection is established, the handset displays "Connected" and the computer screen then displays your device. Note: If the target computer does not detect the newly connected handset or provide an MTP Player dialog window on the PC screen, please follow steps 6-10 from the previous see "Transferring Music from the Digital Music Stores" on page 74. Important!: While this procedure specifies Windows Media Player (version 10.0 or higher), other third-party applications can be used. Refer to the Help files of your specific application for details. 6. From within the Windows Media Player application, click on the Sync tab. Previously downloaded songs are then listed on the left side of the application. 7. Choose the destination location for the media files. The SGH-A827 - Phone and SGH-A827 Card entries both display in a drop-down list on the right side of the screen. This 75 selection determines whether the audio files are synchronized with the Phone or with the inserted memory card. Important!: If there are no items present in the playlist, click the Edit Playlist button and begin adding the music files from among the various media categories. See 'Adding songs to a Playlist" on page 79. 8. Click on the checkmark boxes (to the left of the song entry) to select the song(s) you want to synchronize to your handset. 9. Click the Start Sync button at the upper right corner of the application to download the selected songs to your handset. A "synchronization in progress" message displays on the screen. Do not unplug the handset during this process. Once complete, a Music folder displays below the device entry on the right of the Sync tab. Note: The maximum number of songs you can synchronize between your phone and your PC is 700. 10. It is now safe to unplug the USB connector from the handset.
-
 1
1 -
2
-
3
-
4
-
5
-
6
-
7
-
8
-
9
-
10
-
11
-
12
-
13
-
14
-
15
-
16
-
17
-
18
-
19
-
20
-
21
-
22
-
23
-
24
-
25
-
26
-
27
-
28
-
29
-
30
-
31
-
32
-
33
-
34
-
35
-
36
-
37
-
38
-
39
-
40
-
41
-
42
-
43
-
44
-
45
-
46
-
47
-
48
-
49
-
50
-
51
-
52
-
53
-
54
-
55
-
56
-
57
-
58
-
59
-
60
-
61
-
62
-
63
-
64
-
65
-
66
-
67
-
68
-
69
-
70
-
71
-
72
-
 73
73 -
 74
74 -
 75
75 -
 76
76 -
 77
77 -
 78
78 -
 79
79 -
 80
80 -
 81
81 -
 82
82 -
 83
83 -
84
-
85
-
86
-
87
-
88
-
89
-
90
-
91
-
92
-
93
-
94
-
95
-
96
-
97
-
98
-
99
-
100
-
101
-
102
-
103
-
104
-
105
-
106
-
107
-
108
-
109
-
110
-
111
-
112
-
113
-
114
-
115
-
116
-
117
-
118
-
119
-
120
-
121
-
122
-
123
-
124
-
125
-
126
-
127
-
128
-
129
-
130
-
131
-
132
-
133
-
134
-
135
-
136
-
137
-
138
-
139
-
140
-
141
-
142
-
143
-
144
-
145
-
146
-
147
-
148
-
149
-
150
-
151
-
152
-
153
-
154
-
155
-
156
-
157
-
158
-
159
-
160
-
161
-
162
-
163
-
164
 |
 |
