Samsung SGH-T669 User Manual (user Manual) (ver.f6) (English) - Page 75
Understanding Your Contacts List, Using Mobile Address Book
 |
UPC - 610214622112
View all Samsung SGH-T669 manuals
Add to My Manuals
Save this manual to your list of manuals |
Page 75 highlights
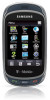
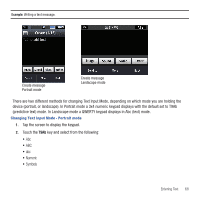
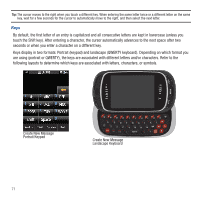
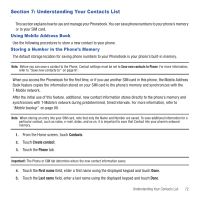
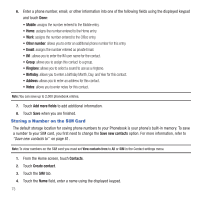
Section 7: Understanding Your Contacts List This section explains how to use and manage your Phonebook. You can save phone numbers to your phone's memory or to your SIM card. Using Mobile Address Book Use the following procedures to store a new contact to your phone. Storing a Number in the Phone's Memory The default storage location for saving phone numbers to your Phonebook is your phone's built-in memory. Note: Before you can save a contact to the Phone, Contact settings must be set to Save new contacts to Phone. For more information, refer to "Save new contacts to" on page 81. When you access the Phonebook for the first time, or if you use another SIM card in this phone, the Mobile Address Book feature copies the information stored on your SIM card to the phone's memory and synchronizes with the T-Mobile network. After the initial use of this feature, additional, new contact information stores directly to the phone's memory and synchronizes with T-Mobile's network during predetermined, timed intervals. For more information, refer to "Mobile backup" on page 80. Note: When storing an entry into your SIM card, note that only the Name and Number are saved. To save additional information for a particular contact, such as notes, e-mail, dates, and so on, it is important to save that Contact into your phone's onboard memory. 1. From the Home screen, touch Contacts. 2. Touch Create contact. 3. Touch the Phone tab. Important!: The Phone or SIM tab determine where the new contact information saves. 4. Touch the First name field, enter a first name using the displayed keypad and touch Done. 5. Touch the Last name field, enter a last name using the displayed keypad and touch Done. Understanding Your Contacts List 72
-
 1
1 -
2
-
3
-
4
-
5
-
6
-
7
-
8
-
9
-
10
-
11
-
12
-
13
-
14
-
15
-
16
-
17
-
18
-
19
-
20
-
21
-
22
-
23
-
24
-
25
-
26
-
27
-
28
-
29
-
30
-
31
-
32
-
33
-
34
-
35
-
36
-
37
-
38
-
39
-
40
-
41
-
42
-
43
-
44
-
45
-
46
-
47
-
48
-
49
-
50
-
51
-
52
-
53
-
54
-
55
-
56
-
57
-
58
-
59
-
60
-
61
-
62
-
63
-
64
-
65
-
66
-
67
-
68
-
69
-
 70
70 -
 71
71 -
 72
72 -
 73
73 -
 74
74 -
 75
75 -
 76
76 -
 77
77 -
 78
78 -
 79
79 -
 80
80 -
81
-
82
-
83
-
84
-
85
-
86
-
87
-
88
-
89
-
90
-
91
-
92
-
93
-
94
-
95
-
96
-
97
-
98
-
99
-
100
-
101
-
102
-
103
-
104
-
105
-
106
-
107
-
108
-
109
-
110
-
111
-
112
-
113
-
114
-
115
-
116
-
117
-
118
-
119
-
120
-
121
-
122
-
123
-
124
-
125
-
126
-
127
-
128
-
129
-
130
-
131
-
132
-
133
-
134
-
135
-
136
-
137
-
138
-
139
-
140
-
141
-
142
-
143
-
144
-
145
-
146
-
147
-
148
-
149
-
150
-
151
-
152
-
153
-
154
-
155
-
156
-
157
-
158
-
159
-
160
-
161
-
162
-
163
-
164
-
165
-
166
-
167
-
168
-
169
-
170
-
171
-
172
-
173
-
174
-
175
-
176
-
177
-
178
-
179
-
180
-
181
-
182
-
183
-
184
-
185
-
186
-
187
-
188
-
189
-
190
-
191
-
192
-
193
-
194
-
195
-
196
-
197
-
198
-
199
-
200
-
201
-
202
-
203
-
204
-
205
-
206
-
207
-
208
-
209
-
210
-
211
-
212
-
213
-
214
-
215
-
216
-
217
 |
 |
