Samsung SGH-T669 User Manual (user Manual) (ver.f6) (English) - Page 76
Storing a Number on the SIM Card, Other number, Add more fields, Save new contacts, Contacts
 |
UPC - 610214622112
View all Samsung SGH-T669 manuals
Add to My Manuals
Save this manual to your list of manuals |
Page 76 highlights
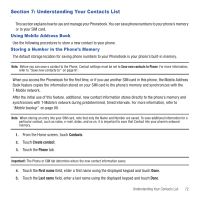
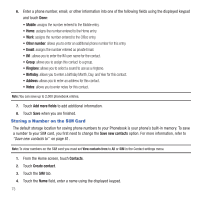
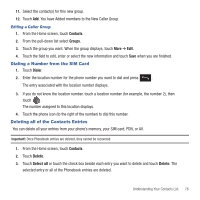
6. Enter a phone number, email, or other information into one of the following fields using the displayed keypad and touch Done: • Mobile: assigns the number entered to the Mobile entry. • Home: assigns the number entered to the Home entry. • Work: assigns the number entered to the Office entry. • Other number: allows you to enter an additional phone number for this entry. • Email: assigns the number entered as private Email. • IM : allows you to enter the IM user name for the contact. • Group: allows you to assign this contact to a group. • Ringtone: allows you to select a sound to use as a ringtone. • Birthday: allows you to enter a birthday Month, Day, and Year for this contact. • Address: allows you to enter an address for this contact. • Notes: allows you to enter notes for this contact. Note: You can save up to 2,000 phonebook entries. 7. Touch Add more fields to add additional information. 8. Touch Save when you are finished. Storing a Number on the SIM Card The default storage location for saving phone numbers to your Phonebook is your phone's built-in memory. To save a number to your SIM card, you first need to change the Save new contacts option. For more information, refer to "Save new contacts to" on page 81. Note: To view numbers on the SIM card you must set View contacts from to All or SIM in the Contact settings menu. 1. From the Home screen, touch Contacts. 2. Touch Create contact. 3. Touch the SIM tab. 4. Touch the Name field, enter a name using the displayed keypad. 73
-
 1
1 -
2
-
3
-
4
-
5
-
6
-
7
-
8
-
9
-
10
-
11
-
12
-
13
-
14
-
15
-
16
-
17
-
18
-
19
-
20
-
21
-
22
-
23
-
24
-
25
-
26
-
27
-
28
-
29
-
30
-
31
-
32
-
33
-
34
-
35
-
36
-
37
-
38
-
39
-
40
-
41
-
42
-
43
-
44
-
45
-
46
-
47
-
48
-
49
-
50
-
51
-
52
-
53
-
54
-
55
-
56
-
57
-
58
-
59
-
60
-
61
-
62
-
63
-
64
-
65
-
66
-
67
-
68
-
69
-
70
-
 71
71 -
 72
72 -
 73
73 -
 74
74 -
 75
75 -
 76
76 -
 77
77 -
 78
78 -
 79
79 -
 80
80 -
 81
81 -
82
-
83
-
84
-
85
-
86
-
87
-
88
-
89
-
90
-
91
-
92
-
93
-
94
-
95
-
96
-
97
-
98
-
99
-
100
-
101
-
102
-
103
-
104
-
105
-
106
-
107
-
108
-
109
-
110
-
111
-
112
-
113
-
114
-
115
-
116
-
117
-
118
-
119
-
120
-
121
-
122
-
123
-
124
-
125
-
126
-
127
-
128
-
129
-
130
-
131
-
132
-
133
-
134
-
135
-
136
-
137
-
138
-
139
-
140
-
141
-
142
-
143
-
144
-
145
-
146
-
147
-
148
-
149
-
150
-
151
-
152
-
153
-
154
-
155
-
156
-
157
-
158
-
159
-
160
-
161
-
162
-
163
-
164
-
165
-
166
-
167
-
168
-
169
-
170
-
171
-
172
-
173
-
174
-
175
-
176
-
177
-
178
-
179
-
180
-
181
-
182
-
183
-
184
-
185
-
186
-
187
-
188
-
189
-
190
-
191
-
192
-
193
-
194
-
195
-
196
-
197
-
198
-
199
-
200
-
201
-
202
-
203
-
204
-
205
-
206
-
207
-
208
-
209
-
210
-
211
-
212
-
213
-
214
-
215
-
216
-
217
 |
 |