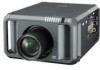
Sanyo PDG-DET100L Instruction Manual, PDG-DET100L POA-MD13NET2 - Page 16
Network configuration (Type1)
 |
UPC - 086483074684
View all Sanyo PDG-DET100L manuals
Add to My Manuals
Save this manual to your list of manuals |
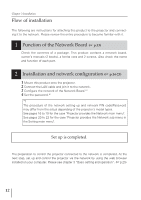
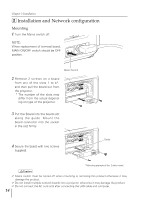
Page 16 highlights
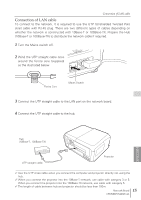
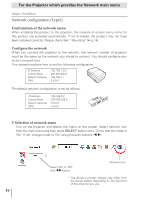
For the Projector which provides the Network main menu Chapter 2 Installation Network configuration (Type1) Confirmation of the network menu When installing this product to the projector, the network on-screen menu items for this product are activated automatically. If not activated, the product may not have been installed correctly. Please check item "Mounting" (☞ p.14). Configure the network When you connect the projector to the network, the network number of projector must be the same as the network you intend to connect. You should configure projector's network first. This example explains how to set the following configuration. IP Address Subnet Mask Default Gateway DNS : 192.168.1.201 : 255.255.255.0 : 192.168.1.1 : 0.0.0.0 The default network configuration is set as follows. IP Address Subnet Mask Default Gateway DNS : 192.168.0.2 : 255.255.255.0 : 0.0.0.0 : 0.0.0.0 1 Selection of network menu Turn on the projector and display the menu on the screen. Select network icon from the main menu and then press SELECT button once. Check that the mode is "On". If not, change mode to "On" using the point buttons (7 8). Select "On" or "Off" with 7,8 button Network icon * The above on-screen display may differ from the actual display depending on the functions of the projector you use. 16
-
 1
1 -
2
-
3
-
4
-
5
-
6
-
7
-
8
-
9
-
10
-
 11
11 -
 12
12 -
 13
13 -
 14
14 -
 15
15 -
 16
16 -
 17
17 -
 18
18 -
 19
19 -
 20
20 -
 21
21 -
22
-
23
-
24
-
25
-
26
-
27
-
28
-
29
-
30
-
31
-
32
-
33
-
34
-
35
-
36
-
37
-
38
-
39
-
40
-
41
-
42
-
43
-
44
-
45
-
46
-
47
-
48
-
49
-
50
-
51
-
52
-
53
-
54
-
55
-
56
-
57
-
58
-
59
-
60
-
61
-
62
-
63
-
64
-
65
-
66
-
67
-
68
-
69
-
70
-
71
-
72
-
73
-
74
-
75
-
76
-
77
-
78
-
79
-
80
-
81
-
82
-
83
-
84
-
85
-
86
-
87
-
88
-
89
-
90
-
91
-
92
 |
 |
