Sharp AR-M237 AR-M237 AR-M277 Operation Manual Suite - Page 103
When the Finish screen appears, in Step 7. - driver 7
 |
View all Sharp AR-M237 manuals
Add to My Manuals
Save this manual to your list of manuals |
Page 103 highlights
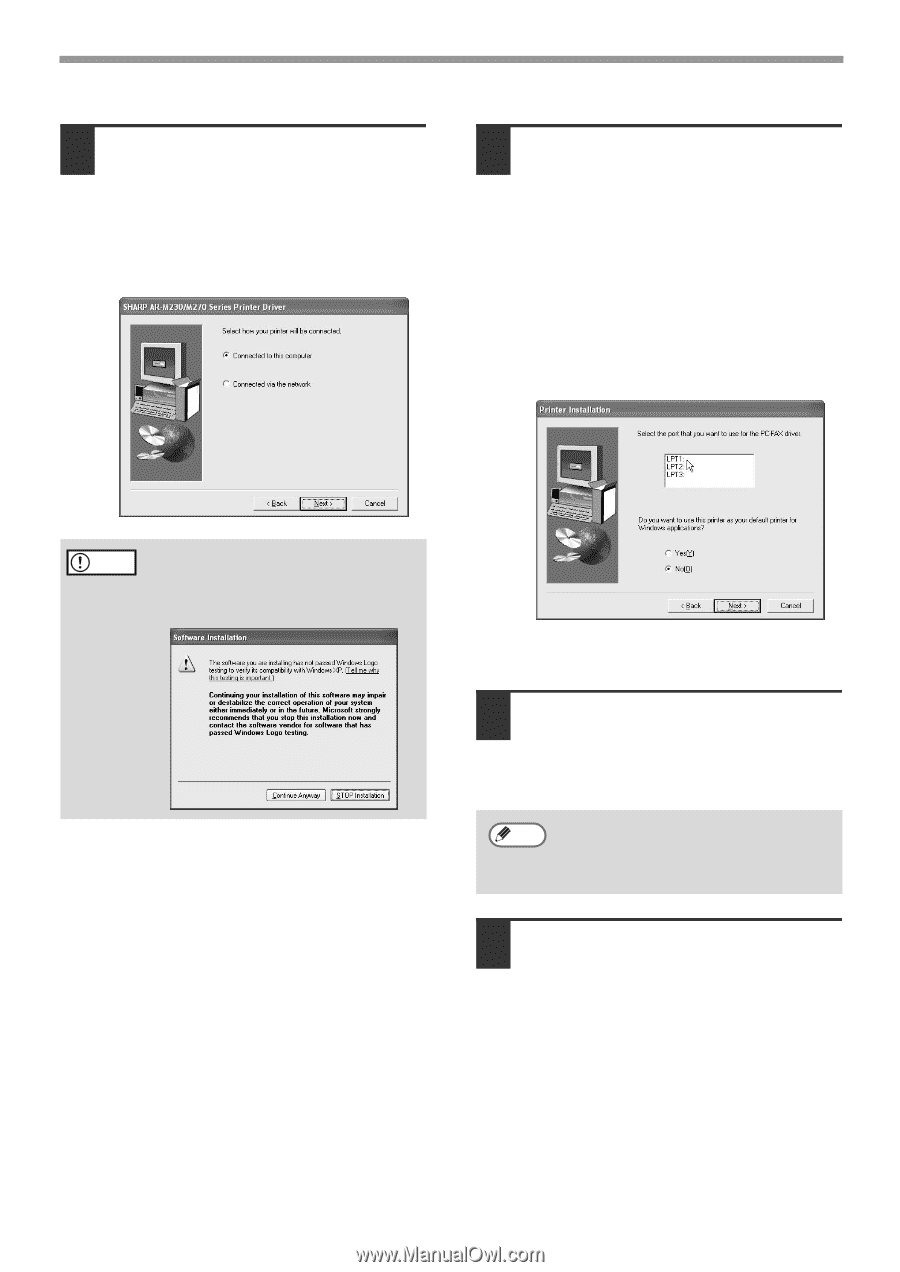
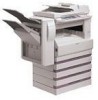
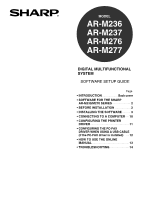
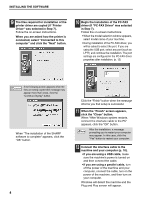
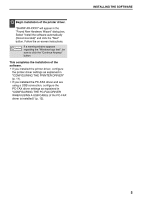
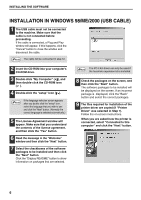
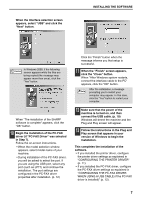
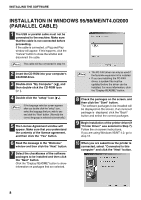
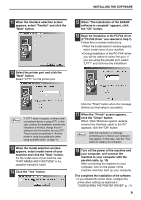
INSTALLING THE SOFTWARE 9 The files required for installation of the printer driver are copied (if "Printer Driver" was selected in Step 7). Follow the on-screen instructions. When you are asked how the printer is connected, select "Connected to this computer" and click the "Next" button. 10 Begin the installation of the PC-FAX driver (if "PC-FAX Driver" was selected in Step 7). Follow the on-screen instructions. • When the model selection window appears, select model name of your machine. • During installation of the PC-FAX driver, you will be asked to select the port. If you are using the USB port, select any port (such as LPT1) and continue the installation. The port settings are configured in the PC-FAX driver properties after installation. (p. 12) Caution If the following screen appears while the files are being copied (the message may appear more than once), click the "Continue Anyway" button. When "The installation of the SHARP software is complete" appears, click the "OK" button. 4 Click the "Finish" button when the message informs you that setup is successful. 11 When the "Finish" screen appears, click the "Close" button. When "After Windows system restarts, connect the interface cable to the PC" appears, click the "OK" button. After the installation, a message Note prompting you to restart your computer may appear. In this case, click the "Yes" button to restart your computer. 12 Connect the interface cable to the machine and your computer (p. 10). • If you are using a USB cable, make sure the machine's power is turned on and then connect the cable. • If you are using a parallel cable, turn off the power of the machine and your computer, connect the cable, turn on the power of the machine, and then turn on your computer. Windows will detect the machine and the Plug and Play screen will appear.
-
 1
1 -
2
-
3
-
4
-
5
-
6
-
7
-
8
-
9
-
10
-
11
-
12
-
13
-
14
-
15
-
16
-
17
-
18
-
19
-
20
-
21
-
22
-
23
-
24
-
25
-
26
-
27
-
28
-
29
-
30
-
31
-
32
-
33
-
34
-
35
-
36
-
37
-
38
-
39
-
40
-
41
-
42
-
43
-
44
-
45
-
46
-
47
-
48
-
49
-
50
-
51
-
52
-
53
-
54
-
55
-
56
-
57
-
58
-
59
-
60
-
61
-
62
-
63
-
64
-
65
-
66
-
67
-
68
-
69
-
70
-
71
-
72
-
73
-
74
-
75
-
76
-
77
-
78
-
79
-
80
-
81
-
82
-
83
-
84
-
85
-
86
-
87
-
88
-
89
-
90
-
91
-
92
-
93
-
94
-
95
-
96
-
97
-
 98
98 -
 99
99 -
 100
100 -
 101
101 -
 102
102 -
 103
103 -
 104
104 -
 105
105 -
 106
106 -
 107
107 -
 108
108 -
109
-
110
-
111
-
112
-
113
-
114
-
115
-
116
-
117
-
118
-
119
-
120
-
121
-
122
-
123
-
124
-
125
-
126
-
127
-
128
-
129
-
130
-
131
-
132
-
133
-
134
-
135
-
136
-
137
-
138
-
139
-
140
-
141
-
142
-
143
-
144
-
145
-
146
-
147
-
148
-
149
-
150
-
151
-
152
-
153
-
154
-
155
-
156
-
157
-
158
-
159
-
160
-
161
-
162
-
163
-
164
-
165
-
166
-
167
-
168
-
169
-
170
-
171
-
172
-
173
-
174
-
175
-
176
-
177
-
178
-
179
-
180
-
181
-
182
-
183
-
184
-
185
-
186
-
187
-
188
-
189
-
190
-
191
-
192
-
193
-
194
-
195
-
196
-
197
-
198
-
199
-
200
-
201
-
202
-
203
-
204
-
205
-
206
-
207
-
208
-
209
-
210
-
211
-
212
-
213
-
214
-
215
-
216
-
217
-
218
-
219
-
220
-
221
-
222
-
223
-
224
-
225
-
226
-
227
-
228
-
229
-
230
-
231
-
232
-
233
-
234
-
235
-
236
-
237
-
238
-
239
-
240
-
241
-
242
-
243
-
244
-
245
-
246
-
247
-
248
-
249
-
250
-
251
-
252
-
253
-
254
-
255
-
256
-
257
-
258
-
259
-
260
-
261
-
262
-
263
 |
 |