Sharp BD-HP20U BD-HP20U Operation Manual - Page 40
Checking the setup sound, Speakers, Selectable size, Selectable Distance, range, Selectable Output
 |
UPC - 074000354791
View all Sharp BD-HP20U manuals
Add to My Manuals
Save this manual to your list of manuals |
Page 40 highlights
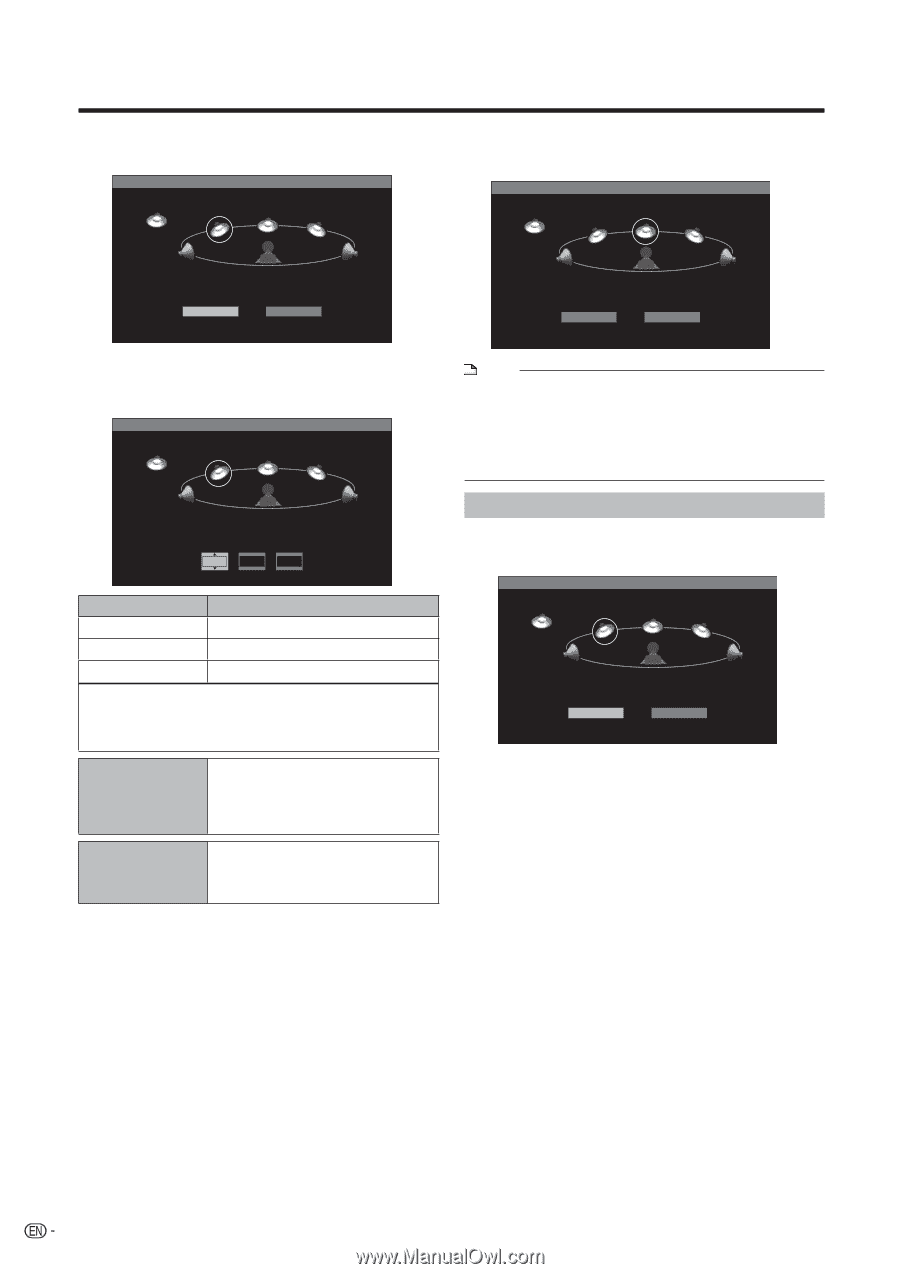
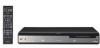
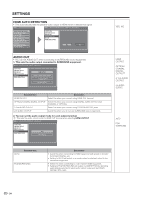
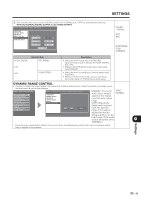
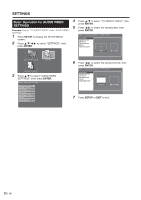
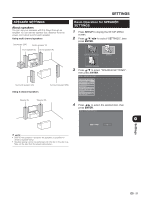
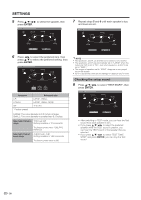
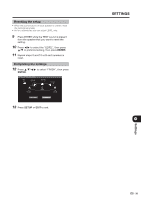
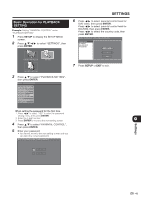
SETTINGS 5 Press a/b/c/d to select the speaker, then press ENTER. MENU [SPEAKER SETTINGS] 0dB 12ft/0dB SW L 12ft/0dB C 12t/0dB R 7 Repeat steps 5 and 6 until each speaker's size, and level are set. MENU [SPEAKER SETTINGS] 0dB SW 12ft/0dB L 12ft/0dB C 12t/0dB R LS 6ft/0dB TEST START FINISH LS 6ft/0dB 6 Press c/d to select the preferred item, then press a/b to select the preferred setting, then press ENTER. MENU [SPEAKER SETTINGS] 0dB 12ft/0dB SW L 12ft/0dB C 12t/0dB R LS 6ft/0dB SIZE LARGE DISTANCE 12ft LEVEL 0dB RS 6ft/0dB Speakers L/R C/RS/LS SW * Factory preset Selectable size LARGE*, SMALL LARGE*, SMALL, NONE YES*, NO LARGE: The cone diameter is 6.3 inches or larger. SMALL: The cone diameter is smaller than 6.3 inches. Selectable Distance 1ft through 29ft range (Settings available in 1ft increments) The factory preset value: 12ft(L/R/C) 6ft(RS/LS) Selectable Output Level range -6dB through +6dB (Settings available in 1dB increments) The factory preset value is 0dB. LS 6ft/0dB TEST START FINISH LS 6ft/0dB NOTE • The speakers L and R, LS and RS move relative to one another. • The speakers L and R are automatically set to "LARGE" when the subwoofer SW is set to "NO", even after speakers L and/or R are set to "SMALL". • The images of speakers set to "NONE" disappear or are greyed out on the screen. • As for a subwoofer, there are no settings for distance only for level. Checking the setup sound 8 Press a/b/c/d to select "TEST START", then press ENTER. MENU [SPEAKER SETTINGS] 0dB 12ft/0dB SW L 12ft/0dB C 12t/0dB R LS 6ft/0dB TEST START FINISH RS 6ft/0dB • After switching to TEST mode, you can hear the Test sound from each speaker in turn. • If you press a/b/c/d to select the preferred speaker while the TEST sound is present, you can hear the TEST sound of the speaker that you selected. • If you press a/b/c/d to select "TEST TONE STOP" and press ENTER, you can stop the Test sound 38
-
 1
1 -
2
-
3
-
4
-
5
-
6
-
7
-
8
-
9
-
10
-
11
-
12
-
13
-
14
-
15
-
16
-
17
-
18
-
19
-
20
-
21
-
22
-
23
-
24
-
25
-
26
-
27
-
28
-
29
-
30
-
31
-
32
-
33
-
34
-
 35
35 -
 36
36 -
 37
37 -
 38
38 -
 39
39 -
 40
40 -
 41
41 -
 42
42 -
 43
43 -
 44
44 -
 45
45 -
46
-
47
-
48
-
49
-
50
-
51
-
52
-
53
-
54
-
55
-
56
-
57
-
58
 |
 |