Sharp MX-M363N Installation Manual - Page 76
MX-PB11, 1. Unpacking, A. Parts included, 2. Installation, A. Preliminary arrangements, B. Turn off
 |
View all Sharp MX-M363N manuals
Add to My Manuals
Save this manual to your list of manuals |
Page 76 highlights
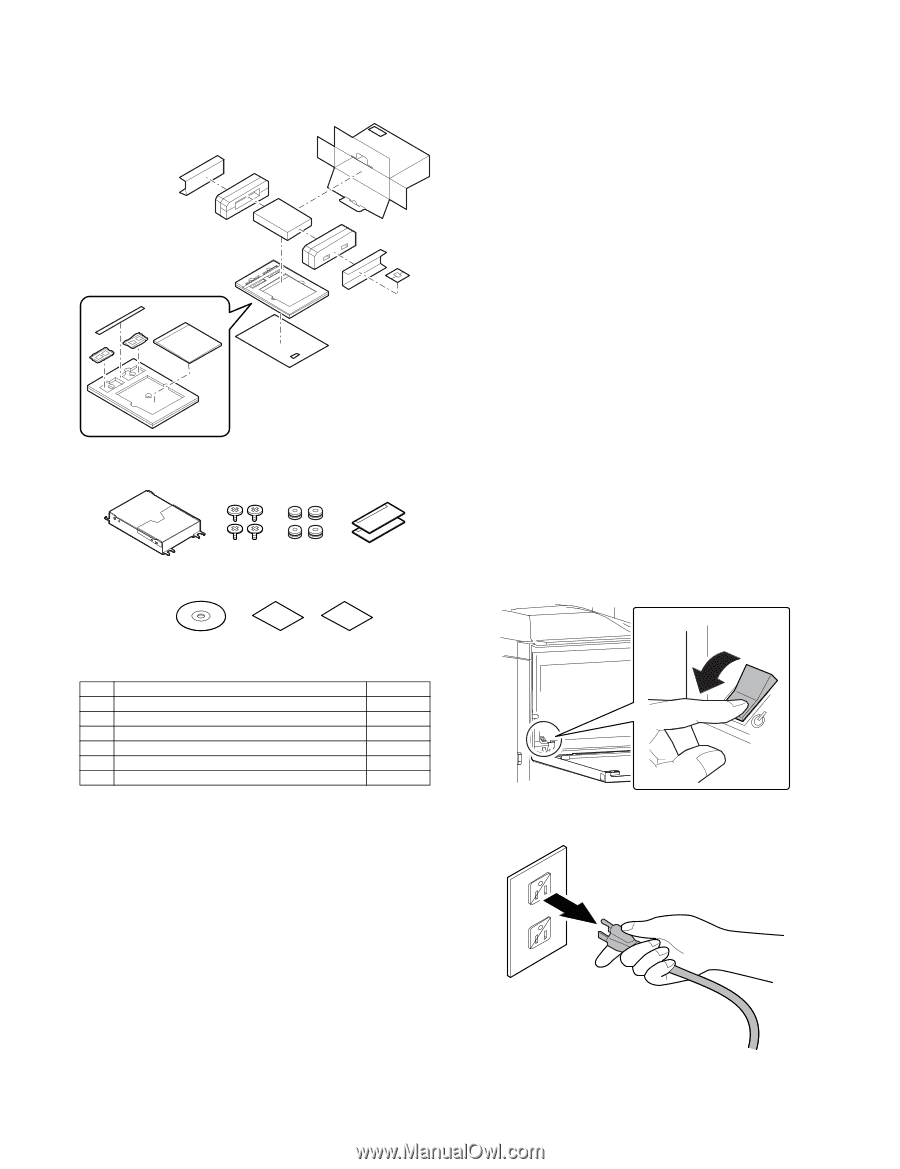
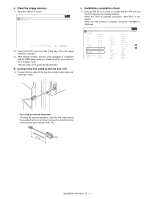
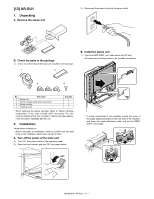
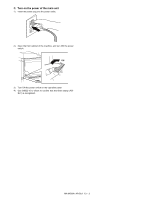
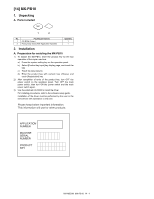
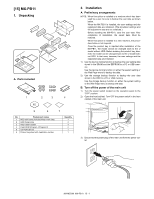
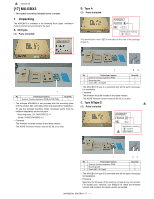
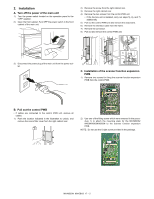
M[1X-5M]50M3NX-PB11 1. Unpacking A. Parts included 1 2 3 4 S2e. rvInicsetalMlaantiuoanl A. Preliminary arrangements NOTE: When this option is installed to a machine which has been used by a user, be sure to backup the user data as shown below. When the MX-PB11 is installed, the user settings and the registered data are initialized. (The simulation settings and the adjustment data are not initialized.) Before installing the MX-PB11, save the user data. After completion of installation, the saved data. Must be restored. When this option is installed to a new machine, the procedure below is not required. Once the product key is inputted after installation of the MX-PB11, the model cannot be changed back to the U model without HDD. Before entering the product key, however, the model can be changed back to the U model without HDD. In that case, however, the user settings and the registered data are initialized. 1) Use the device cloning function to backup the user setting data stored in the SRAM and the EEPROM to a PC or USB memory. Use the device cloning function on either the system setting or the Web Page menu to backup the data. 2) Use the storage backup function to backup the user data stored in the HDD to a PC or USB memory. Use the storage backup function on either the system setting or the Web Page menu to backup the data. B. Turn off the power of the main unit 1) Turn the power switch located on the operation panel to the "OFF" position. 2) Open the front cabinet. Turn OFF the power switch in the front cabinet of the main unit. 5 6 7 No. Packed part names 1 HDD with frame (Included Water mark data) 2 HDD fixing screw 3 HDD rubber isolator 4 Flash ROM (Program 1/Program 2) 5 CD-ROM (Driver) 6 Product key sheet with Application number Quantity 1 4 4 2 1 1 OFF 3) Disconnect the power plug of the main unit from the power outlet. MX-M503N MX-PB11 15 - 1
-
 1
1 -
2
-
3
-
4
-
5
-
6
-
7
-
8
-
9
-
10
-
11
-
12
-
13
-
14
-
15
-
16
-
17
-
18
-
19
-
20
-
21
-
22
-
23
-
24
-
25
-
26
-
27
-
28
-
29
-
30
-
31
-
32
-
33
-
34
-
35
-
36
-
37
-
38
-
39
-
40
-
41
-
42
-
43
-
44
-
45
-
46
-
47
-
48
-
49
-
50
-
51
-
52
-
53
-
54
-
55
-
56
-
57
-
58
-
59
-
60
-
61
-
62
-
63
-
64
-
65
-
66
-
67
-
68
-
69
-
70
-
 71
71 -
 72
72 -
 73
73 -
 74
74 -
 75
75 -
 76
76 -
 77
77 -
 78
78 -
 79
79 -
 80
80 -
 81
81 -
82
-
83
-
84
-
85
-
86
-
87
-
88
-
89
-
90
-
91
-
92
-
93
-
94
-
95
-
96
-
97
-
98
-
99
-
100
-
101
-
102
-
103
-
104
-
105
-
106
-
107
-
108
-
109
-
110
-
111
-
112
-
113
-
114
-
115
-
116
-
117
 |
 |