Sharp MX-M363N Installation Manual - Page 96
E. Adjust the position of the key top unit, F. Turn on the power of the main unit - admin password
 |
View all Sharp MX-M363N manuals
Add to My Manuals
Save this manual to your list of manuals |
Page 96 highlights
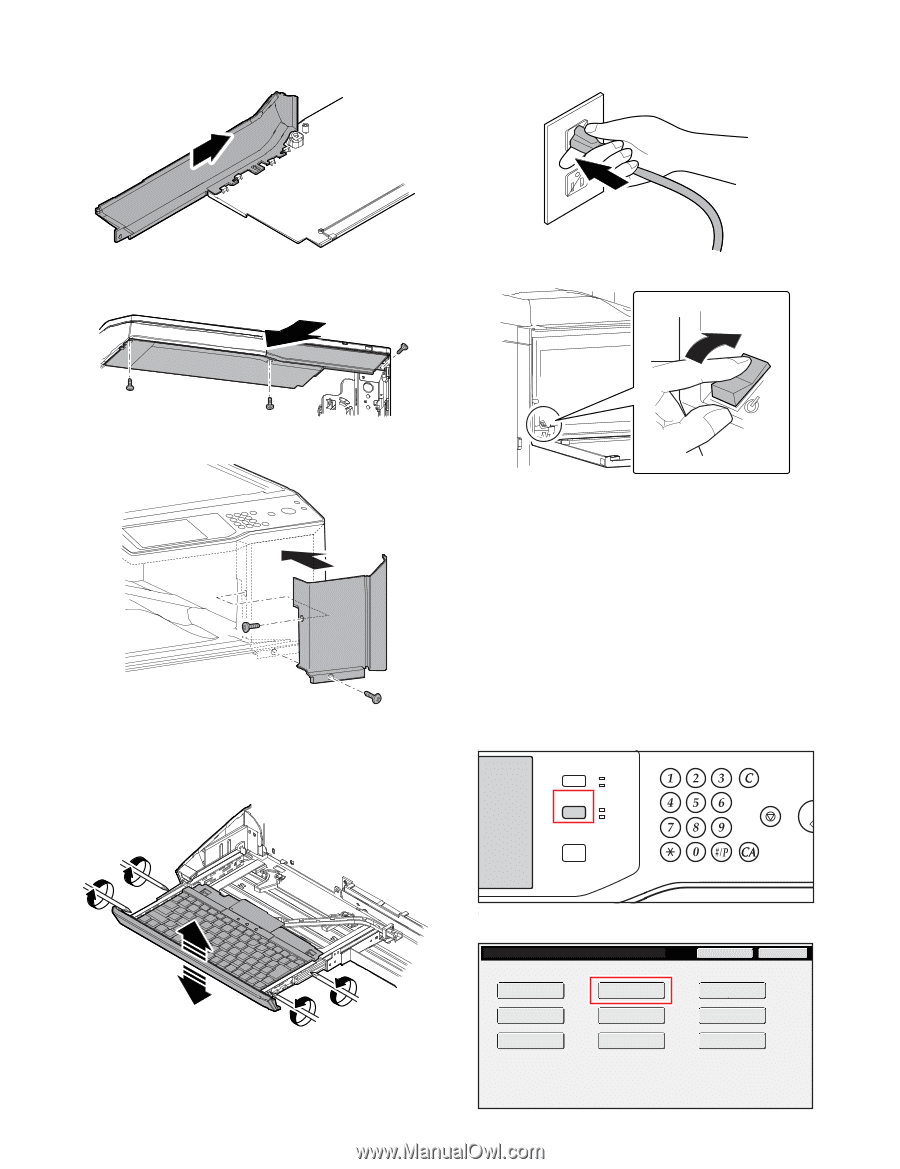
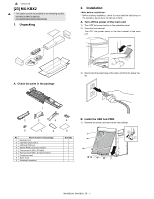
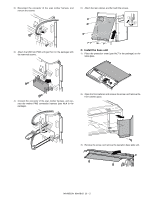
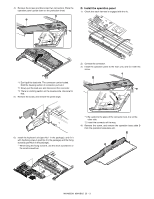
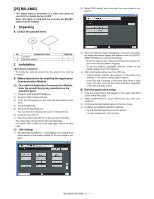
5) Slide and attach the operation base plate C (part No.2 in the package) to the operation base plate unit. F. Turn on the power of the main unit 1) Insert the power plug of the main unit into the power outlet. 6) Install the operation base plate unit to the main unit, and fix it with the screws. 2) Turn ON the power switch inside the front cabinet. ON 7) Attach the front cabinet upper, and fix it with the screws. E. Adjust the position of the key top unit 1) When the cabinet position of the key top unit is shifted, loosen the screws which are fixing the key top unit and adjust the position up and down. Then tighten the screws. 3) Turn ON the power switch on the operation panel. G. Check the keyboard input 1) Touch [IMAGE SEND] on the touch panel. 2) Touch [SEND SETTING] on the touch panel. 3) Touch [FILE NAME/DIRECT ENTRY] on the touch panel. 4) Enter the keyboard input, and check the input on the touch panel. H. Language setting Targets: The model for 8.5 inch LCD panel with option keyboard installed. The language selected should be the same as the layout of the option keyboard, otherwise false input occur. 1) Press the [SYSTEM SETTINGS] key. The following menu screen appears on the touch panel. JOB STATUS SYSTEM SETTINGS PRINT READY DATA IMAGE SEND LINE DATA HOME LOGOUT 2) Touch [Default Settings]. System Setting Total Count Paper Tray Settings Printer Condition Settings Default Settings Address Control Document Filing Control Admin Password Exit List Print (User) Fax Data Receive/Forward USB-Device Check MX-M503N MX-KBX2 23 - 4
-
 1
1 -
2
-
3
-
4
-
5
-
6
-
7
-
8
-
9
-
10
-
11
-
12
-
13
-
14
-
15
-
16
-
17
-
18
-
19
-
20
-
21
-
22
-
23
-
24
-
25
-
26
-
27
-
28
-
29
-
30
-
31
-
32
-
33
-
34
-
35
-
36
-
37
-
38
-
39
-
40
-
41
-
42
-
43
-
44
-
45
-
46
-
47
-
48
-
49
-
50
-
51
-
52
-
53
-
54
-
55
-
56
-
57
-
58
-
59
-
60
-
61
-
62
-
63
-
64
-
65
-
66
-
67
-
68
-
69
-
70
-
71
-
72
-
73
-
74
-
75
-
76
-
77
-
78
-
79
-
80
-
81
-
82
-
83
-
84
-
85
-
86
-
87
-
88
-
89
-
90
-
 91
91 -
 92
92 -
 93
93 -
 94
94 -
 95
95 -
 96
96 -
 97
97 -
 98
98 -
 99
99 -
 100
100 -
 101
101 -
102
-
103
-
104
-
105
-
106
-
107
-
108
-
109
-
110
-
111
-
112
-
113
-
114
-
115
-
116
-
117
 |
 |