Sony CHC-CL1 Operating Instructions - Page 26
Troubleshooting, Precautions continued - problems
 |
View all Sony CHC-CL1 manuals
Add to My Manuals
Save this manual to your list of manuals |
Page 26 highlights
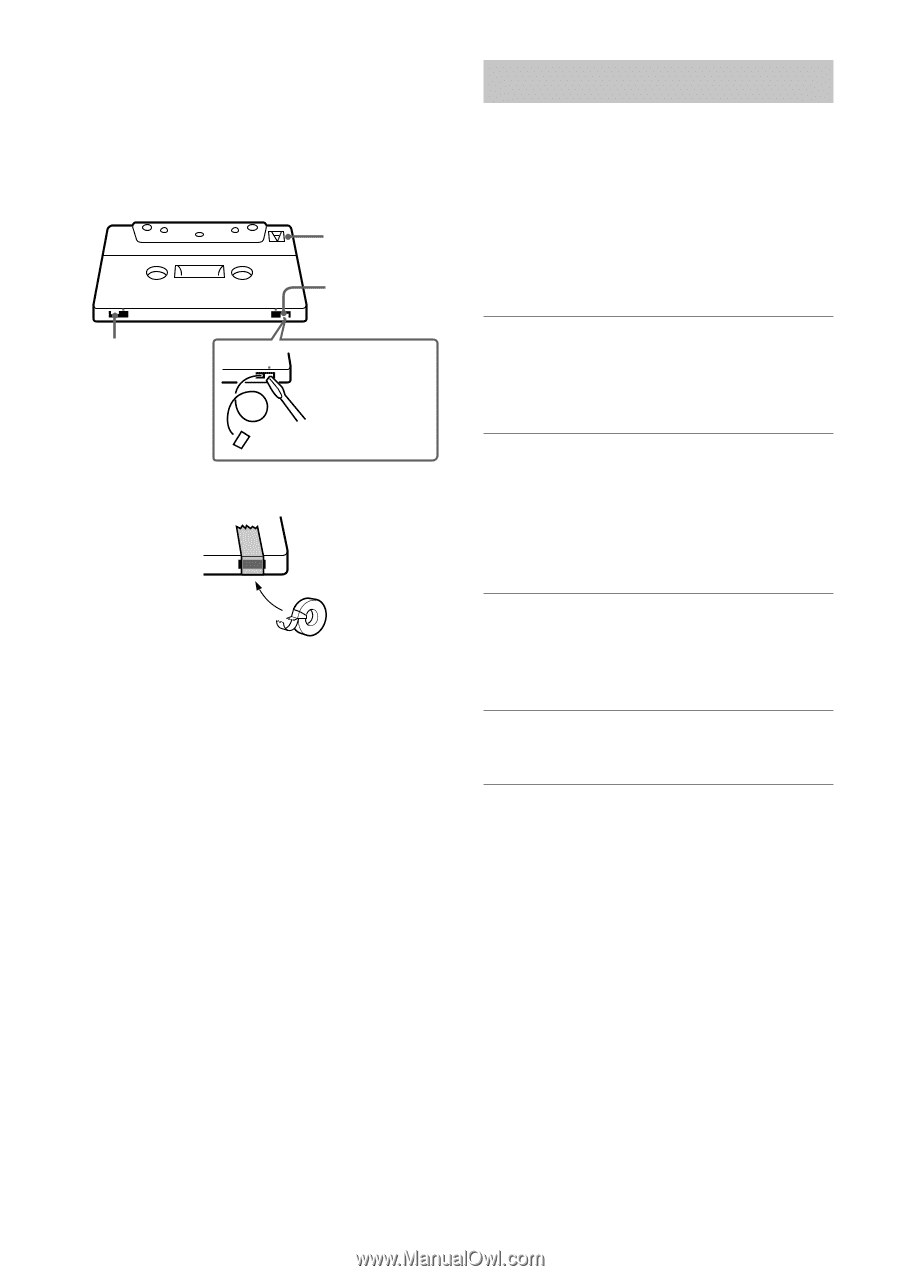
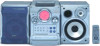
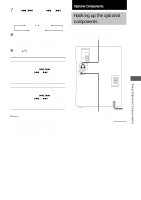
Precautions (continued) To save a tape permanently To prevent a tape from being accidentally recorded over, break off the cassette tab from side A or B as illustrated. Side A Tab of side A Tab of side B Break off the cassette tab of side A If you later want to reuse the tape for recording, cover the broken tab with adhesive tape. Cleaning the tape heads Clean the tape heads after every 10 hours of use. Be sure to clean the tape heads before you start an important recording or after playing an old tape. Use a separately sold dry-type or wet-type cleaning cassette. For details, refer to the instructions of the cleaning cassette. Demagnetizing the tape heads Demagnetize the tape heads and the metal parts that have contact with the tape after every 20 to 30 hours of use with a separately sold demagnetizing cassette. For details, refer to the instructions of the demagnetizing cassette. Troubleshooting If you have any problem using this system, use the following checklist. First, check that the power cord is connected firmly and that the speakers are connected correctly and firmly. Should any problem persist, consult your nearest Sony dealer. General There is no sound. • Turn VOLUME clockwise (or press VOL+ on the remote). • Make sure the headphones are not connected. • Check the speaker connections (see page 6). Sound comes from one channel, or unbalanced left and right volume. • Connect the speaker cords properly (see page 6). • Place the speakers as symmetrically as possible. • Connect only one of the supplied speakers to each set of speaker terminals. • Connect the supplied speakers. There is severe hum or noise. • Move the system away from the source of noise. • Connect the system to a different wall outlet. • Install a noise filter (commercially available) to the power line. "0:00" (for the European model) or "12:00 AM" (for other models) flashes in the display. • Set the clock again (see page 8). The timer cannot be set. • Set the clock again (see page 8). 26
-
 1
1 -
2
-
3
-
4
-
5
-
6
-
7
-
8
-
9
-
10
-
11
-
12
-
13
-
14
-
15
-
16
-
17
-
18
-
19
-
20
-
 21
21 -
 22
22 -
 23
23 -
 24
24 -
 25
25 -
 26
26 -
 27
27 -
 28
28 -
 29
29 -
 30
30 -
 31
31 -
32
 |
 |