Sony HVR-Z5E Operation Guide - Page 45
Recording an index signal, To cancel the operation
 |
View all Sony HVR-Z5E manuals
Add to My Manuals
Save this manual to your list of manuals |
Page 45 highlights
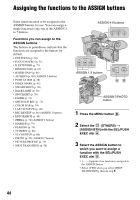
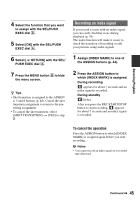
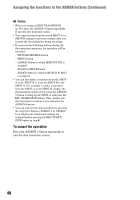
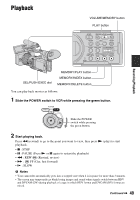
Recording/Playback 4 Select the function that you want to assign with the SEL/PUSH EXEC dial A. 5 Select [OK] with the SEL/PUSH EXEC dial A. 6 Select [ RETURN] with the SEL/ PUSH EXEC dial A. 7 Press the MENU button B to hide the menu screen. z Tips • Shot transition is assigned to the ASSIGN 4, 5 and 6 buttons (p. 46). Cancel the shot transition assignment to return to the presetting assignment. • To cancel the shot transition, select [SHOT TRANSITION] t [YES] in step 3. Recording an index signal If you record a scene with an index signal, you can easily find that scene during playback (p. 54). The index function will make it easier to check the transition of recording or edit your pictures using index signals. 1 Assign [INDEX MARK] to one of the ASSIGN buttons (p. 44). 2 Press the ASSIGN button to which [INDEX MARK] is assigned. During recording appears for about 7 seconds and an index signal is recorded. During standby flashes. After you press the REC START/STOP button to start recording, appears for about 7 seconds and an index signal is recorded. To cancel the operation Press the ASSIGN button to which [INDEX MARK] is assigned again before you start recording. b Notes • You cannot record an index signal on a recorded tape afterward. Continued , 45
-
 1
1 -
2
-
3
-
4
-
5
-
6
-
7
-
8
-
9
-
10
-
11
-
12
-
13
-
14
-
15
-
16
-
17
-
18
-
19
-
20
-
21
-
22
-
23
-
24
-
25
-
26
-
27
-
28
-
29
-
30
-
31
-
32
-
33
-
34
-
35
-
36
-
37
-
38
-
39
-
 40
40 -
 41
41 -
 42
42 -
 43
43 -
 44
44 -
 45
45 -
 46
46 -
 47
47 -
 48
48 -
 49
49 -
 50
50 -
51
-
52
-
53
-
54
-
55
-
56
-
57
-
58
-
59
-
60
-
61
-
62
-
63
-
64
-
65
-
66
-
67
-
68
-
69
-
70
-
71
-
72
-
73
-
74
-
75
-
76
-
77
-
78
-
79
-
80
-
81
-
82
-
83
-
84
-
85
-
86
-
87
-
88
-
89
-
90
-
91
-
92
-
93
-
94
-
95
-
96
-
97
-
98
-
99
-
100
-
101
-
102
-
103
-
104
-
105
-
106
-
107
-
108
-
109
-
110
-
111
-
112
-
113
-
114
-
115
-
116
-
117
-
118
-
119
-
120
-
121
-
122
-
123
-
124
-
125
-
126
-
127
-
128
-
129
-
130
-
131
-
132
-
133
-
134
-
135
-
136
-
137
-
138
-
139
-
140
-
141
-
142
-
143
 |
 |
