Sony KDS-70Q006 Owners Guide - Page 128
When the AC power cord is unplugged, the Clock/Timers settings will
 |
View all Sony KDS-70Q006 manuals
Add to My Manuals
Save this manual to your list of manuals |
Page 128 highlights
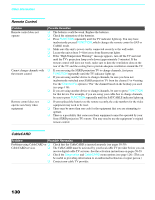
Using the Menus Option Description Displays... Timer 1 and Timer 2 cannot be set until you set the Current Time. 1 Press V or v to highlight Timer 1 or Timer 2. To set the timer, press b. ✍ To go directly to programming Timer 1 or 2, press instead of pressing b. 2 Press V or v to highlight one of the following options, then press . Program Off Select to set the Timer by day, time, duration, and channel. Select to turn off the Timer. (Your previous settings are saved.) 3 If you selected Program in step 2, press V and v to set the day(s), hour, minute, duration, and channel number. Press or press b to confirm each setting and move to the next setting. Press B to go back to the previous setting. 4 Press MENU to exit the menu screen. An LED on the front panel will light, indicating the Timer has been set. Current Time You can set the current time. 1 Press to select Current Time. 2 Press V and v to set the current time (day, hour, minute, and AM/PM). Press (or press b) to confirm each setting and move to the next setting. Press B to go back the previous setting. 3 Press MENU to exit the menu screen. ✍ When the AC power cord is unplugged, the Clock/Timers settings will be reset. Set the clock or timer again. Diagnostics Display diagnostics information about the TV. This can be useful in providing information to an authorized technician or repair person. CableCARD This list of selectable CableCARD options will vary, depending on your cable service provider. 126
-
 1
1 -
2
-
3
-
4
-
5
-
6
-
7
-
8
-
9
-
10
-
11
-
12
-
13
-
14
-
15
-
16
-
17
-
18
-
19
-
20
-
21
-
22
-
23
-
24
-
25
-
26
-
27
-
28
-
29
-
30
-
31
-
32
-
33
-
34
-
35
-
36
-
37
-
38
-
39
-
40
-
41
-
42
-
43
-
44
-
45
-
46
-
47
-
48
-
49
-
50
-
51
-
52
-
53
-
54
-
55
-
56
-
57
-
58
-
59
-
60
-
61
-
62
-
63
-
64
-
65
-
66
-
67
-
68
-
69
-
70
-
71
-
72
-
73
-
74
-
75
-
76
-
77
-
78
-
79
-
80
-
81
-
82
-
83
-
84
-
85
-
86
-
87
-
88
-
89
-
90
-
91
-
92
-
93
-
94
-
95
-
96
-
97
-
98
-
99
-
100
-
101
-
102
-
103
-
104
-
105
-
106
-
107
-
108
-
109
-
110
-
111
-
112
-
113
-
114
-
115
-
116
-
117
-
118
-
119
-
120
-
121
-
122
-
 123
123 -
 124
124 -
 125
125 -
 126
126 -
 127
127 -
 128
128 -
 129
129 -
 130
130 -
 131
131 -
 132
132 -
 133
133 -
134
-
135
-
136
-
137
-
138
-
139
-
140
-
141
-
142
-
143
-
144
-
145
-
146
-
147
 |
 |
