Sony MZ-NF610 Operating Instructions - Page 52
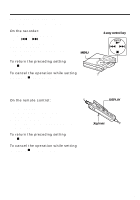
To erase a group, until G : Ers
 |
View all Sony MZ-NF610 manuals
Add to My Manuals
Save this manual to your list of manuals |
Page 52 highlights
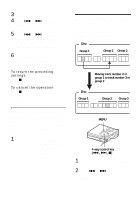
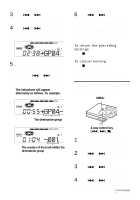
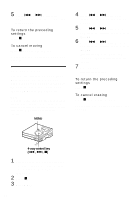
5 Press . or > to select the destination point on the disc, and then press ENTER. To return the preceding settings Press x. To cancel moving Press x for 2 seconds or more. For the remote control operation, see page 61. To erase a group You can erase tracks in a selected group. Note that once a recording has been erased, you cannot retrieve it. Be sure to check the contents of the group before you erase it. Note You cannot erase tracks that have been checked out from your computer. You cannot erase a group if it contains a checked-out track. In this case, check in the track or tracks to the computer. MENU 4 Press . or > until "EDIT" appears in the display, and then press ENTER. 5 Press . or > until "Erase" appears in the display, and then press ENTER. 6 Press . or > until "G : Ers" appears in the display, and then press ENTER. The group name,"G : Ers?" and "ENTER" appear alternately in the display. 7 Press ENTER. The group is erased. To return the preceding settings Press x. To cancel erasing Press x for 2 seconds or more. For the remote control operation, see page 62. 4-way control key (., >, x) 1 Select a group you want to erase and check the contents (see "To cue to the start of a group (Group Skip)" (page 47)). 2 Press x. 3 Press MENU. 52
-
 1
1 -
2
-
3
-
4
-
5
-
6
-
7
-
8
-
9
-
10
-
11
-
12
-
13
-
14
-
15
-
16
-
17
-
18
-
19
-
20
-
21
-
22
-
23
-
24
-
25
-
26
-
27
-
28
-
29
-
30
-
31
-
32
-
33
-
34
-
35
-
36
-
37
-
38
-
39
-
40
-
41
-
42
-
43
-
44
-
45
-
46
-
 47
47 -
 48
48 -
 49
49 -
 50
50 -
 51
51 -
 52
52 -
 53
53 -
 54
54 -
 55
55 -
 56
56 -
 57
57 -
58
-
59
-
60
-
61
-
62
-
63
-
64
-
65
-
66
-
67
-
68
-
69
-
70
-
71
-
72
-
73
-
74
-
75
-
76
-
77
-
78
-
79
-
80
-
81
-
82
-
83
-
84
-
85
-
86
-
87
-
88
-
89
-
90
-
91
-
92
-
93
-
94
-
95
-
96
-
97
-
98
-
99
-
100
-
101
-
102
-
103
-
104
-
105
-
106
-
107
-
108
-
109
-
110
-
111
-
112
-
113
-
114
-
115
-
116
-
117
-
118
-
119
-
120
-
121
-
122
-
123
-
124
 |
 |