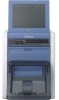
Sony UPCR20L Operating Instructions - Page 22
Attaching the Scrap Receptacle, Attaching the Output Tray, Notes on storage
 |
View all Sony UPCR20L manuals
Add to My Manuals
Save this manual to your list of manuals |
Page 22 highlights
Chapter 2 Preparations 5 Hold the center of the ribbon tray, and load it into the unit. Attaching the Scrap Receptacle When printing, a margin of empty space is left between each printout. These excess portions are cut off and dropped into the scrap receptacle. Remove scraps from the receptacle as soon as possible. Notes • Always hold the center of the ribbon tray when loading it into the unit. If you hold the tray by any other part, your fingers may get caught while inserting the tray and injuries may result. • Be sure to insert the ribbon tray fully into the unit. 6 Close the ribbon door. Notes on storage • Avoid placing the unit where it will be subject to: - high temperatures, - high humidity or dust, - direct sunlight. • After opening the bag, use the ribbon and the paper as soon as possible. • When transporting or storing the paper roll and ink ribbon after partial use, we recommend putting them back into their respective bags. Note If the scrap receptacle becomes too full, scraps that are cut off may be unable to eject. This may result in malfunction. Remove scraps from the receptacle as soon as possible, and be sure to empty the receptacle whenever you replace a paper roll. Attaching the Output Tray When printing, printouts are ejected from the printer and collect in the output tray. 1 Attach the output tray to the printer. 22 Loading the Paper Roll and Ink Ribbon
-
 1
1 -
2
-
3
-
4
-
5
-
6
-
7
-
8
-
9
-
10
-
11
-
12
-
13
-
14
-
15
-
16
-
 17
17 -
 18
18 -
 19
19 -
 20
20 -
 21
21 -
 22
22 -
 23
23 -
 24
24 -
 25
25 -
 26
26 -
 27
27 -
28
-
29
-
30
-
31
-
32
-
33
-
34
-
35
-
36
-
37
-
38
-
39
-
40
-
41
-
42
-
43
-
44
-
45
-
46
-
47
-
48
-
49
-
50
-
51
-
52
-
53
-
54
-
55
-
56
-
57
-
58
-
59
-
60
-
61
-
62
-
63
-
64
-
65
-
66
-
67
-
68
-
69
-
70
-
71
-
72
-
73
-
74
-
75
-
76
-
77
-
78
-
79
-
80
-
81
 |
 |
