Sony VPL-CX76 Operating Instructions - Page 13
Connecting the Projector, Connecting a Computer - xga
 |
UPC - 027242666238
View all Sony VPL-CX76 manuals
Add to My Manuals
Save this manual to your list of manuals |
Page 13 highlights
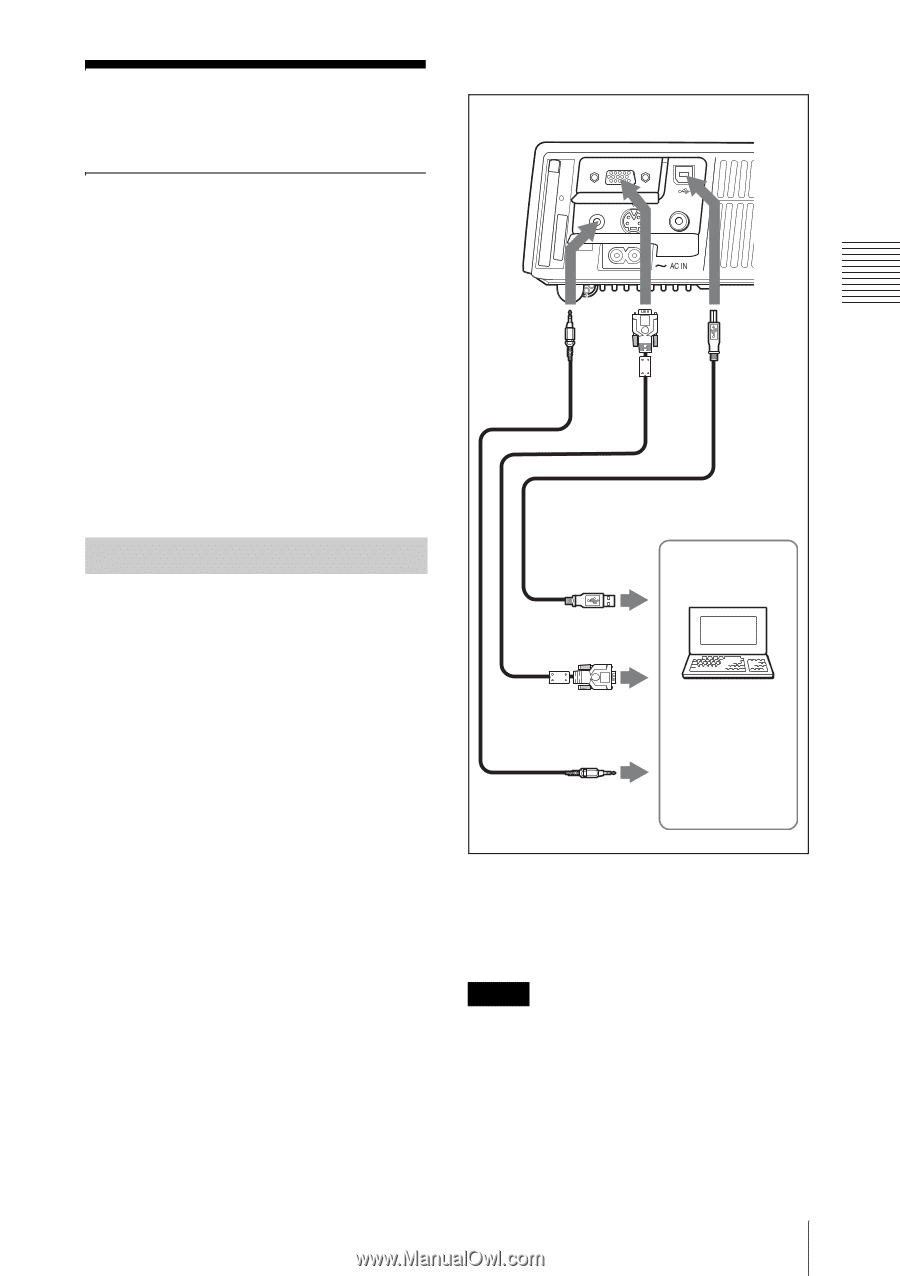
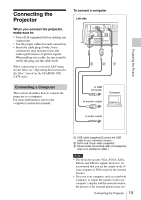
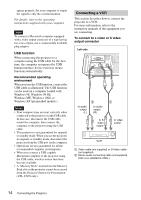
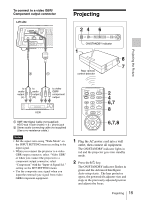
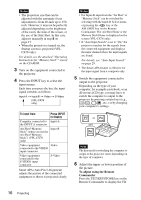
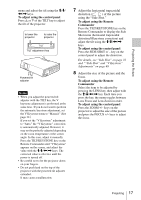
Projecting the Picture Connecting the Projector To connect a computer Left side When you connect the projector, make sure to: • Turn off all equipment before making any connections. • Use the proper cables for each connection. • Insert the cable plugs firmly; loose connections may increase noise and reduce performance of picture signals. When pulling out a cable, be sure to pull it out by the plug, not the cable itself When connecting to a wireless LAN using the Air Shot, see "Operating Instructions for Air Shot" stored on the CD-ROM (VPLCX76 only). AUDIO INPUT A S VIDEO VIDEO STD/DUO 3 21 Connecting a Computer This section describes how to connect the projector to a computer. For more information, refer to the computer's instruction manual. to USB connector Computer to monitor output to audio output A USB cable (supplied)(Connect the USB cable to use a wireless mouse.) B HD D-sub 15-pin cable (supplied) C Stereo audio connecting cable (not supplied) (Use a no-resistance cable.) Notes • The projector accepts VGA, SVGA, XGA, SXGA, and SXGA+ signals. However, we recommend that you set the output mode of your computer to XGA mode for the external monitor. • If you set your computer, such as a notebook computer, to output the signal to both your computer's display and the external monitor, the picture of the external monitor may not Connecting the Projector 13
-
 1
1 -
2
-
3
-
4
-
5
-
6
-
7
-
 8
8 -
 9
9 -
 10
10 -
 11
11 -
 12
12 -
 13
13 -
 14
14 -
 15
15 -
 16
16 -
 17
17 -
 18
18 -
19
-
20
-
21
-
22
-
23
-
24
-
25
-
26
-
27
-
28
-
29
-
30
-
31
-
32
-
33
-
34
-
35
-
36
-
37
-
38
-
39
-
40
-
41
-
42
-
43
-
44
-
45
-
46
-
47
-
48
-
49
-
50
-
51
-
52
-
53
-
54
 |
 |