Sony VPL-CX76 Operating Instructions - Page 6
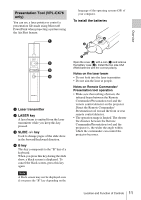
Location and Function of Controls, Top/Front/Left Side, Rear/Right Side/Bottom - remote
 |
UPC - 027242666238
View all Sony VPL-CX76 manuals
Add to My Manuals
Save this manual to your list of manuals |
Page 6 highlights
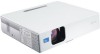
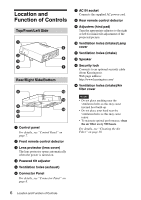
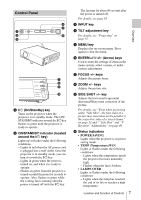
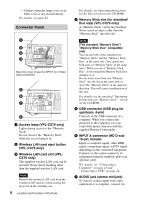
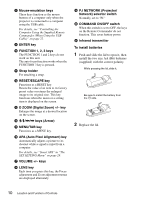
Location and Function of Controls Top/Front/Left Side Rear/Right Side/Bottom a Control panel For details, see "Control Panel" on page 7. b Front remote control detector c Lens protector (lens cover) The lens protector opens automatically when the power is turned on. d Powered tilt adjuster e Ventilation holes (exhaust) f Connector Panel For details, see "Connector Panel" on page 8. g AC IN socket Connects the supplied AC power cord. h Rear remote control detector i Adjusters (hind pad) Turn the appropriate adjuster to the right or left for minor tilt adjustment of the projected picture. j Ventilation holes (intake)/Lamp cover k Ventilation holes (intake) l Speaker m Security lock Connects to an optional security cable (from Kensington). Web page address: http://www.kensington.com/ n Ventilation holes (intake)/Air filter cover Notes • Do not place anything near the ventilation holes as this may cause internal heat build-up. • Do not place your hand near the ventilation holes as this may cause injury. • To maintain optimal performance, clean the air filter every 500 hours. For details, see "Cleaning the Air Filter" on page 38. 6 Location and Function of Controls
-
 1
1 -
 2
2 -
 3
3 -
 4
4 -
 5
5 -
 6
6 -
 7
7 -
 8
8 -
 9
9 -
 10
10 -
 11
11 -
 12
12 -
13
-
14
-
15
-
16
-
17
-
18
-
19
-
20
-
21
-
22
-
23
-
24
-
25
-
26
-
27
-
28
-
29
-
30
-
31
-
32
-
33
-
34
-
35
-
36
-
37
-
38
-
39
-
40
-
41
-
42
-
43
-
44
-
45
-
46
-
47
-
48
-
49
-
50
-
51
-
52
-
53
-
54
 |
 |
