TP-Link TL-PS110U User Manual - Page 23
TL-PS110U, Setup, TCP/IP, Use the following TCP/IP Settings, IP Address
 |
UPC - 845973031008
View all TP-Link TL-PS110U manuals
Add to My Manuals
Save this manual to your list of manuals |
Page 23 highlights
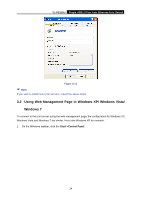
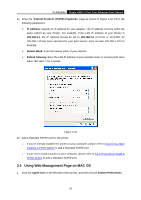
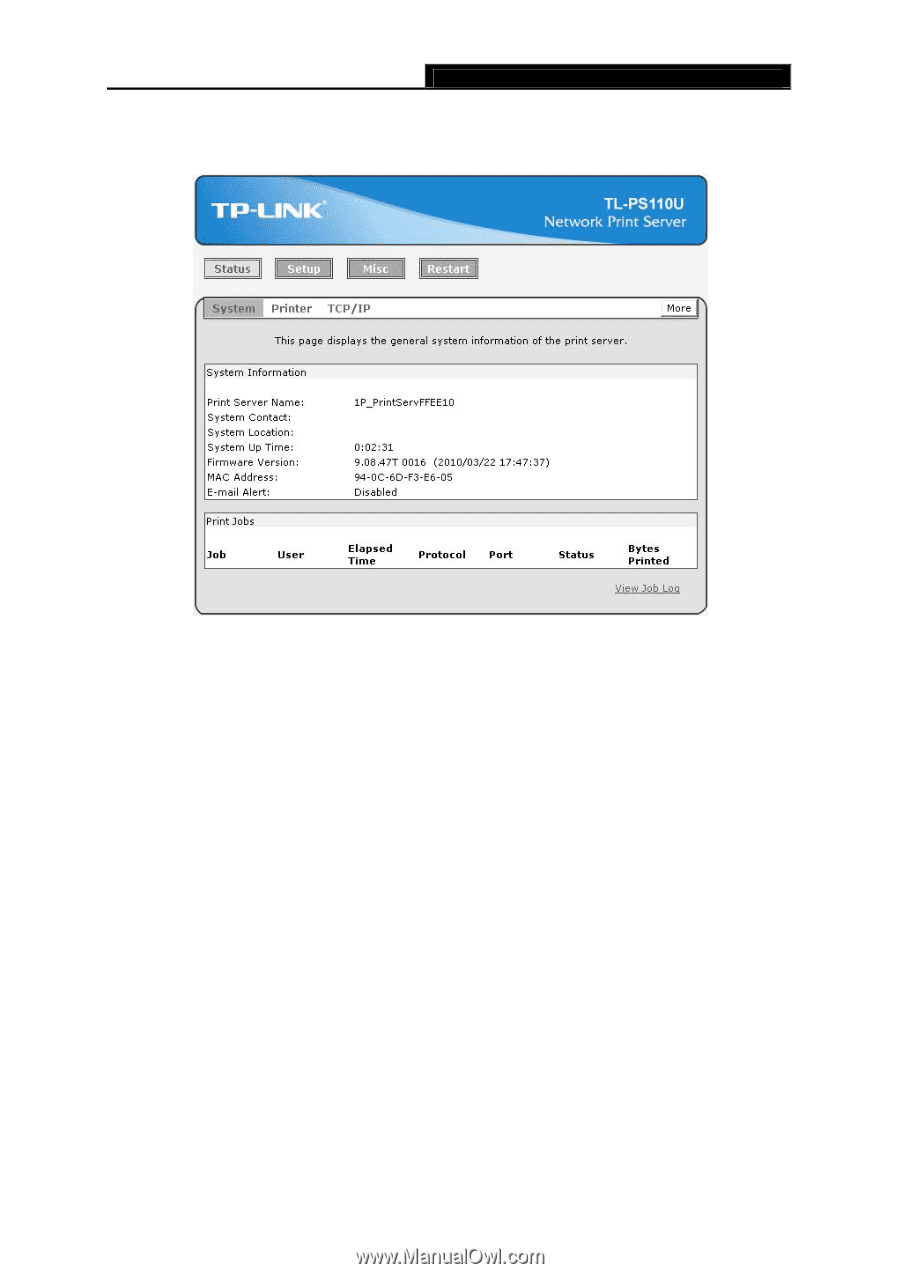
TL-PS110U Single USB2.0 Port Fast Ethernet Print Server 8. Then the print server web management page will appear, with which you can configure all print server settings. Figure 3-29 9. Click "Setup" and then choose "TCP/IP". Check "Use the following TCP/IP Settings" radio button and then fill in the following parameters. ¾ IP Address: Specify an IP address for your print server. The IP address must be within the same subnet as your Router. For example, if the LAN IP address of your Router is 192.168.1.1, the IP address should be set to 192.168.1.X (1
-
 1
1 -
2
-
3
-
4
-
5
-
6
-
7
-
8
-
9
-
10
-
11
-
12
-
13
-
14
-
15
-
16
-
17
-
 18
18 -
 19
19 -
 20
20 -
 21
21 -
 22
22 -
 23
23 -
 24
24 -
 25
25 -
 26
26 -
 27
27 -
 28
28 -
29
-
30
-
31
-
32
-
33
-
34
-
35
-
36
-
37
-
38
-
39
-
40
-
41
-
42
-
43
-
44
-
45
-
46
-
47
-
48
-
49
-
50
-
51
-
52
-
53
-
54
-
55
-
56
-
57
-
58
 |
 |
TL-PS110U
Single USB2.0 Port Fast Ethernet Print Server
18
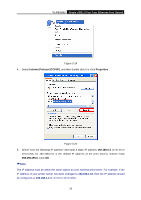
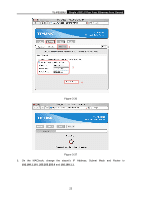
8.
Then the print server web management page will appear, with which you can configure all
print server settings.
Figure 3-29
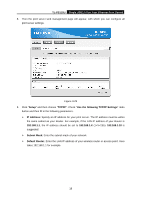
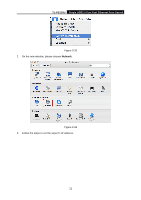
9.
Click “
Setup
”
and then choose “
TCP/IP
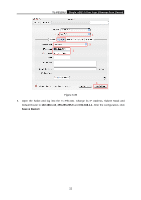
”. Check “
Use the following TCP/IP Settings
” radio
button and then fill in the following parameters.
¾
IP Address:
Specify an IP address for your print server. The IP address must be within
the same subnet as your Router. For example, if the LAN IP address of your Router is
192.168.1.1
, the IP address should be set to
192.168.1.X
(1<X<255).
192.168.1.10
is
suggested.
¾
Subnet Mask:
Enter the subnet mask of your network.
¾
Default Router:
Enter the LAN IP address of your wireless router or access point. Here
takes 192.168.1.1 for example.