TP-Link TL-PS110U User Manual - Page 43
More Configuration for the Print Server, 4.1 Login - support
 |
UPC - 845973031008
View all TP-Link TL-PS110U manuals
Add to My Manuals
Save this manual to your list of manuals |
Page 43 highlights
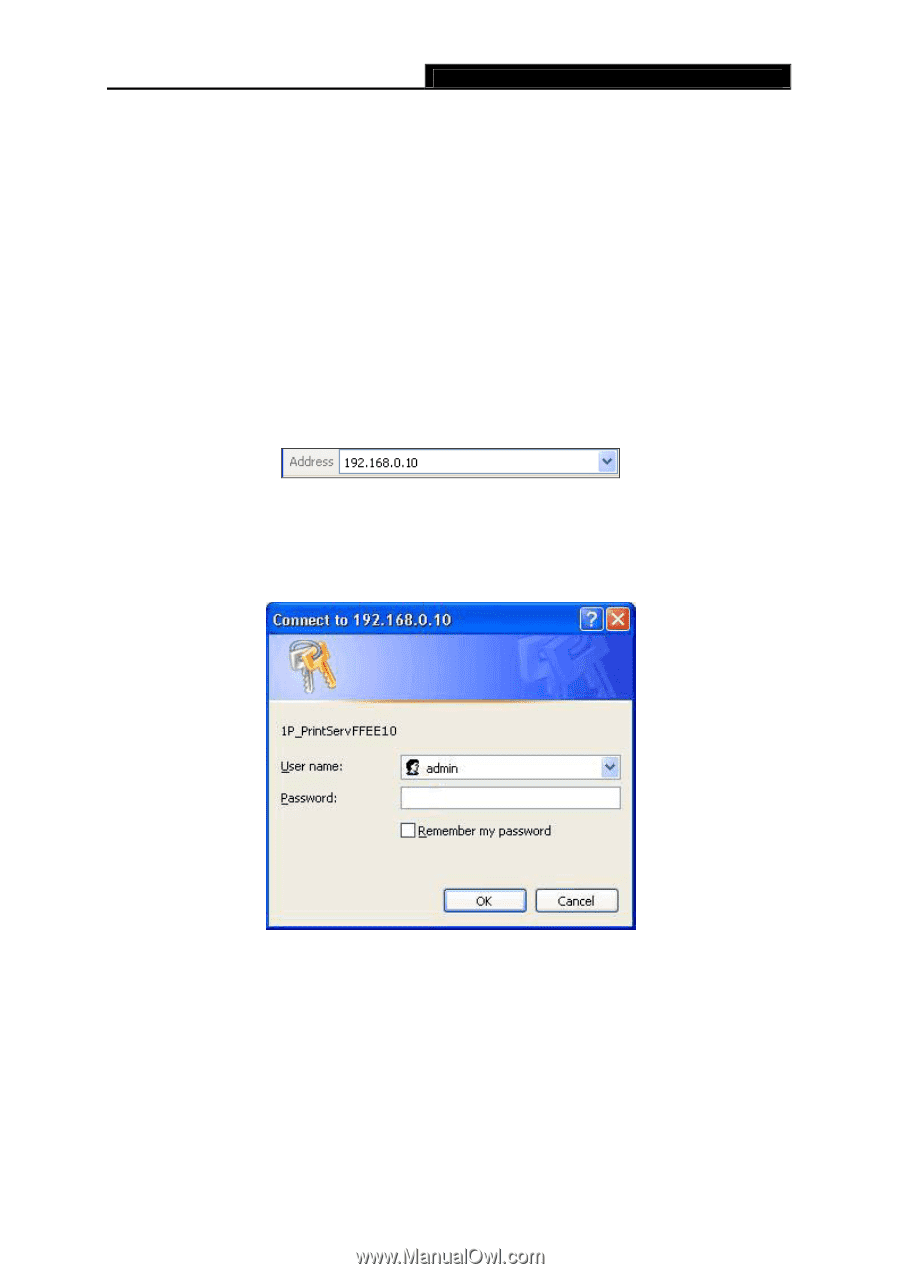
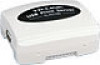
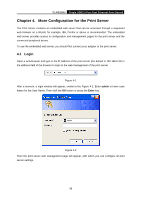
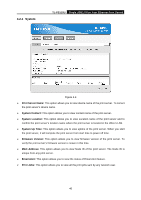
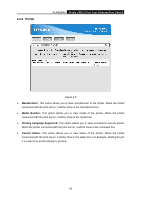
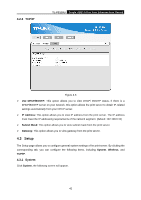
TL-PS110U Single USB2.0 Port Fast Ethernet Print Server Chapter 4. More Configuration for the Print Server The Print Server contains an embedded web server that can be accessed through a supported web browser on a WLAN, for example, IE6, Firefox or above is recommended. The embedded web server provides access to configuration and management pages for the print server and the connected peripheral device. To use the embedded web server, you should first connect your adapter to the print server. 4.1 Login Open a web-browser and type in the IP address of the print server (the default is 192.168.0.10) in the address field of the browser to login to the web management of the print server. Figure 4-1 After a moment, a login window will appear, similar to the Figure 4-2. Enter admin in lower case letters for the User Name. Then click the OK button or press the Enter key. Figure 4-2 Then the print server web management page will appear, with which you can configure all print server settings. 38
-
 1
1 -
2
-
3
-
4
-
5
-
6
-
7
-
8
-
9
-
10
-
11
-
12
-
13
-
14
-
15
-
16
-
17
-
18
-
19
-
20
-
21
-
22
-
23
-
24
-
25
-
26
-
27
-
28
-
29
-
30
-
31
-
32
-
33
-
34
-
35
-
36
-
37
-
 38
38 -
 39
39 -
 40
40 -
 41
41 -
 42
42 -
 43
43 -
 44
44 -
 45
45 -
 46
46 -
 47
47 -
 48
48 -
49
-
50
-
51
-
52
-
53
-
54
-
55
-
56
-
57
-
58
 |
 |